Frustrated managing your cloud environment? BigFix 10 has a solution!
Introduction
Seamless and exhaustive endpoint management is critical in the modern enterprise, but IT organizations have long struggled with complex tools that discover and manage only a certain percentage of devices in their environments. A solution that can seamlessly manage disparate endpoints is a need of the hour, and the latest release of BigFix – version 10 – brings to you just that! BigFix 10 enables IT administrators to have complete visibility, control, and compliance enforcement of both cloud and on-prem endpoints, regardless of their location or connectivity.
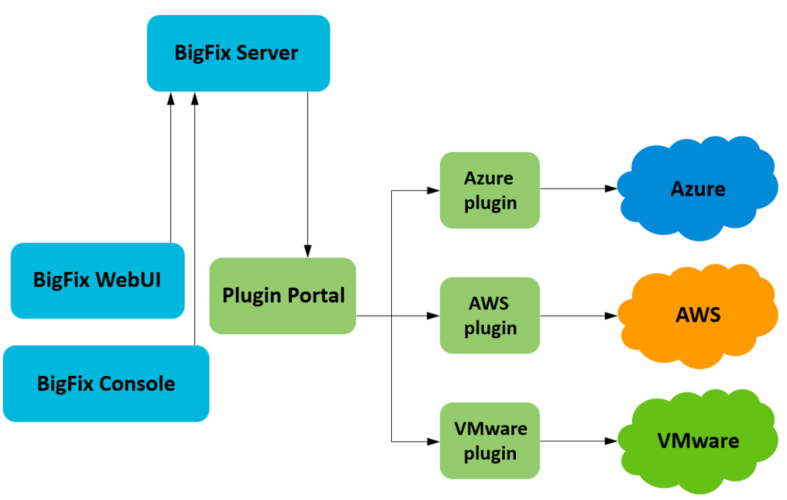
With BigFix 10, you can now discover virtual machines hosted in the following cloud environments too: Amazon Web Services (AWS), Microsoft Azure, VMware. This all-new capability provides you with complete visibility and control of Windows, Mac, and Linux instances deployed in your cloud environment and allows you to manage them with advanced features of the BigFix infrastructure. The components that facilitate the discovery of cloud instances are the Plugin Portal and the specific plugin components you can activate within the portal.
You can manage cloud instances either from the BigFix Console or WebUI – this article however covers only the WebUI side of things. The article uses a lot of screenshots (from a BigFix 10 installation) to help you guide through the flow.
Figure 1 - Architecture
As a BigFix Operator with “Master” privileges, you can access the plugin management interface through the configuration icon in WebUI, where you can install and configure the Plugin Portal and cloud plugins.
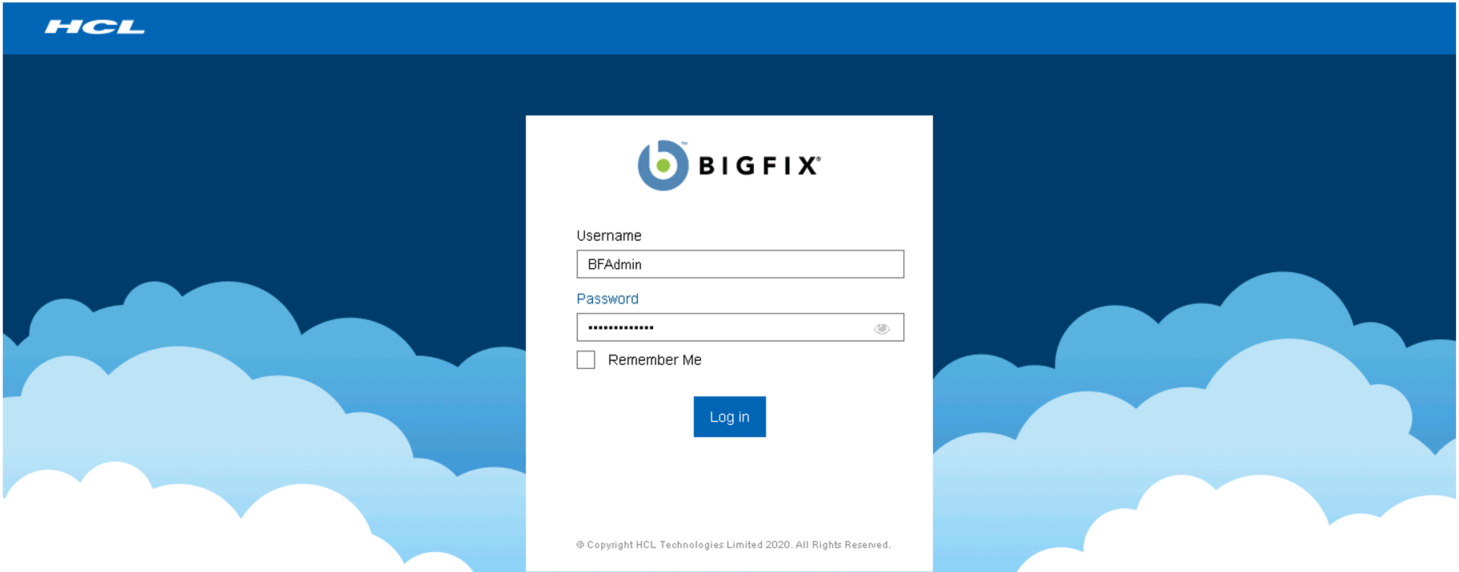
Figure 2 – The WebUI Login Panel
Figure 3 - The WebUI Welcome Page
Plugin Portal
Plugin Portal is a prerequisite component that facilitates the discovery of cloud instances in your environment. Plugin Portal connects to cloud providers through the cloud plugins and retrieves information about the cloud instances and the networks they are associated with. You can install more than one Plugin Portal. Each Plugin Portal supports management of up to 10K cloud instances.
To install and run the Plugin Portal, you need the following:
- Red Hat Linux or Windows operating system
- BigFix Client. Install it by using Client Deploy Tool which is available through the BigFix Console or by selecting code from support.bigfix.com.
- MongoDB, one of the most popular NoSQL databases, which retains information retrieved from the cloud. Install it from www.mongodb.com.
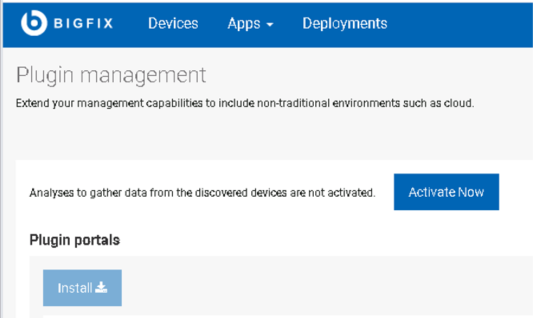
The first step you do before installing a Plugin Portal is to activate a few Analyses. To do so, on the Plugin management screen, click Activate Now. The Install button is enabled only after the Analyses are activated.
Figure 4 – The Plugin Portal Installation Panel
The next screen shows the number of computers in your environment that allow the installation of Plugin Portal based on the applicable prerequisites:
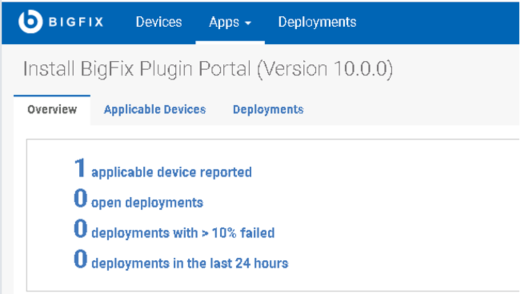
Figure 5 – Deployment overview
Open the Applicable Devices tab and select devices to install the Plugin Portal.

Figure 6 – Applicable devices
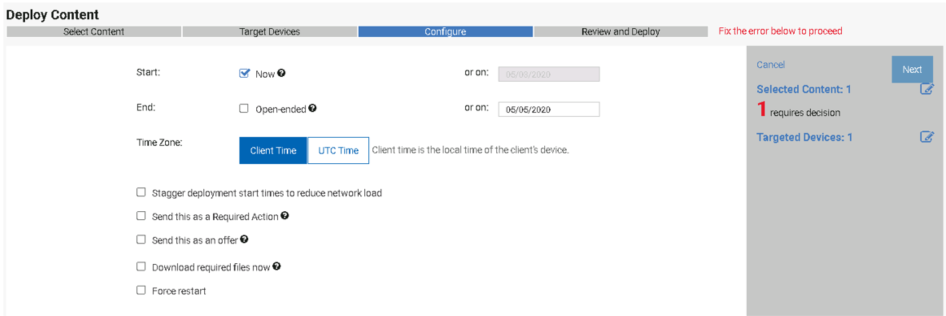
On the Deploy Content page, you have a few deployment options to set and a decision to make before proceeding.
Figure 7 – Deployment options
In the Select An Action drop-down, click Click here to install the BigFix Plugin Portal then Apply:

Figure 8 – Selection of the action
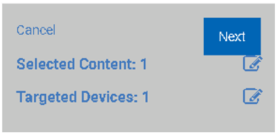
The content and target selected for the deployment are displayed. Click Next.
Figure 9 – Selected content and target
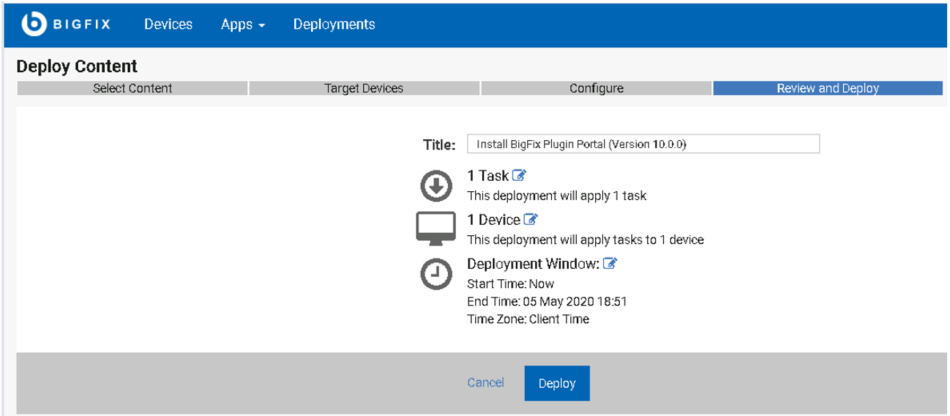
Review the deployment information on the Review and Deploy page and click Deploy to proceed with the installation:
Figure 10 - Review deployment information
A status bar shows the installation progress and result. To check the progress, refresh your browser.
Figure 11 – Installation progress
The default path of the Plugin Portal installation and associated logs are as follows:
Windows:
- C:\Program Files (x86)\BigFix Enterprise\BES Plugin Portal
- C:\Program Files (x86)\BigFix Enterprise\BES Plugin Portal\BESPluginPortal.log
Linux:
- /opt/BESPluginPortal
- /var/opt/BESPluginPortal
- /var/log/BESPluginPortal.log
After the installation is complete, the Plugin Portal is listed on the Plugin management page – you can expand the entry to view the details such as the name of the client on which it is installed and the version. On the right side of the pane, you have options to upgrade the portal when a new version is available or to delete it.
Figure 12 Details of the Plugin Portal
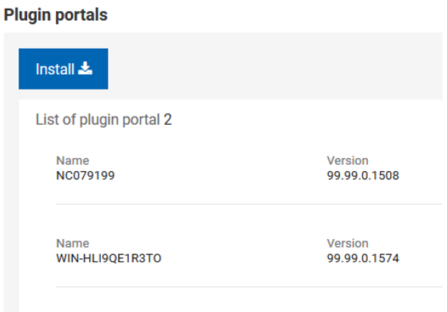
Depending on your cloud environment, the Plugin Portal can manage multiple cloud plugins or multiple Plugin Portals can manage the discovery of multiple cloud environments. You can have more than one Plugin Portal at a given time.
Figure 13 Multiple plugin portals
Installing and configuring cloud plugins
After installing the Plugin Portal, you can proceed with the installation of cloud plugins.
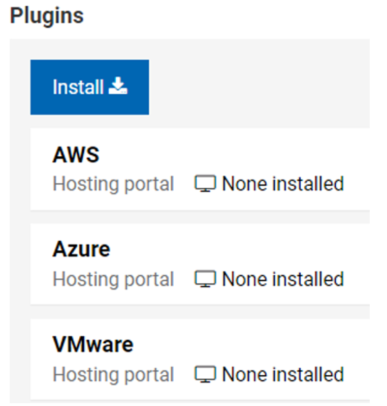
In the Plugins section on the Plugin management page, click Install.
Figure 14 – Cloud plugins
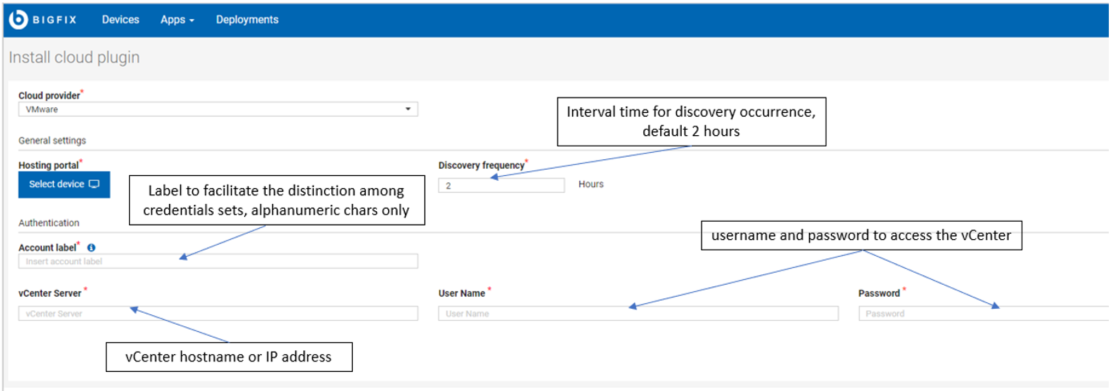
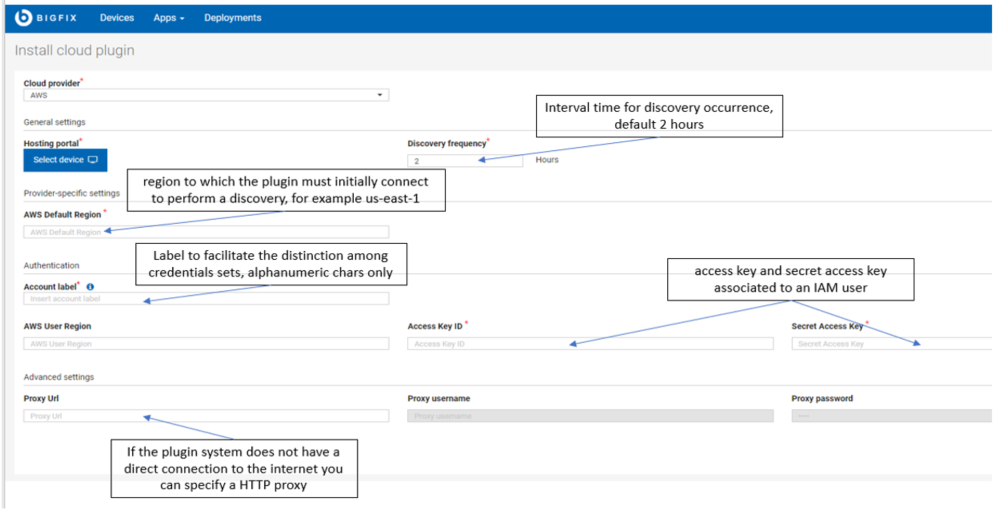
The Install cloud plugins page is displayed. The list of parameters changes based on the cloud provider selected from the drop-down list. The following sections describe the parameters you need to set for the three cloud provides supported by BigFix 10.
The default installation paths of the cloud plugins are follows:
Windows
- C:\Program Files (x86)\BigFix Enterprise\BES Plugin Portal\Plugins
Linux
- /opt/BESPluginPortal/Plugins
VMware
Figure 15- Cloud plugin - VMWare
After the installation, the cloud plugin is shown on the Plugin management page:
Figure 16 - VMware Plugin
You also have options to upgrade the plugin when a new version is available, or to uninstall it.
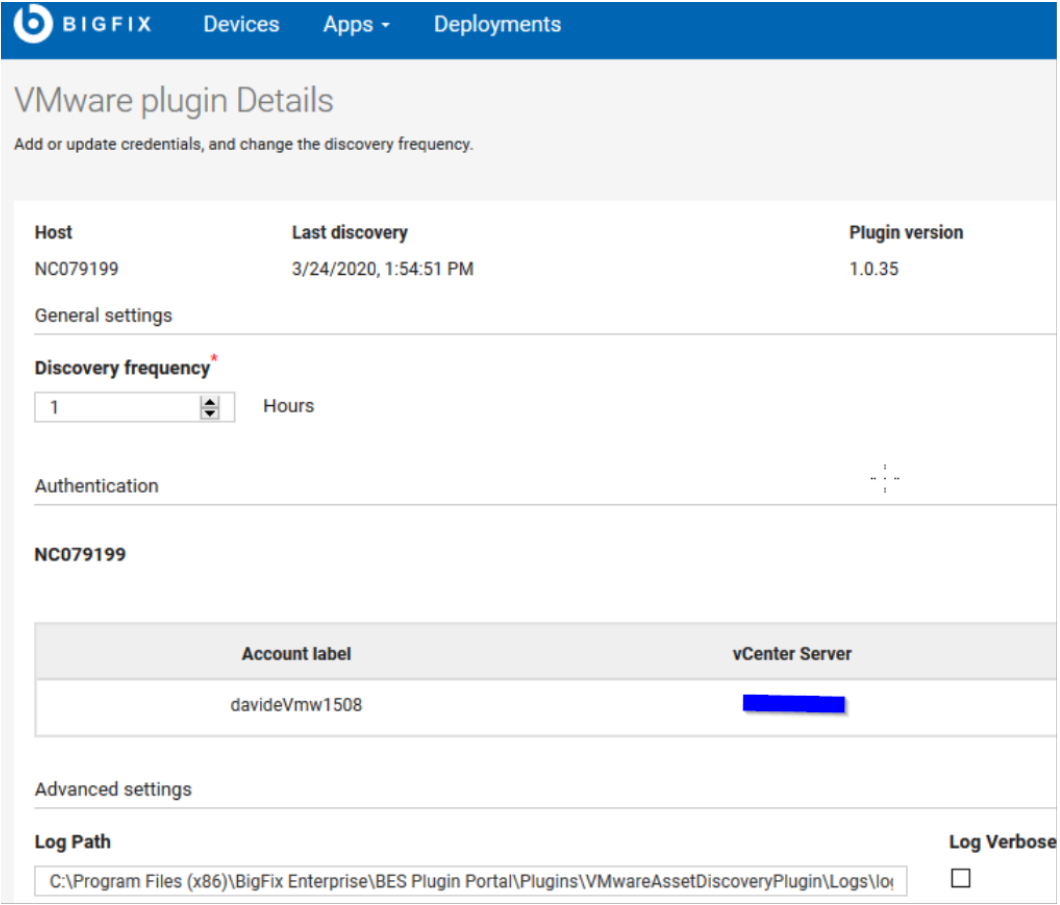
The following screen shot shows a sample VMware plugin:
Figure 17 - VMware plugin details (1 of 2)
Figure 18 - VMware plugin details (2 of 2)
AWS
To be able to discover Amazon Web Services resources, install the AWS cloud plugin as an IAM user that has programmatic access with MFA disable. The user must have the following permissions at the minimum: action "ec2:Describe*" allowed on resource "*". Note that a suitable predefined AWS policy is AmazonEC2ReadOnlyAccess.
Figure 19 – Cloud plugin - AWS
After the installation, the cloud plugin is shown on the Plugin management page:
Figure 20 - AWS Plugin installed
You also have options to upgrade the plugin when a new version is available, or to uninstall it.
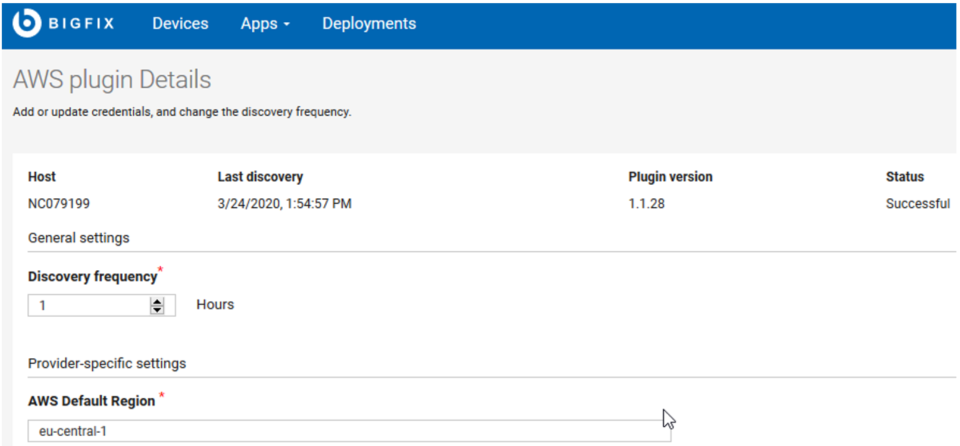
The following screen shot shows details of a sample AWS plugin:
Figure 21 - AWS plugin details (1 of 2)
Figure 22 - AWS plugin details (2 of 2)
Azure
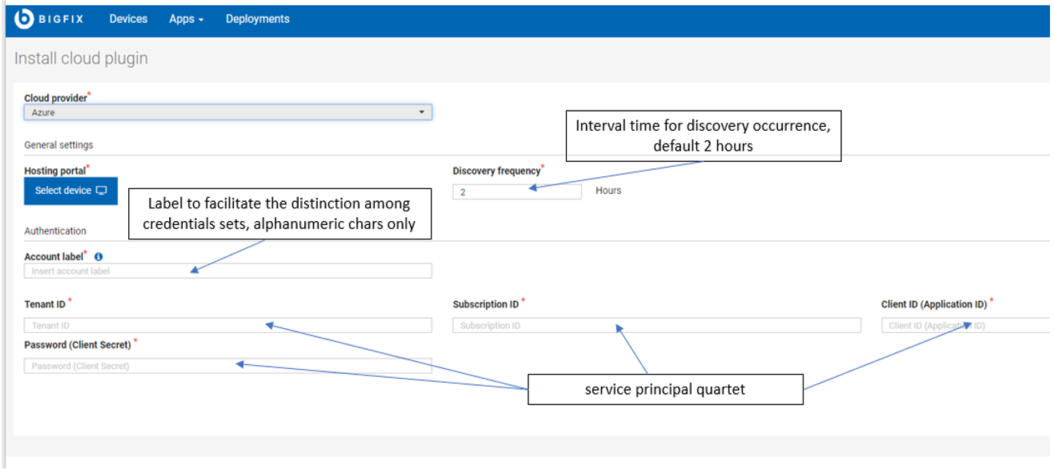
To be able to discover Microsoft Azure resources, install the Azure cloud plugin by using a service principal that has the "Reader" role and with MFA disabled.
The Azure admin provides the service principal quartet needed to configure the Azure Plugin.
Figure 23 – Cloud plugin - Azure
After the installation, the cloud plugin is shown on the Plugin management page:
Figure 24 – Azure Plugin installed
You also have options to upgrade the plugin when a new version is available, or to uninstall it.
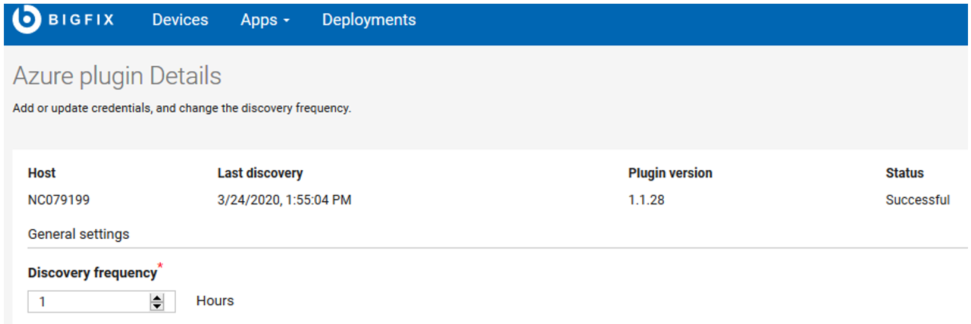
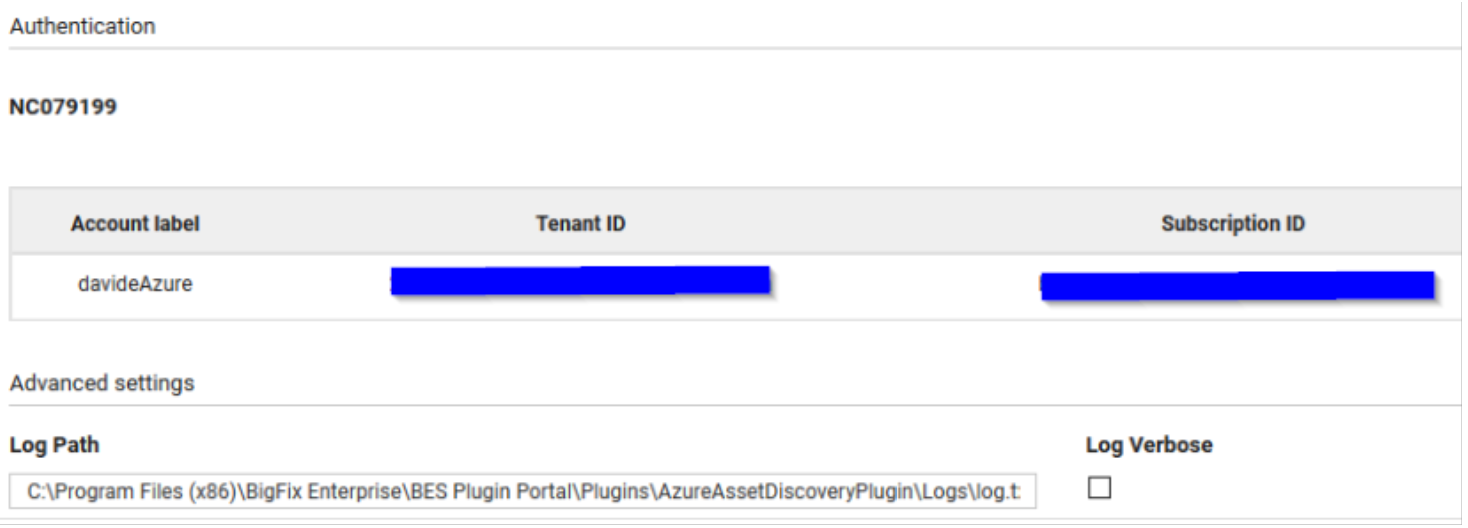
The following screen shot shows a sample Azure plugin:
Figure 25 - Azure plugin details (1 of 3)
Figure 26 - Azure plugin details (2 of 3)
Figure 27- Azure plugin details (3 of 3)
Adding credentials to cloud plugins
After the installation of a cloud plugin, you can add more credentials that can be used to discover devices.
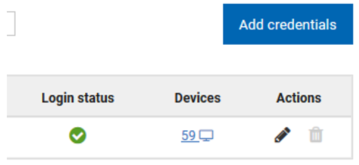
On the Azure/AWS/VMware plugin details page, click the Add credentials button.
Figure 28 - Add credentials
On the page that is displayed, specify the credentials information needed by the plugin.
Troubleshooting
After the plugin installation if you see no proxied devices, you can check the logs. For example, the following log messages indicate that the credential set used lacks some permissions.
2020/04/20 18:20:45 - [info] AzureAssetDiscoveryPlugin 1.1.59 starts on windows-amd64
2020/04/20 18:20:45 - [info] Plugin Portal with API version 1
2020/04/20 18:20:46 - [info] Refresh all: Attempting discovery
2020/04/20 18:20:52 - [info] Refresh all: Discovery returned 0 unique devices
To solve this problem, you need to add the proper Role or permissions to the used credential set.
If an account password expires, the cloud plugin attempts to log in to the cloud provider a limited number of times and then the credential set is ignored for the following discoveries. The standard log file shows the following message:
2020/04/20 18:20:52 - [error] Refresh all: user 'my_cloud_account' reached the maximum attempts (3) and it will be skipped
To solve this problem, edit the credential set and update your password from WebUI.
Authors
Davide Cosentino is a BigFix Performance and Scalability Engineer at HCL. After 17 years at IBM where he was in Software Product Development covering roles like Coder, Tester and Level 3 Support Engineer for many different deliverables, he joined HCL in 2018. He's now part of the Performance and Scalability Team for 5 years, with major expertise in the BigFix Platform and the WebUI.
Luca Balestrazzi is a BigFix QA Engineer at HCL. He worked for 26 years for IBM, first years at Rome Lab in the Network and Lan Management Area then in Products Support team. He worked for one year as employee of a phone company in start-up phase, starting from 2000 he worked as IBM IT Architect with main Italian Customers in the System Management and Change Management products area then joined IBM BigFix starting from 2012 and moved to HCL in 2018.
Viviana Tripodi is a BigFix Test Automation Engineer at HCL. She worked 15 years in IBM covering different roles in the QA team - functional tester, system tester, performance tester and fix pack test leader – for several software products. In 2020 she moved to HCL Software where she joined the Platform Automation team.
Review and editorial credits
Shivi Sivasubramanian is a senior-level technical author and editor with a demonstrated history of working in the technology industry. A firm believer in the magical power of words, she loves helping the community deliver expressive, minimalist, and user-friendly content. Shivi currently leads a team of information developers in BigFix.

