This article is aimed at providing an in-depth overview of the steps required to successfully install BigFix Client on AWS by using the native APIs. Before proceeding further, check if you have the following in your environment:
- BigFix Plugin Portal, Version 10.0.2 or higher
- An AWS Asset Discovery Plugin, Version 1.3 or higher installed in the plugin portal
- Credentials for the plugin that allow the use of the AWS System Manager
To prepare the ground-provider side, you need to do some configuration. The idea is to associate an IAM Role to one or more EC2 instances to allow the AWS SSM agent to do its job, which is to help with the installation of the BigFix Client. At a minimum, you need to be able to use the AWS System Manager service and the SSM agent should be present on each target instance.
Creating IAM roles
First, create an IAM Role to assign to a certain instance in your environment.
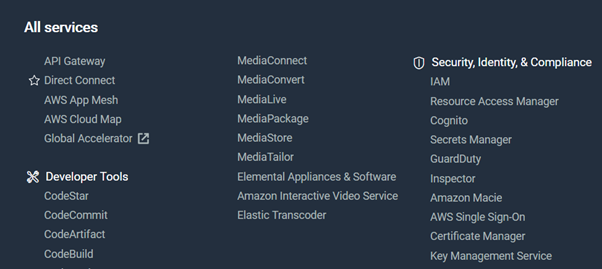
- In the AWS Console, find the IAM service – to do so, type IAM in the search bar (see screenshot):

Alternatively, click to open the drop-down menu on the top-left of the screen. The list of all services shows up which includes IAM under Security, Identity & Compliance.
-
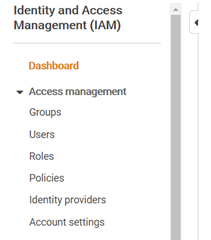
On the IAM page, find Roles on the Access Management drop-down menu on the left.
-
Click Create a Role.

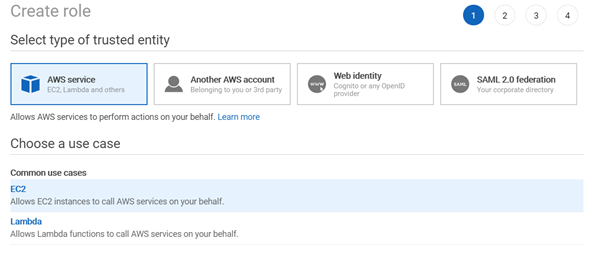
Remember that you need an Instance Role and have to choose an AWS Instance as a Trusted entity, thus the AWS EC2 service. As you can see in the following screenshot, these types of roles allow instances to call AWS services without needing your intervention.
4. Create and select an IAM Policy to associate to the role. For example, AmazonSSMManagedInstanceCore.
-
Review the role:
-
Enter a name, description, and tags of your choice.
-
Click Create role.
-
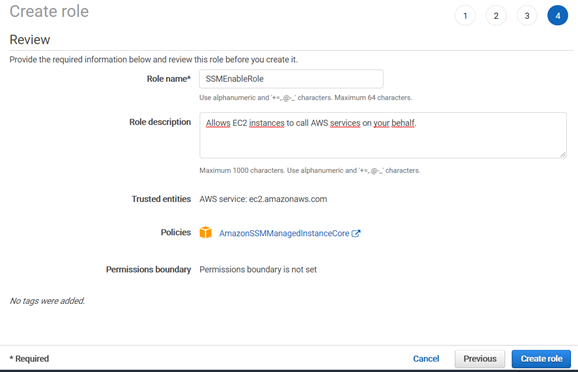
The next step is to associate the role you created to the AWS instances that are your installation targets.
Associating IAM role to AWS instances
Now, associate the IAM Role you created to the target instances. You can do this either during or after the instance creation.
- Run a search for Instances in the EC2 service.
- Click Launch Instances to launch any number of EC2 instances as needed.
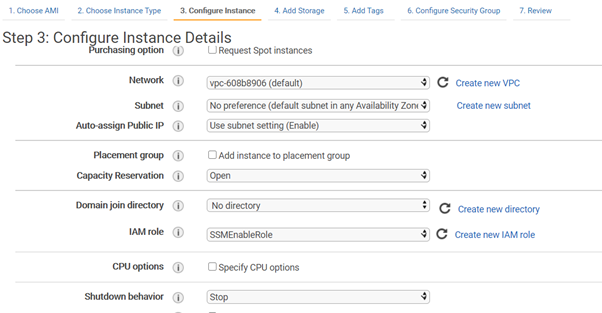
- Select the role you created in the previous step
This happens at the third step of the instance creation. As you can see in the following picture, at Step 3: Configure Instance Details, you can choose an IAM Role.
- Proceed with the instance creation.
You can assign a role to an instance even after its creation, by simply associating it to an instance id. Run the following command on the AWS CLI:
aws ec2 associate-iam-instance-profile --instance-id <AWS instance id> --iam-instance-profile Name=<IAM Role name>
Starting or installing the AWS SSM agent
You now have the required role and instances in place. As a next step, ensure that the AWS SSM agent is up and running on the instances – that means, the agent must be enabled and active (running).
More recent AMIs come with a pre-installed SSM agent. However, for some well-documented cases, this might not apply. For further reading, see:
https://docs.aws.amazon.com/systems-manager/latest/userguide/sysman-install-ssm-win.html
https://docs.aws.amazon.com/systems-manager/latest/userguide/sysman-install-ssm-agent.html
For detailed instructions on how to install the AWS SSM Agent, see:
https://docs.aws.amazon.com/systems-manager/latest/userguide/sysman-install-win.html
https://docs.aws.amazon.com/systems-manager/latest/userguide/sysman-install-win.html
Installation setup – An example
Following is an example of the installation and starting of the AWS SSM Agent on an Amazon Linux 2 instance.
- Check if SSM is installed:

The screenshot shows that the agent is up and running on this particular instance. For AMIs such as the most recent Amazon Linux 2, this is the expected output.
However, for the sake of this example, the agent was removed from the instance:

- Install the agent manually.
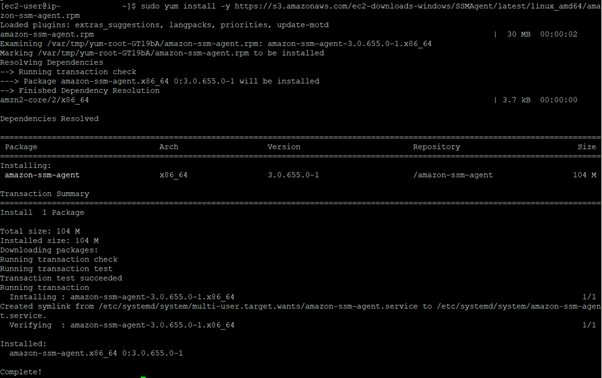
- After the installation is complete, check the agent status:

If you see a different output, or if the agent is disabled or stopped, run the following commands:
sudo systemctl enable amazon-ssm-agent
sudo systemctl start amazon-ssm-agent
sudo systemctl status amazon-ssm-agent
You can use similar steps on other Linux flavors and Windows as well. For further information, visit the AWS documentation sites.
Installing BigFix Agent
You can now proceed to install the BigFix Agent.
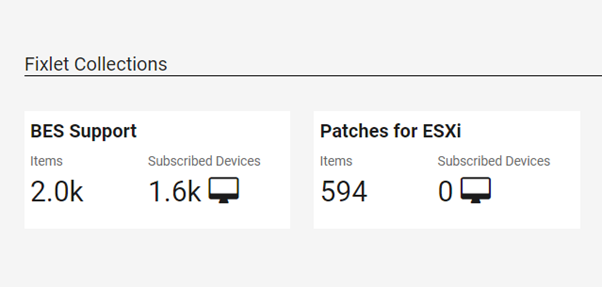
- Find the installation task on BES Support.
For instance, on the WebUI console, under Apps > Content > BES Support, locate the Task named “Install BigFix Client through Amazon Web Services”.

- Run the task on all the configured instances (displayed under the applicable ones).
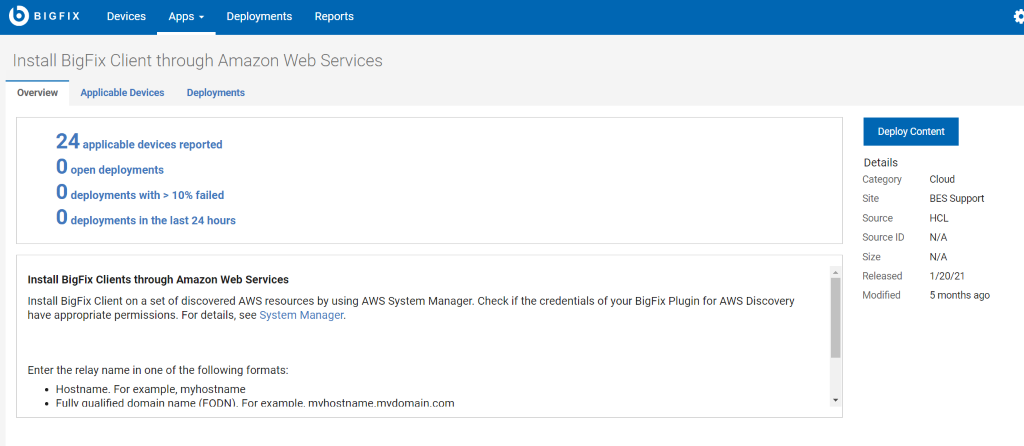
- Click Deploy Content and select the target instances.
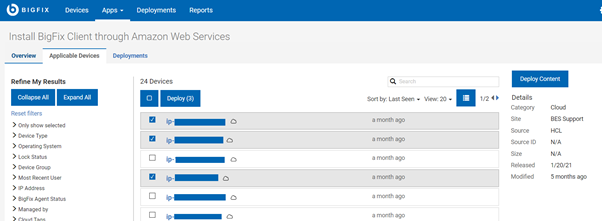
4. Edit the required parameters and custom configuration steps.
5. Enter a non-authenticating BigFix Relay name – it could be a hostname, an IP address, or the Fully Qualified Domain Name.
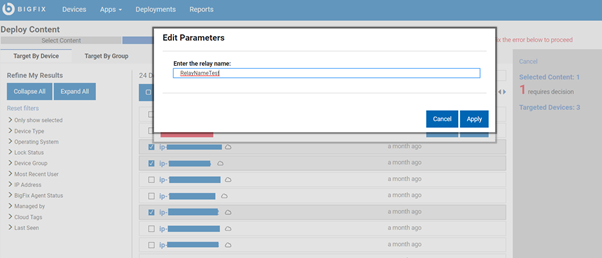
6. Click Deploy. Wait for the installation to complete which might take a few minutes.
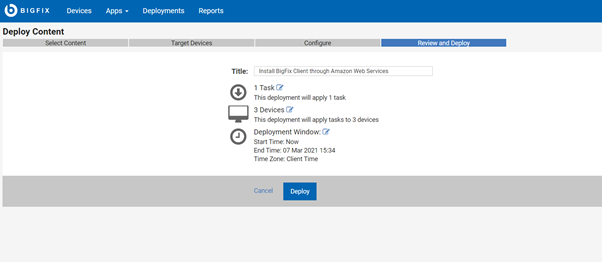
That’s it! The output from the installation contains detailed information about the deployment. You will also find information and tips on the WebUI for troubleshooting.
References
https://help.hcltechsw.com/bigfix/10.0/webui/Platform/Config/c_install_oncloud.html
https://docs.aws.amazon.com/systems-manager/latest/userguide/systems-manager-prereqs.html
~~~~~~~~~~~~~~~~~~~~~~~~~~~~~~~~~~~~~~~~~~~~~~~~~~~~~~~~~~~~~~~~~~~~~
Author
Andrea Sacco is a software engineer at HCL, he joined HCL in 2018 and is currently working on the Cloud features for the BigFix Platform project.
Review and editorial credits
Shivi Sivasubramanian is a senior-level technical author and editor with a demonstrated history of working in the technology industry. A firm believer in the magical power of words, she loves helping the community deliver expressive, minimalist, and user-friendly content. Shivi currently leads a team of information developers in BigFix.
