Many organizations use Azure, Google Cloud, and AWS and often times, costs can get out of hand due to admins spinning up VM's and forgetting about them. With BigFix, you can now manage and control your Azure, Google Cloud, and AWS environments and gather inventory and key information about cloud instances. BigFix is a single platform that can tell you where the device is and whether it is patched and compliant. This article provides detailed guidance on how to set up a multicloud environment with BigFix 10.
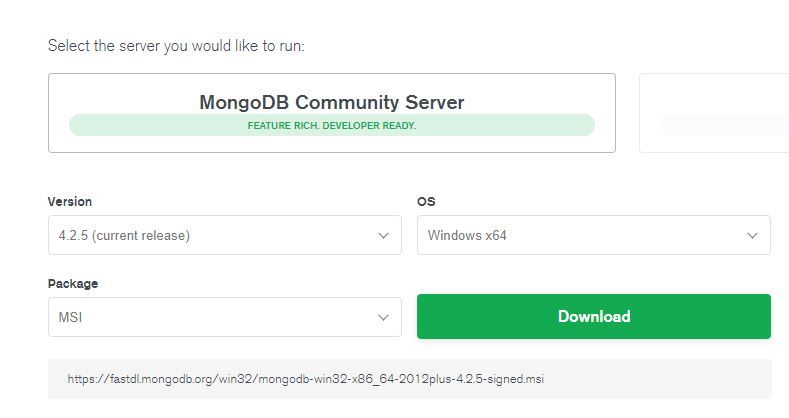
- Install MongoDB on a machine that you would like to host the Plugin Portal. This cannot be a current relay. For assistance, see https://www.mongodb.com/download-center/community
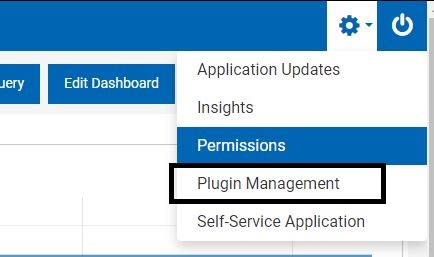
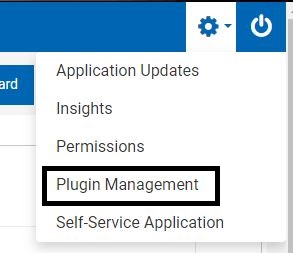
- In WebUI, click the gear Icon and select Plugin Management. The gear Icon is only visible to Master Operators.

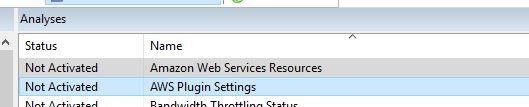
- Click Activate Now to activate the cloud providers analyses.
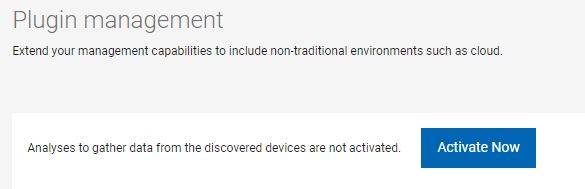
- Click OK to activate the prerequisite analysis.

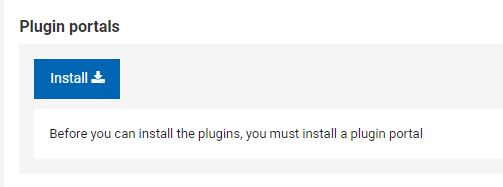
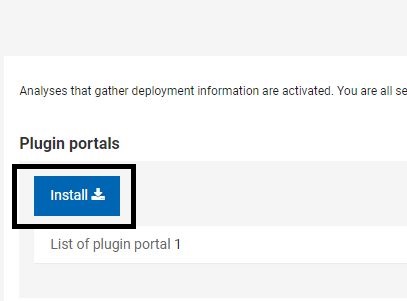
- Click Install to install the Plugin Portal to the machine on which you installed MongoDB.
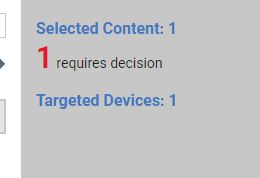
- Click Deploy Content.
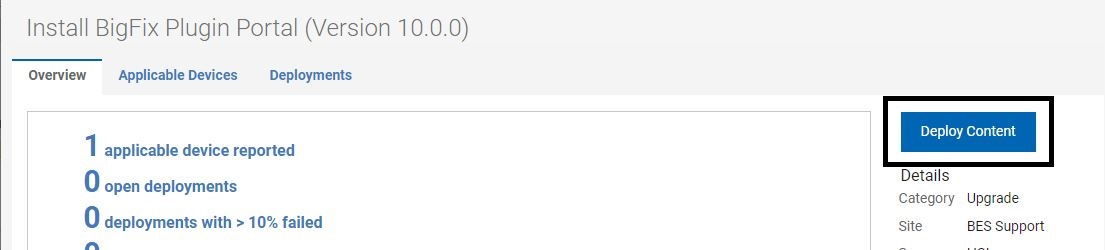
- Select the machine on which you installed MongoDB.
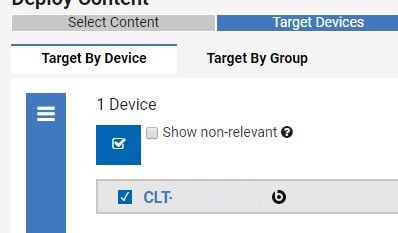
- Click Requires Decision.
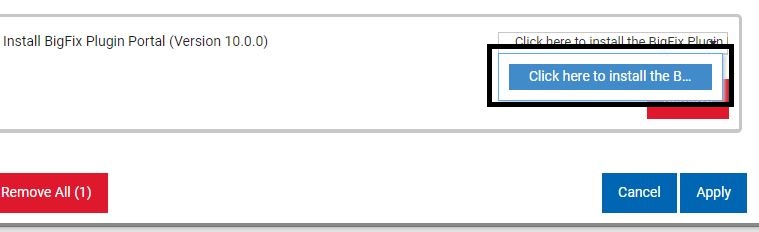
- Click Click here to install the BigFix Plugin Portal.
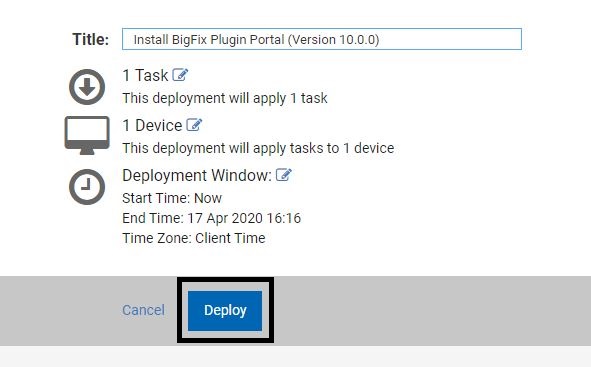
- Click Next.

- Click Deploy.
Once the Plugin Portal finishes installing, install your AWS, Azure, or VMware plugins.
Installing AWS plugin
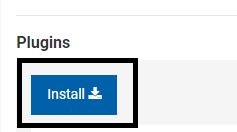
- Click the gear Icon and click Plugin Management.
- Under Plugins, click Install.
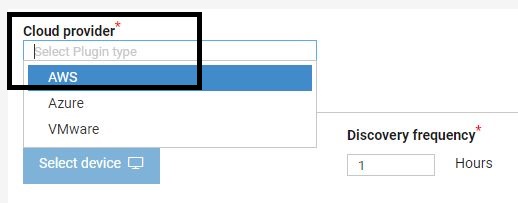
- Select the cloud provider you would like to configure. For example, AWS.
This action requires you to set the following:
- AWS default region
- Account label
- Access key ID
- Secret access key

You need to need to log in to your AWS environment to find these details. If you are a novice AWS user, here is some guidance:
- Log in to AWS: https://aws.amazon.com/
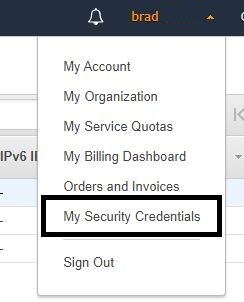
- Select your account in the top right corner and click My Security Credentials.
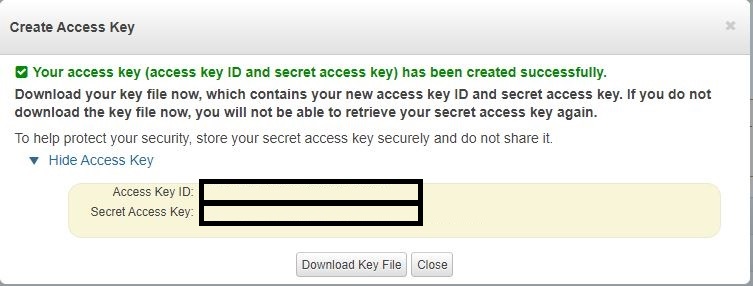
- Click Access Keys and then Create New Access Key.
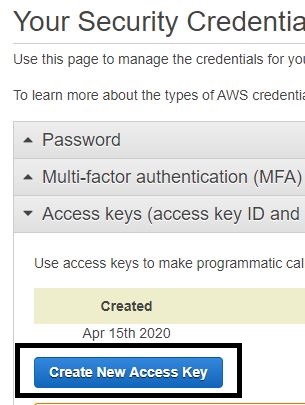
Your Access Key ID and Secret Key Access Key are created.
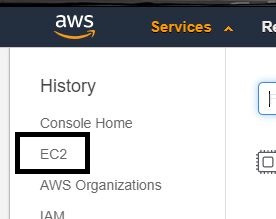
- Go to Services > EC2.
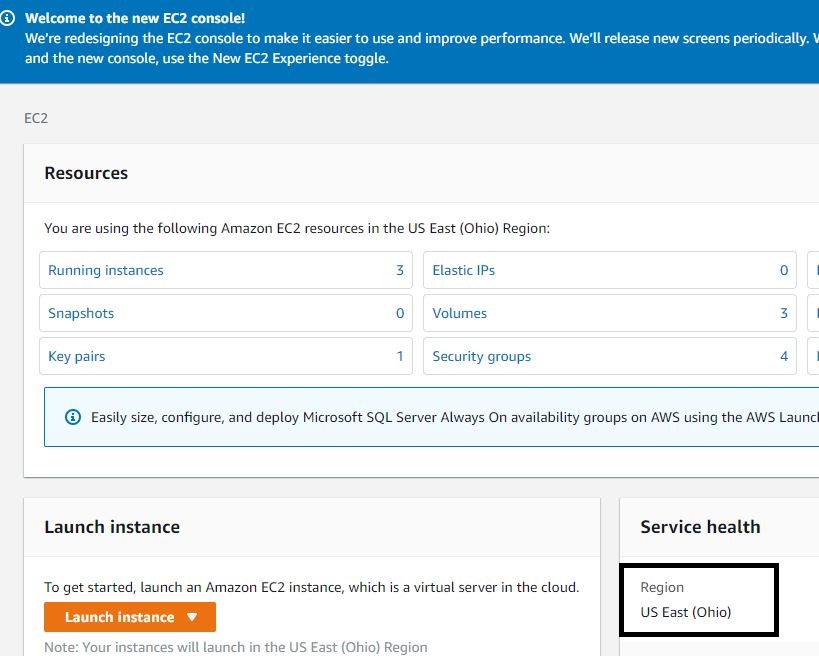
Under Service Health, you will find the region you are assigned to.
To find the syntax for that region, go here: https://docs.aws.amazon.com/AWSEC2/latest/UserGuide/using-regions-availability-zones.html
Once you have all of your information, take action on your cloud plugin install to complete the AWS setup.
- Activate analyses in the legacy BigFix Console. They should activate automatically if you installed the AWS plug-in via the WebUI.
- Activate the cloud providers analyses.

Installing Azure plugin
If you are setting up for Azure, then the following analyzes apply. These should activate automatically if you installed the Azure plug-in via the WebUI.

For Azure you will need the following information:
- Account Label
- Tenant ID
- Subscription ID
- Client ID (Application ID)
- Password (Client Secret)
- Being a novice Azure admin I was unsure where to find this information and here is how I found it

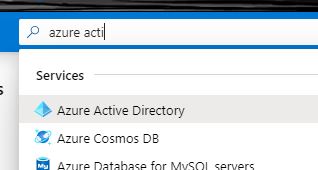
- Log in to https://portal.azure.com/ and search for Azure Active Directory and open it.
- Note down the Tenant ID.

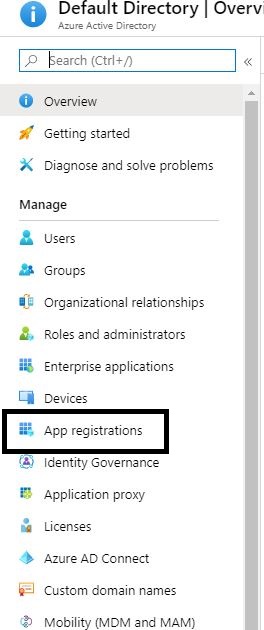
- Click App Registrations.
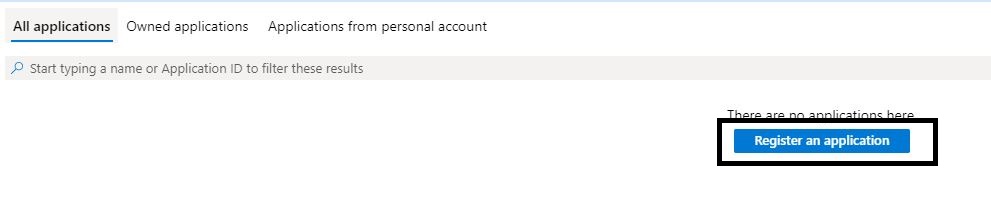
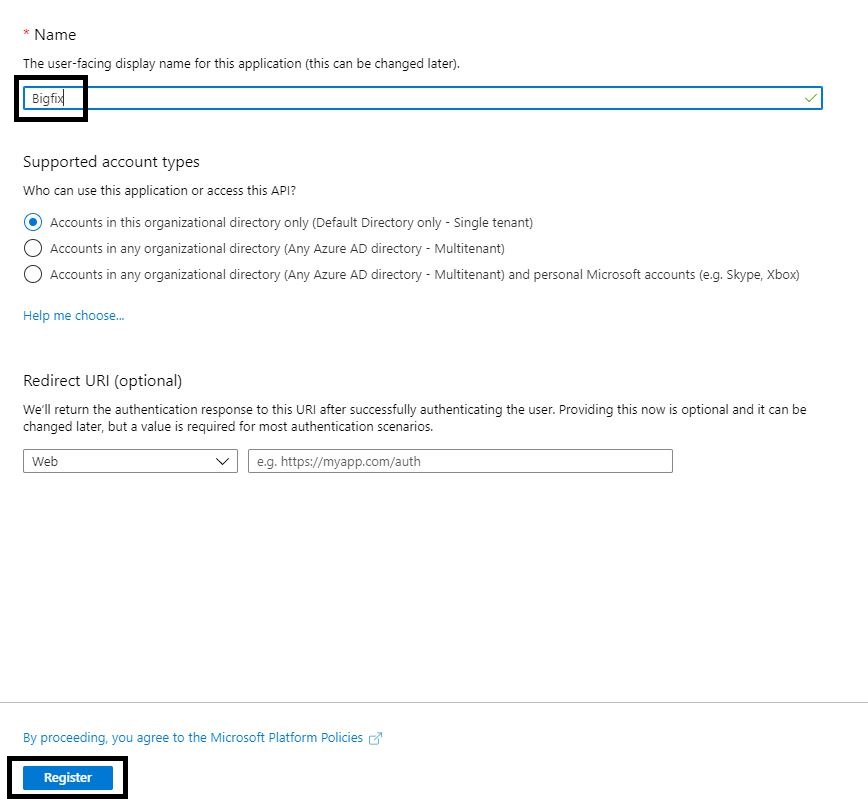
- Click Register an application.
- Name the instance and click Register.
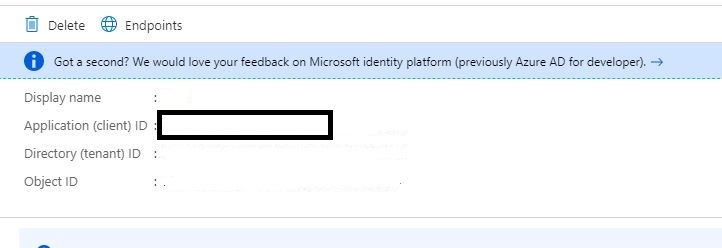
- Note down the Application (Client) ID.
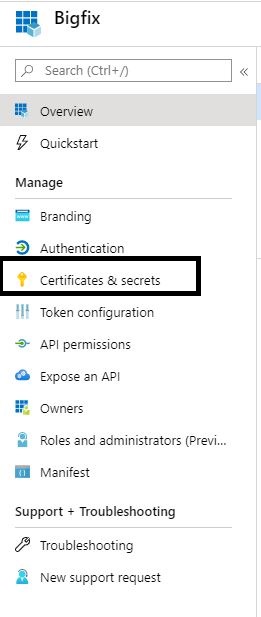
- Click Certificates and Secrets
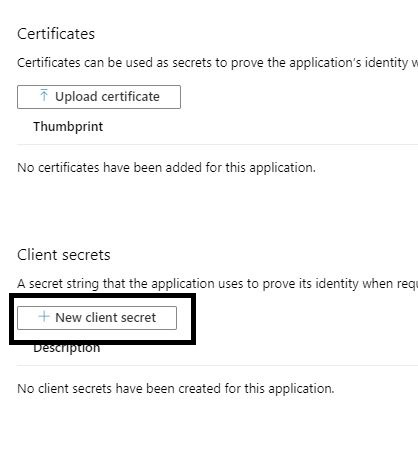
- Click Add a new client secret
- Enter a name and expiration and click Add
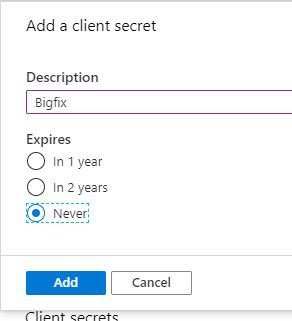
- Copy the new security key to the BigFix Action.

- Search for subscriptions.
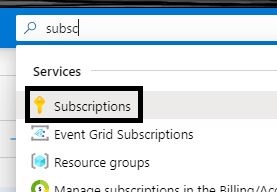
- Note down the Subscription ID.
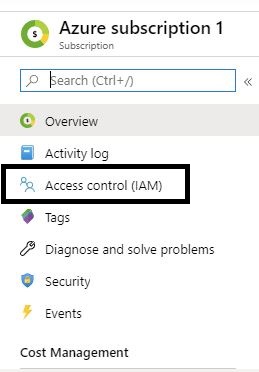
- Click on your Azure subscription.

- Click Access control (IAM).
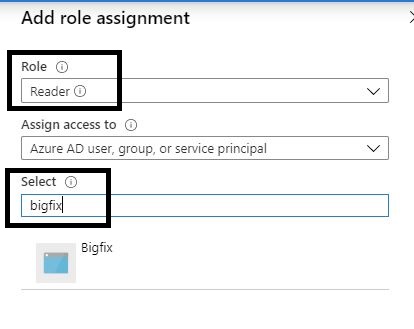
- Click Add a role assignment.

- Select the Reader role and add the app registration name created earlier and save the changes.
Now that you have all of the required details, you can take action to install the Azure plugin.
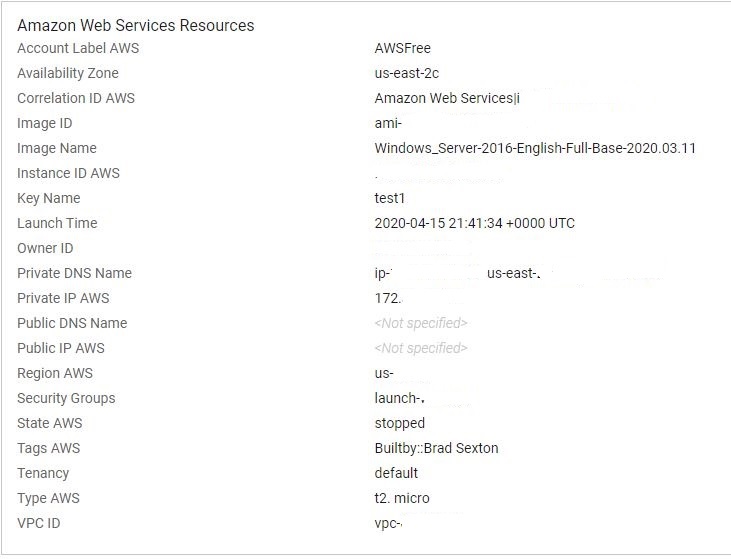
Once the plugin gets installed for either provider, you will see BigFix populated with cloud devices.

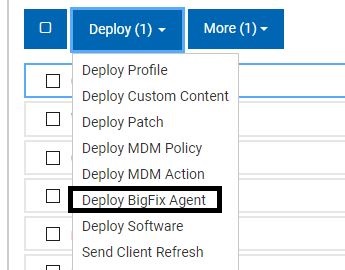
Select any device and deploy the BigFix agent if desired.
If the machine has the BigFix agent installed and is a cloud device, you will see a BigFix logo with a cloud icon attached to it.

Once your cloud machine checks in, you get a bunch of information that you can now filter for within Webui, the legacy console, and WebReports.
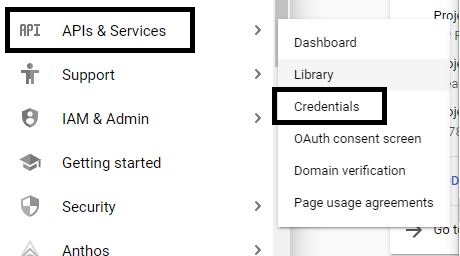
For example, log in to your Google Cloud console and click API & Services > Credentials.
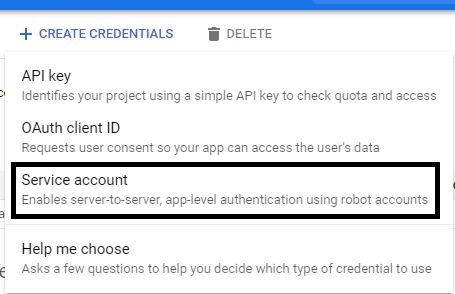
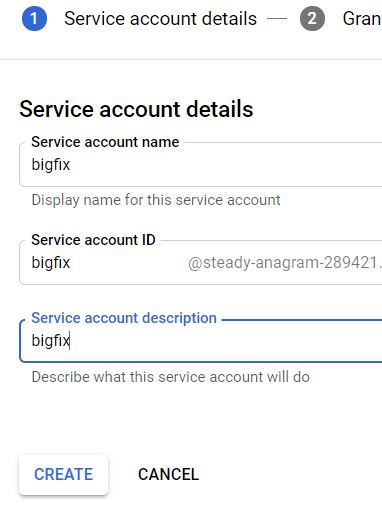
Click Create Credentials > Service Account.
Enter a name for the account and description and click Create.
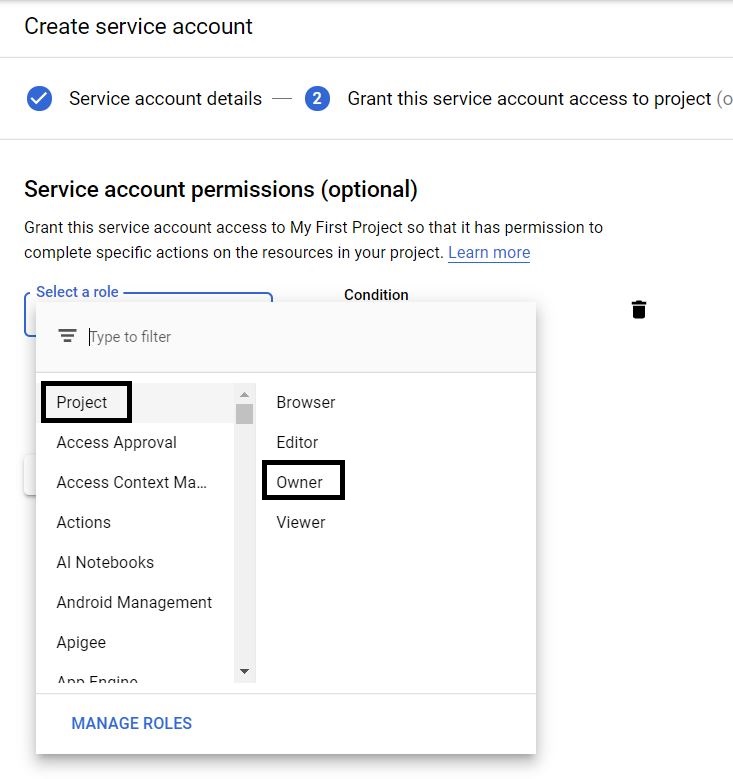
Assign a owner role to your account and click Continue.
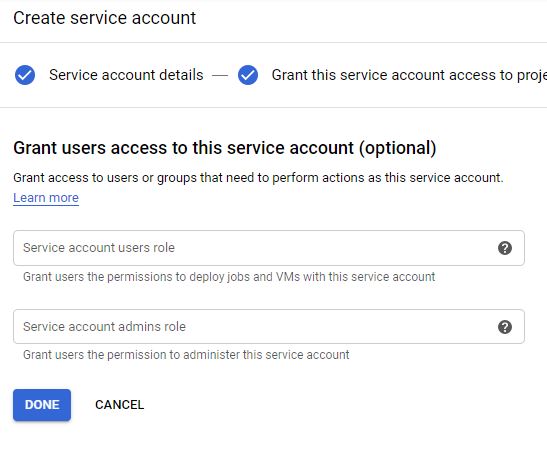
Click Done on the next screen.
Edit the newly created account.

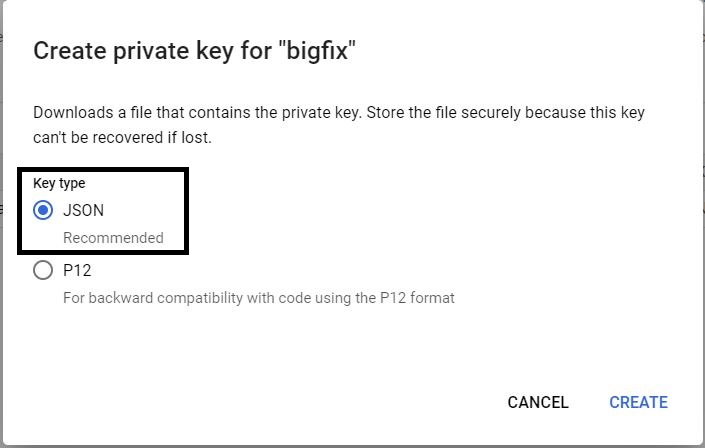
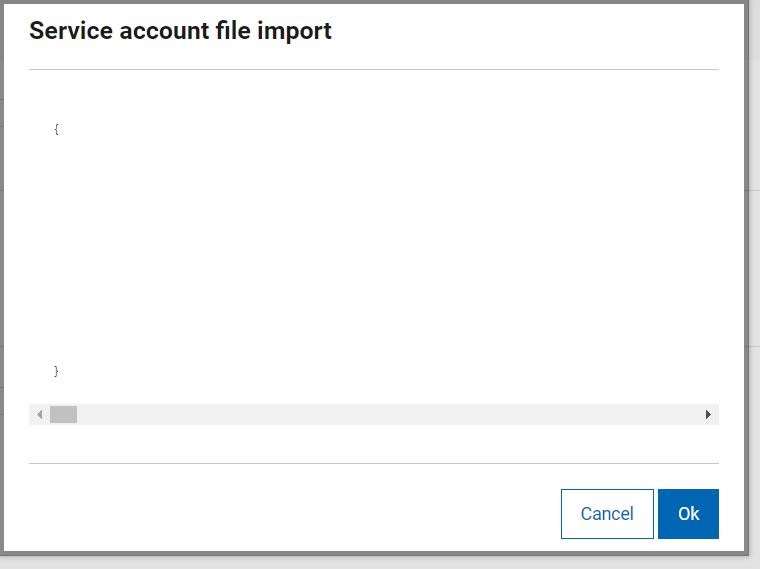
Click ADD KEY > Create New Key.
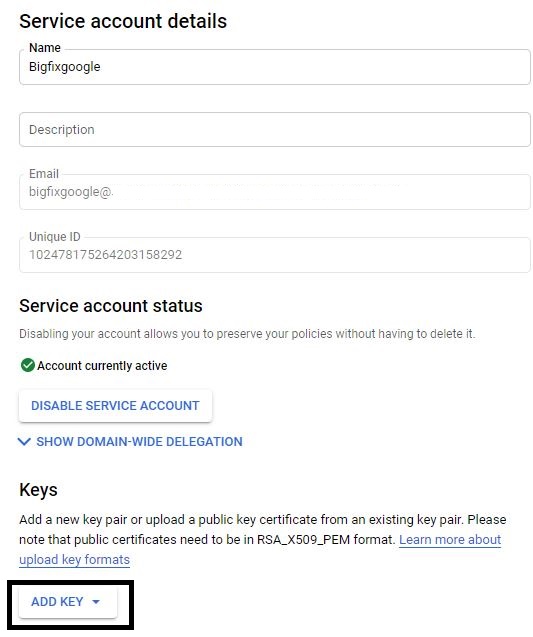
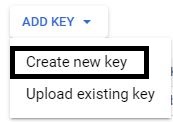
Select JSON and click Create.
Log in to BigFix WebUI and click the gear Icon in the top right corner and then click Plugin Management.
Click Install.
Click GCP for Google Cloud.
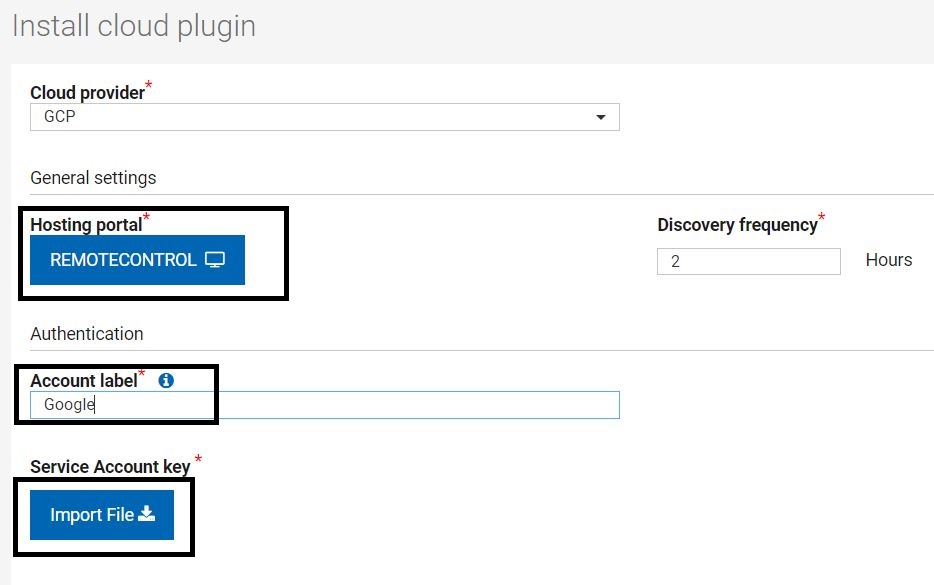
Select the hosting portal and account label. Import the JSON file created earlier and click Install.
~~~~~~~~~~~~~~~~~~~~~~~~~~~~~~~~~~~~~~~~~~~~~~~~~~~~~~~~~~~~~~~~~~~~~
Author
Brad Sexton is a BigFix technical advisor for the mid-Atlantic region. He was a BigFix administrator in a global enterprise for 7 years where he was using BigFix for OSD, Software Deployments, and patching. Brad joined the HCL BigFix team in 2018.
Review and editorial credits
Shivi Sivasubramanian is a senior-level technical author and editor with a demonstrated history of working in the technology industry. A firm believer in the magical power of words, she loves helping the community deliver expressive, minimalist, and user-friendly content. Shivi currently leads a team of information developers in BigFix