This article presents a method to import the default app associations for PCs. For example, you might not want Microsoft Edge to be your PDF reader but Adobe reader. You can change such default app associations in BigFix and use the configuration during Phase 1 of the OSD process. For details on how to set up OSD phases, see Fat Images vs. Layered Images.
Creating custom app associations
- Log in with a local administrator account and make the file association changes as required.
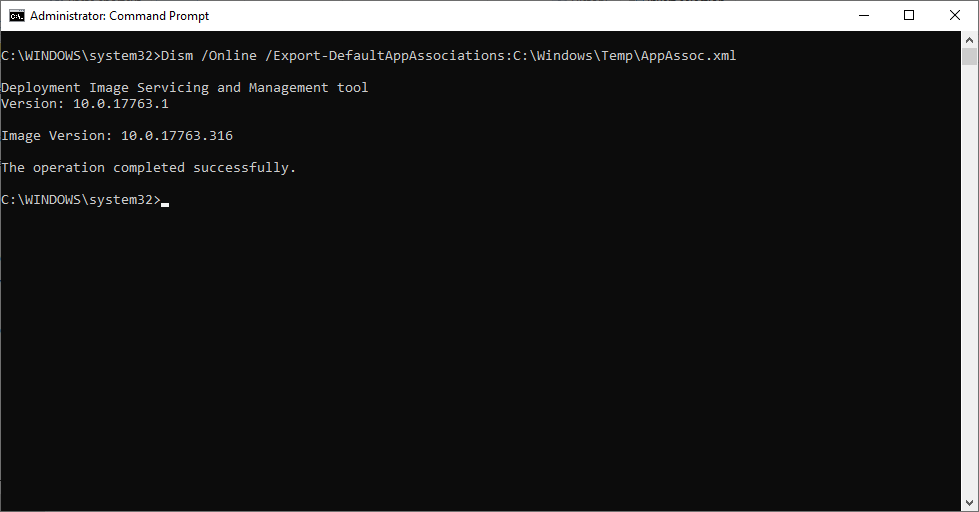
- Run the command under elevated command prompt.
Dism /Online /Export-DefaultAppAssociations:C:\Windows\Temp\AppAssoc.xml
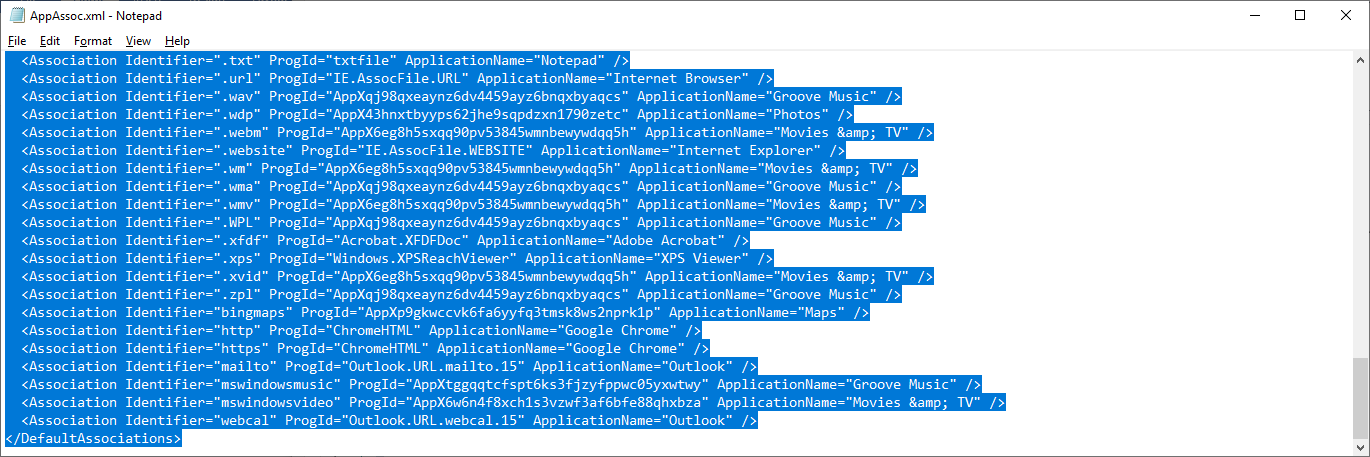
- Open the following xml file C:\Windows\Temp\AppAssoc.xml in an app like Notepad.
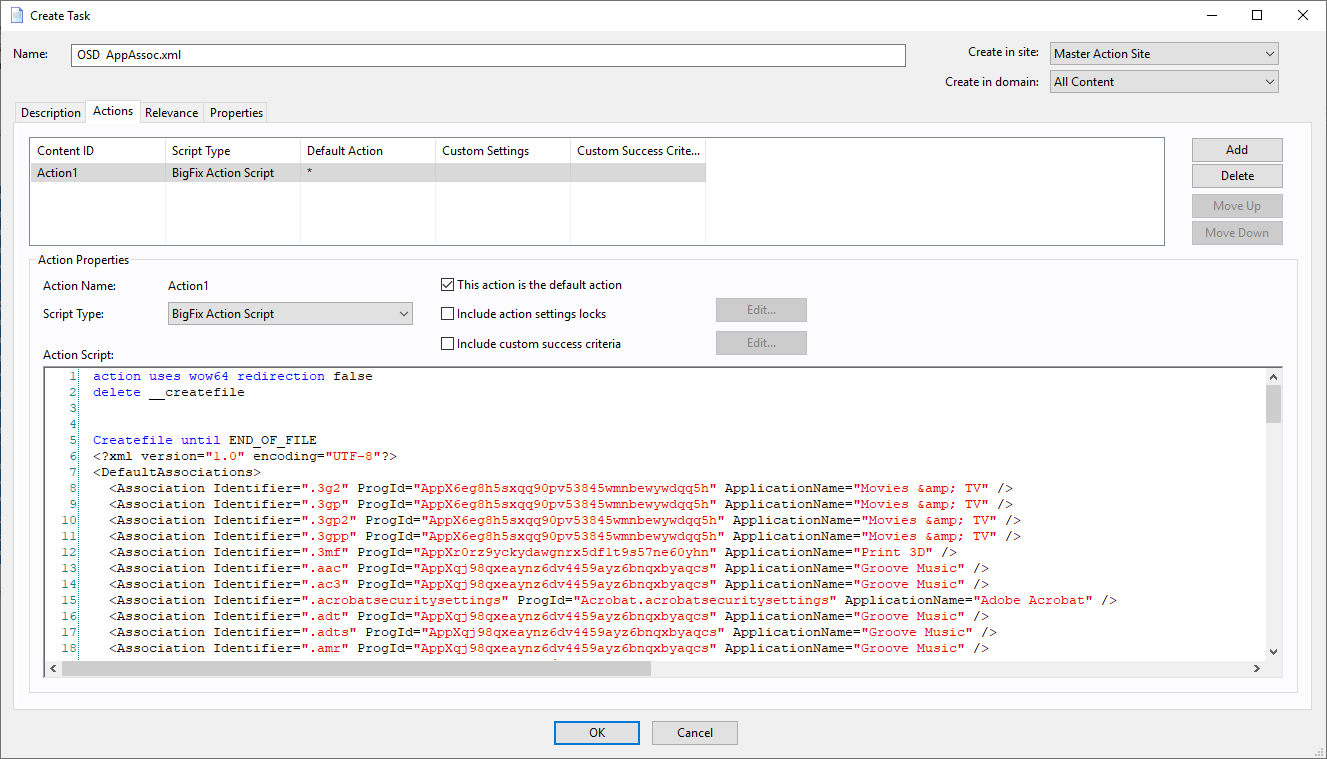
- In BigFix, create a new Task called "OSD – AppAssoc.xml".
- Open the Actions tab.
- Copy and paste the lines:
action uses wow64 redirection false
delete __createfile
Createfile until END_OF_FILE
<PASTE THE XML FILE HERE>
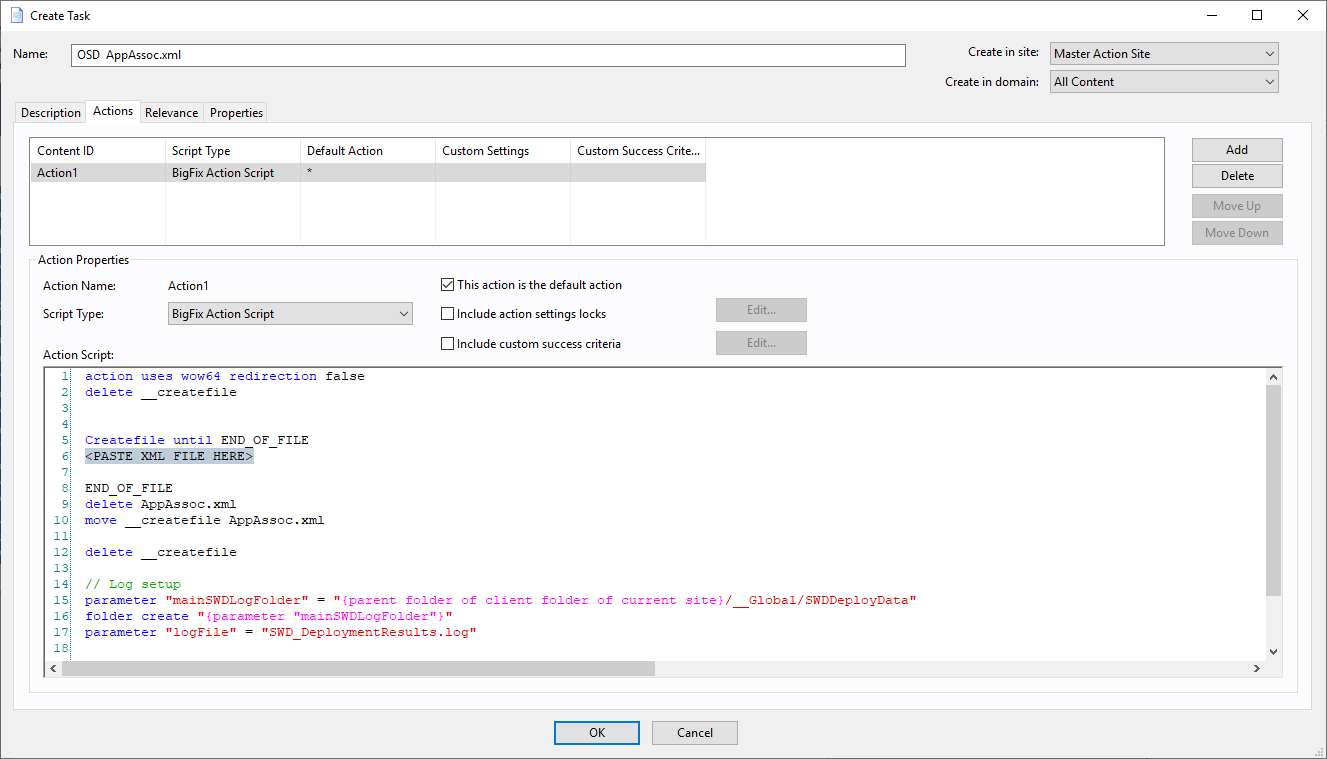
END_OF_FILE
delete AppAssoc.xml
move __createfile AppAssoc.xml
delete __createfile
// Log setup
parameter "mainSWDLogFolder" = "{parent folder of client folder of current site}/__Global/SWDDeployData"
folder create "{parameter "mainSWDLogFolder"}"
parameter "logFile" = "SWD_DeploymentResults.log"
waithidden C:\WINDOWS\SYSNATIVE\DISM.EXE /online /Import-DefaultAppAssociations:AppAssoc.xml
- Open Notepad. Select all the contents of the xml file and copy them.
- In the BigFix Task, select the section <PASTE YOUR XML FILE HERE> and replace it will the contents of the XML file.
The Task should look like this:
Add the task to your OSD – Phase 1 section and Take Action for Phase 1 as described in the previous OSD Phases setup. This step updates the file associations in phase 1 of the OSD deployment.
~~~~~~~~~~~~~~~~~~~~~~~~~~~~~~~~~~~~~~~~~~~~~~~~~~~~~~~~~~~~~~~~~~~~~
Author
Brad Sexton is a BigFix technical advisor for the mid-Atlantic region. He was a BigFix administrator in a global enterprise for 7 years where he was using BigFix for OSD, Software Deployments, and patching. Brad joined the HCL BigFix team in 2018.
Review and editorial credits
Shivi Sivasubramanian is a senior-level technical author and editor with a demonstrated history of working in the technology industry. A firm believer in the magical power of words, she loves helping the community deliver expressive, minimalist, and user-friendly content. Shivi currently leads a team of information developers in BigFix.