Introduction
There are many references on how to use web programming (like JavaScript) within BigFix to get information or control dashboards. In this article, we want to provide guidelines for creating dashboards using the power of the most modern React.
In the following sections, we take into account that the basic concepts on React and JavaScript are known as well as those relating to the Session Relevance usage within the dashboards.
In any case, we have specified some references to these topics at the end of the article.
As with everything else, the best way to understand a new process is to create a "Hello world".
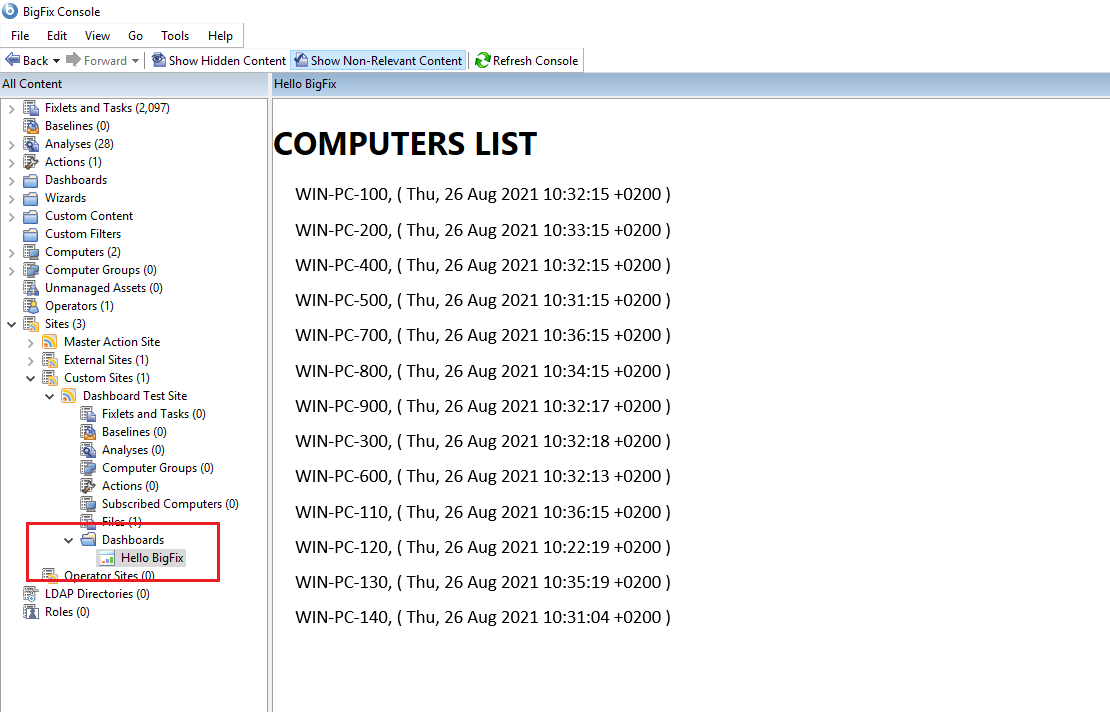
In the following section, we will create a "Hello BigFix" React project which we will turn into a dashboard for the BigFix Console. The dashboard has the simple purpose of displaying the list of computers on the platform showing the time of the last report.
Create a New React App
Create-react-app is a useful tool for make it easier to generate a new React project from scratch, and is the best way to start building a new single-page application, without spending time setting up basic configuration, which is the same for any new project. In this way we could have a scaffold project ready in few minutes, just after running a single command.
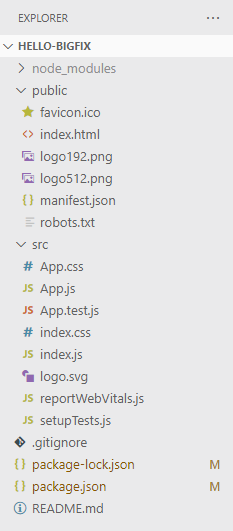
It sets up our development environment so that we can use the latest JavaScript features, provides a nice developer experience, and optimizes our app for production. We need to have Node >= 10.16 and npm >= 5.6 on our machine.
To create a project, run the command:
npx create-react-app hello-bigfix
The command creates a working base project inside the hello-bigfix folder which can already be viewed with the command:
npm start
Edit the project
At this point, we can modify the project by inserting the logic and functions we need. Since we want to create a view with the list of all computers on the platform, we create a new React component that has this purpose. Inside the src folder we create a new file named ComputersList.js and with the following code inside:
import React from 'react';
const ComputersList = props =>
{
const COMPUTERS_LIST_RELEVANCE = '(names of it, last report time of it) of bes computers';
const computers = window.EvaluateRelevance( COMPUTERS_LIST_RELEVANCE );
return (
<div align='left'>
<h1>COMPUTERS LIST</h1>
{computers.map( data => (
<p>{data}</p>
) )}
</div>
);
};
export default ComputersList;
The component simply displays the list of computers. It is important to note the use of the EvaluateRelevance function. This function is defined in an external JavaScript source file (“wizards.js”) that is automatically included in the console environment. It supports the dashboard functions, including Fixlets, tasks, baselines, analyzes, wizard documents, and Web Reports. Remember you can use this approach only in the Console, because this EvaluateRelevance function (as for all the others exposed in the wizards.js) will not be available outside, the window object will not include it. You can image the wizards.js file as a API connector between the dashboard and the Console.
The result of EvaluateRelevance depends on whether the expression is a singular expression or a plural expression. If the expression is singular, the result is a string. If it is plural, the result is an array of strings.
The project entry point is App.js, so to use our new component, we need to edit this file. Let us open it and modify it as follows:
import React from 'react';
import './App.css';
import ComputersList from './ComputersList'
function App() {
return (
<div className="App">
<ComputersList className="main-container" />
</div>
);
}
export default App;
Build the project
At this point, we are ready to build our project with the "npm build" command.
This would build our application for production to the build directory. The "build" folder would contain all the static files which can be directly used on any web server; the output folder contains the main index.html file and the associated JavaScript and CSS files are added to the /static/js and /static/css folders respectively. Also, the build command transpiles our source code into code which the browser can understand (for example making some modern javascript functions to be evaluated by old browsers too), and files are optimized for best performance. All of our JS files are bundled into a single minified file and even the HTML/CSS code is minified to significantly reduce the download times on the client browser.
However, this sub-folder structure cannot be used as a dashboard. In fact, the BigFix Console sources from BES Support require that all the necessary dashboard files must be stored within the same folder for the gathering process.
One way to fix this is to combine all these JS and CSS files of React App in a single bundle. To do this we can take advantage of the capabilities of gulp. gulp which is an external tool for automating our build process (you can learn more about Gulp.js at http://gulpjs.com).
Let us go to the command line and install the gulp packages as dev dependencies in your package.json file.
npm install --save-dev gulp gulp-inline-source gulp-replace
Next, let us create a .env file in our project root folder and set the following environment variables to disable the source maps.
INLINE_RUNTIME_CHUNK=false
GENERATE_SOURCEMAP=false
SKIP_PREFLIGHT_CHECK=true
Next, let us create a gulpfile.js file in the root folder.
const gulp = require( "gulp" );
const inlinesource = require( "gulp-inline-source" );
const replace = require( "gulp-replace" );
gulp.task( "default", () => {
return gulp
.src( "./build/*.html" )
.pipe( replace( '.js"></script>', '.js" inline></script>' ) )
.pipe( replace( 'rel="stylesheet">', 'rel="stylesheet" inline>' ) )
.pipe( inlinesource( {
compress: false,
ignore: ["png"],
} ) )
.pipe( gulp.dest( "./build" ) );
} );
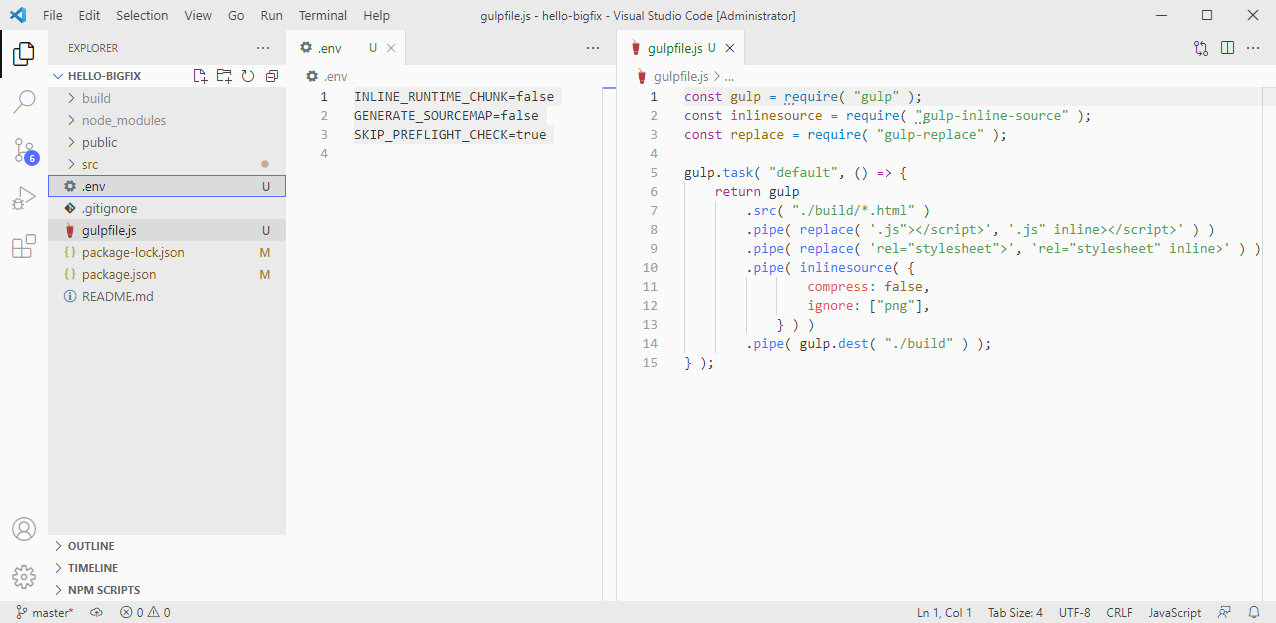
The gulp task will add the inline attribute to the <script> and the <link> tags. The inlinesource module will read these inline attributes in the html file and replace them with the actual content of the corresponding files.
Let us run the command
npm run build
to create an optimized production build for our React App. The command produces the following output, where it warns us that the static content of the build refers to the deployment path "/", i.e. the root of the machine.
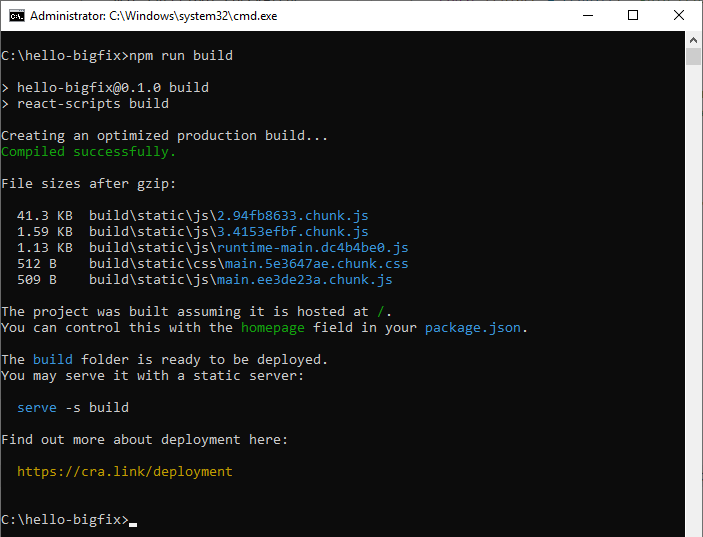
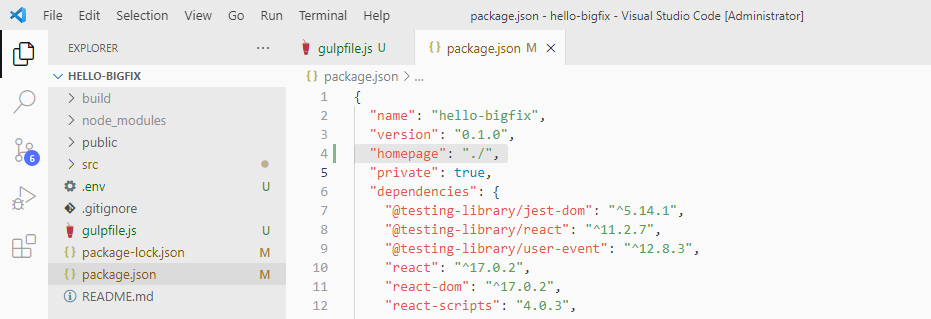
This is not what we want. We want all contents to refer to the local folder. The command suggests that, in order to do this, we need to change the homepage field value in our package.json, then we put its value to the current directory, i.e. "./".
Let us run the command
npm run build
to create an optimized production build for our React App which has all static references to the local project folder.
Let us run the command
npx gulp
to bundle all the JS and CSS files in the static build folder into the single main html file.
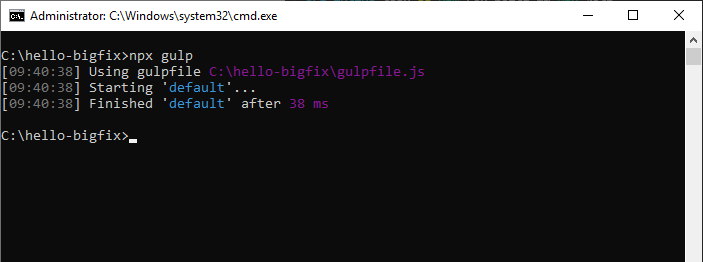
At this point, we have our static content and we just have to create the .ojo file which will be the entry point of our new dashboard.
To create the .ojo file, we can start from the following template:
<?xml version="1.0" encoding="UTF-8"?>
<BES>
<Wizard>
<Title>Hello BigFix</Title>
<UIHooks LaunchType="Document" Menu="True" NavBar="" />
<DefaultPage>Page1</DefaultPage>
<Page Name="Page1" DocType="HTML5">
<Title>Hello BigFix</Title>
<Head>
<meta http-equiv="X-UA-Compatible" content="IE=11" />
<meta name="viewport" content="width=device-width, initial-scale=1">
</Head>
<HTML>
<![CDATA[
---------à Enter the HTML code here
]]>
</HTML>
</Page>
</Wizard>
</BES>
Here we insert the contents of the index.html file of the build folder of our project into the <![CDATA[ ]]> tag. It’s important to understand that all the content added at this point is part of the HTML body element, so it’s not formally correct to insert a whole html document here, because html tags as <html>, <head>, <title> declared yet and wil be automatically created by the Console, as you can verify by right-clicking on the “View Source” option in the dashboard page. However, inserting the fully html content does not affect the correct functioning of the dashboard.
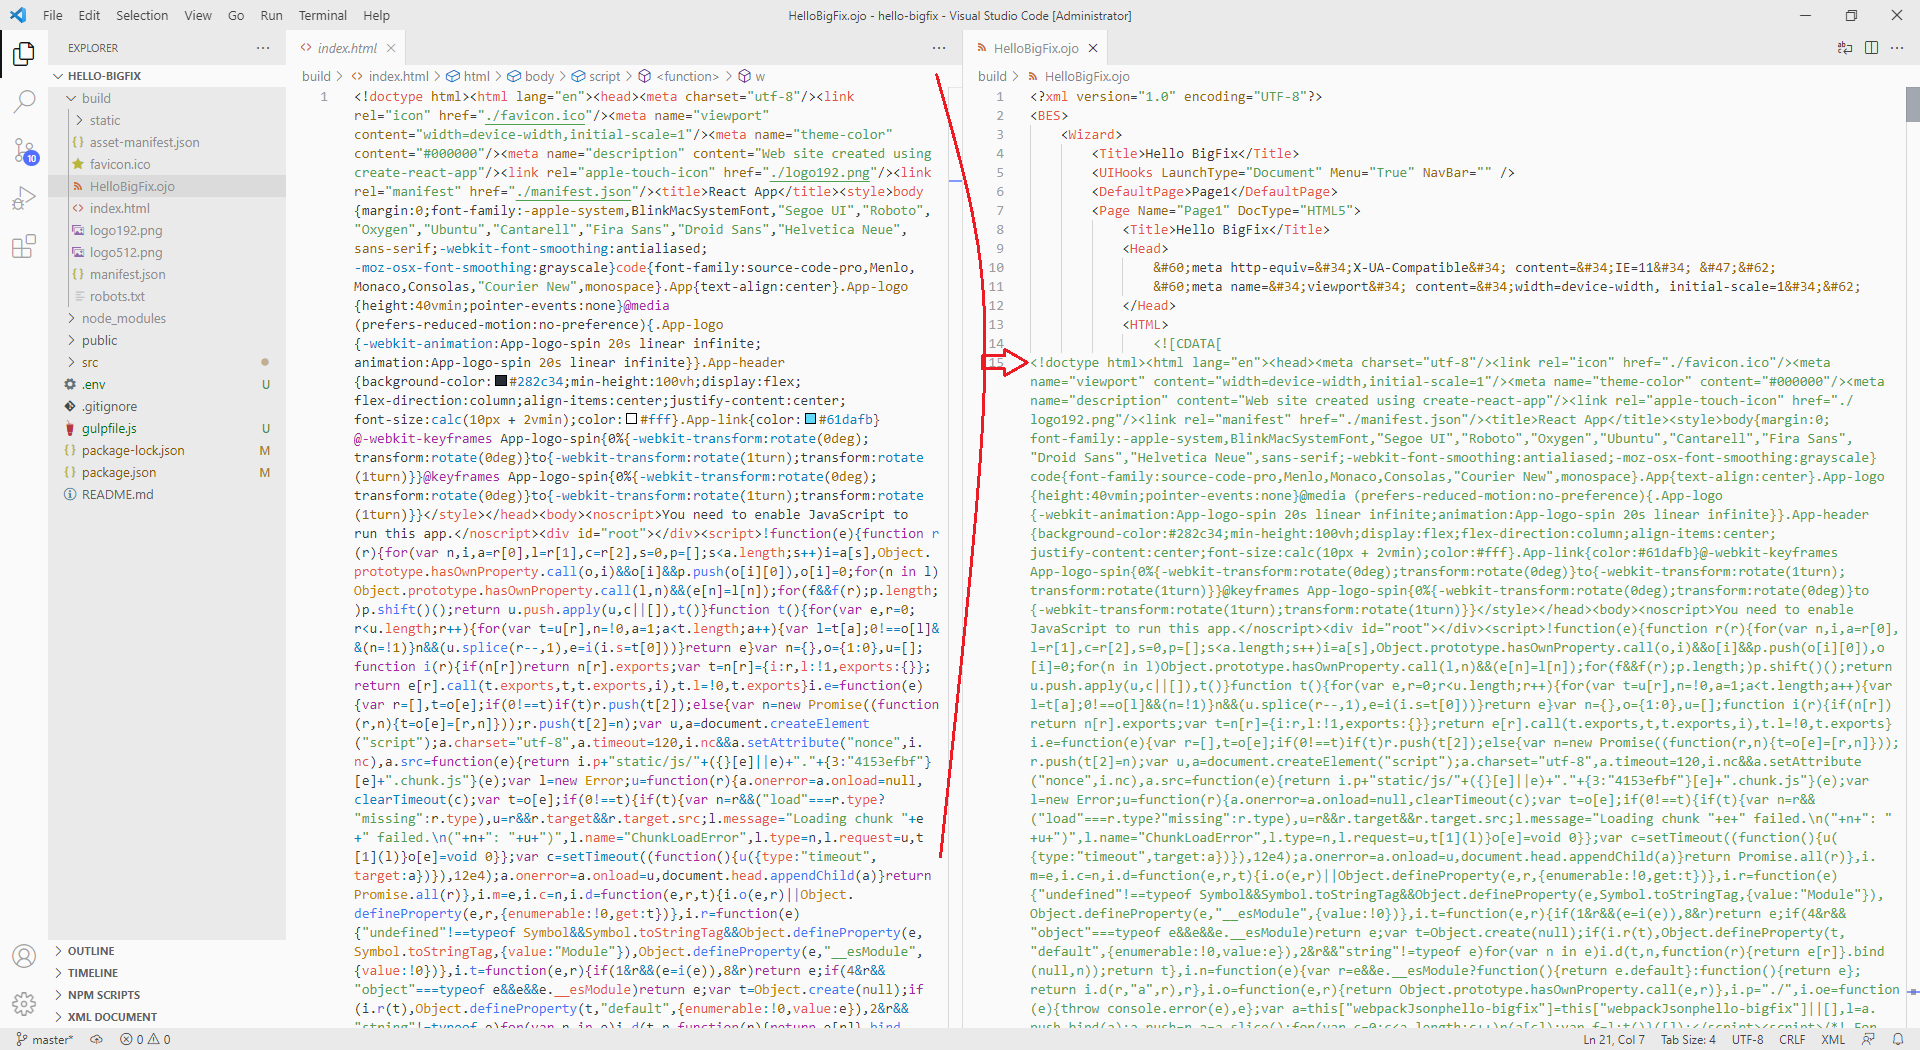
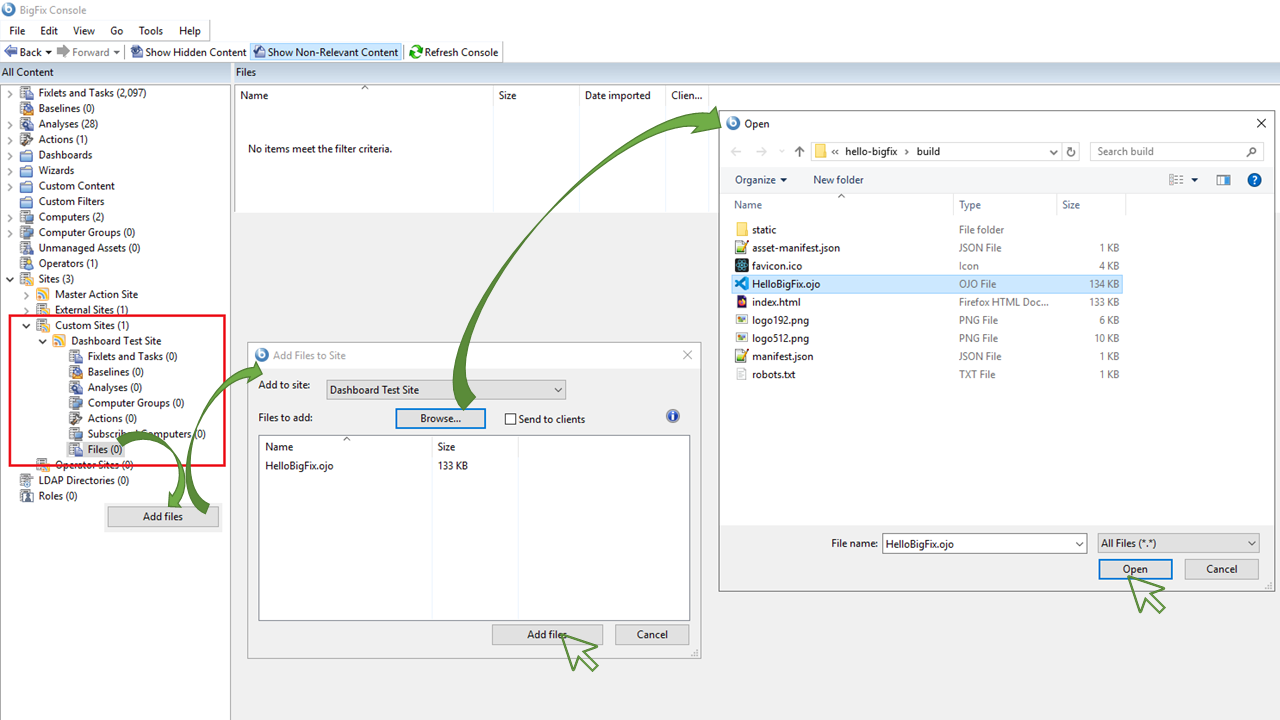
Now our dashboard is ready. We just have to insert it into the console and test it. To do this, we can create our own custom site and add the .ojo file to it.
The BigFix Console automatically recognizes and classifies the new dashboard and makes it immediately available. By selecting the new dashboard we can see the result obtained.
Reference
- https://developer.bigfix.com/other/dashboard-api/relevance_in_dashboards.html
- https://developer.bigfix.com/other/dashboard-api/dashboard_content.html
- https://forum.bigfix.com/t/how-to-create-a-custom-dashboard/15418
- https://reactjs.org/
- https://reactjs.org/docs/create-a-new-react-app.html
- https://create-react-app.dev/
- https://gulpjs.com/
- https://www.npmjs.com/package/gulp
- https://create-react-app.dev/docs/deployment/
- https://help.hcltechsw.com/bigfix/10.0/platform/Platform/Console/c_creating_client_dashboards.html
- https://help.hcltechsw.com/bigfix/10.0/platform/Platform/Console/c_creating_custom_sites.html
- https://help.hcltechsw.com/bigfix/10.0/platform/Platform/Console/c_adding_files_to_sites.html
- https://docplayer.net/47933442-Dashboard-framework-advanced-development-guide.html
Authors of this Blog
Alberto Lima
Giorgio Bruschini
