You can easily create software packages and deploy them with the BigFix Lifecycle module. At the same time, you can also determine if a package is installed based on a logic with the power of relevance. You can check if it is a registered app, a file, or a registry entry so as to determine if it is installed. BigFix determines if it is installed based on the relevance and either skips the install, upgrade, or install. The article demonstrates how software can be packaged in BigFix in a way there is no need for deploying an individual software task. It also explains how to create a dynamic package so BigFix can independently determine what to install on that particular machine. The article also explains how to create a property so you have that software version readily available on the BigFix Console so you can quickly see whether they exist on your machines and the version of the software.
In this example, I will create a package for Google Chrome - package a 32-bit version and a 64-bit version and then add them to one single package. This way, your IT Helpdesk does not need to determine if the machine is 64-bit or 32-bit and they need to only deploy one package and BigFix uses logic to pick what that machine actually needs. I also demonstrate how to add the built-in content in BigFix to disable Chrome from updating and then deploy the patch to bring Chrome up to the latest version. This way, you do not need to create a new package each time Chrome releases a new version - you only need to add the new patch to the package to update it.
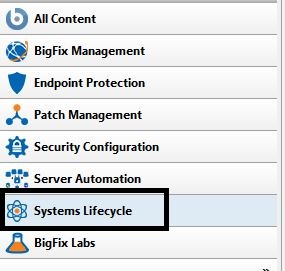
- In BigFix Console, go to Systems Lifecycle.
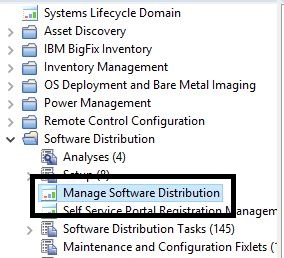
- Go to Software Distribution and click Manage Software Distribution.
- Click New Package.
- Name the package and enter a version.
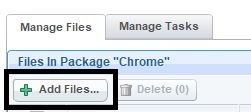
- Click Add Files.
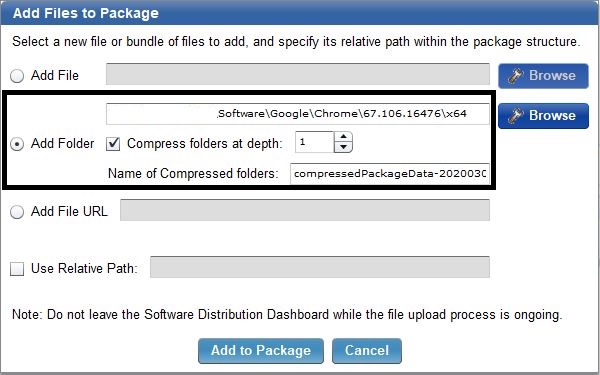
- Upload the installer(s) and click Add to Package.
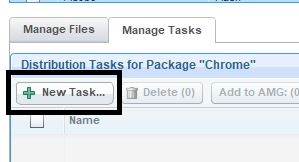
- Open the Manage Tasks tab and click New Task.
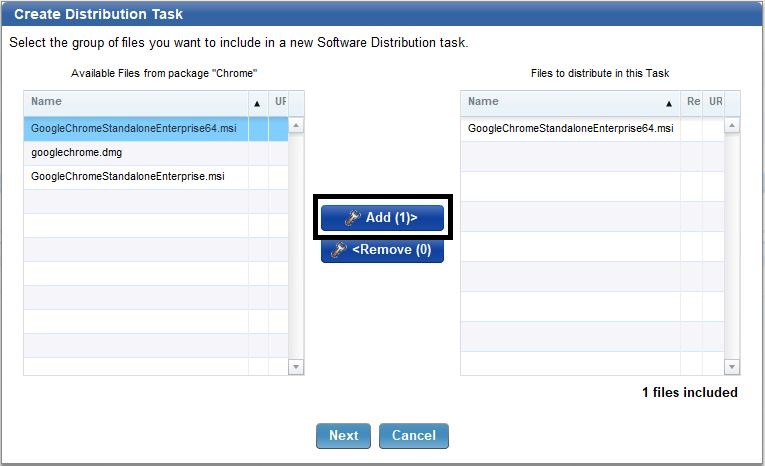
- Add the 64-bit installer for just this task and click Add.
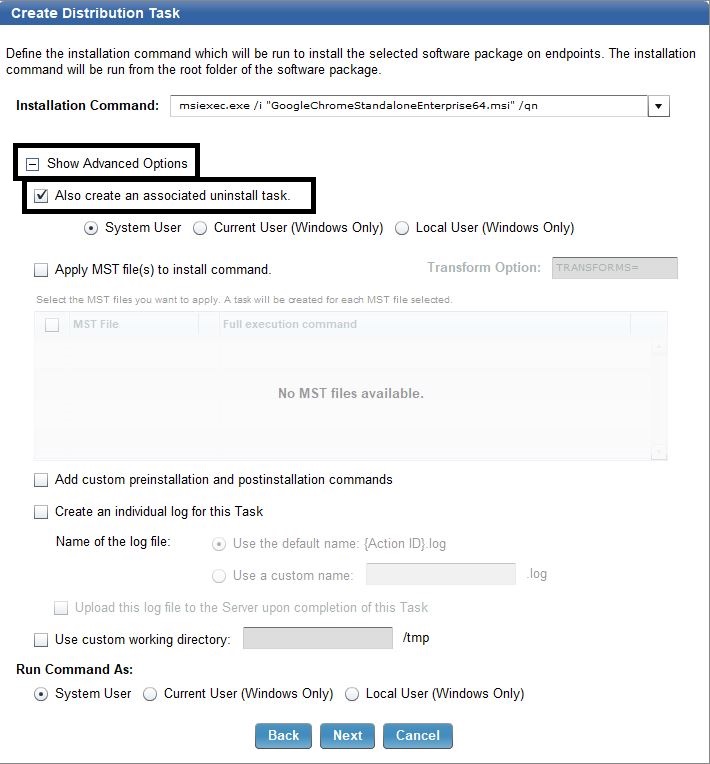
Since it is an MSI, it automatically detects the installation command.
- Click Show Advanced Options. Check the Also create an associated uninstall task check box and click Next.
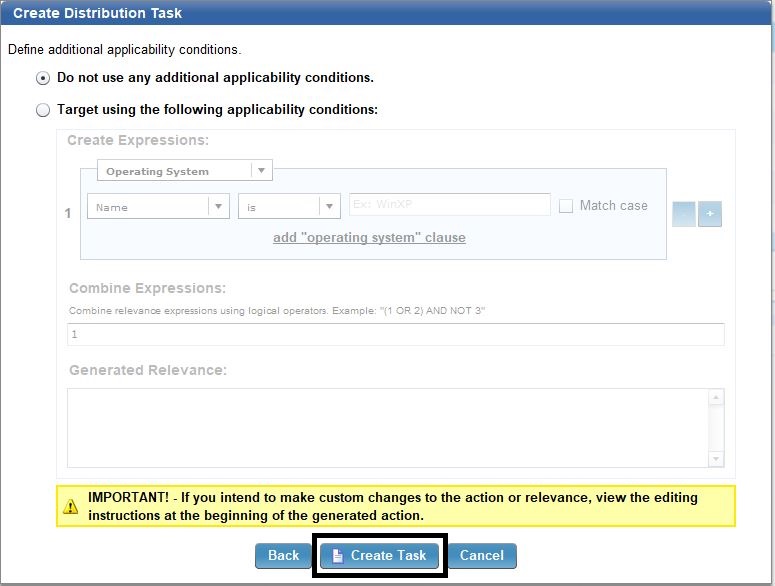
- Click Create Task.
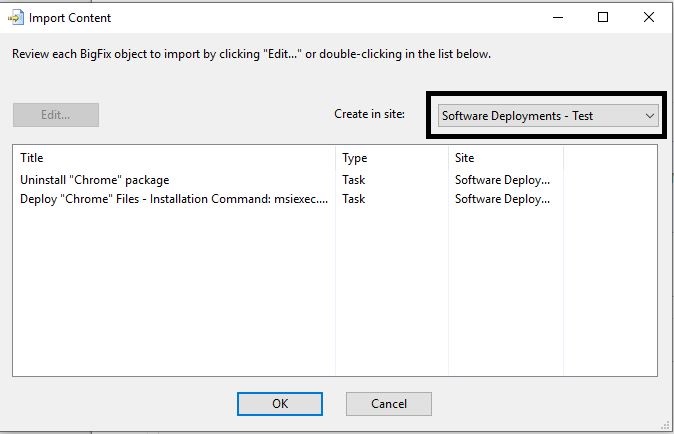
- Create two new tasks in your Software Deployment – Test site if you have one. I prefer organizing my software deployments in 3 sites:
- Software Deployments – Test (only my software packages have access to this site)
- Software Deployments – Licensed (for licensed software that might require an additional approval before they are deployed)
- Software Deployments – All (free software or enterprise licensed software that do not require an additional approval)
- Click the deploy task and then Edit.
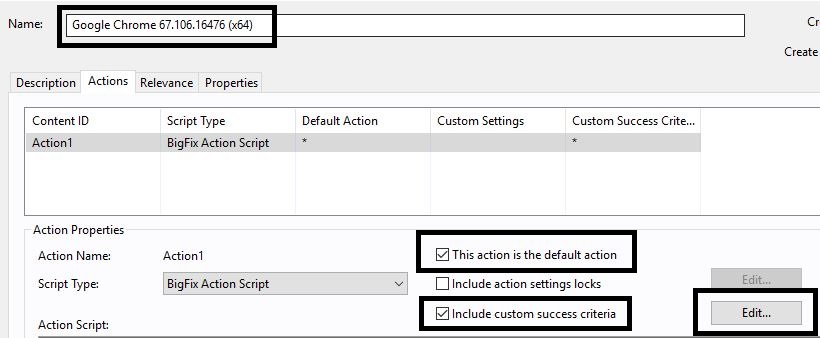
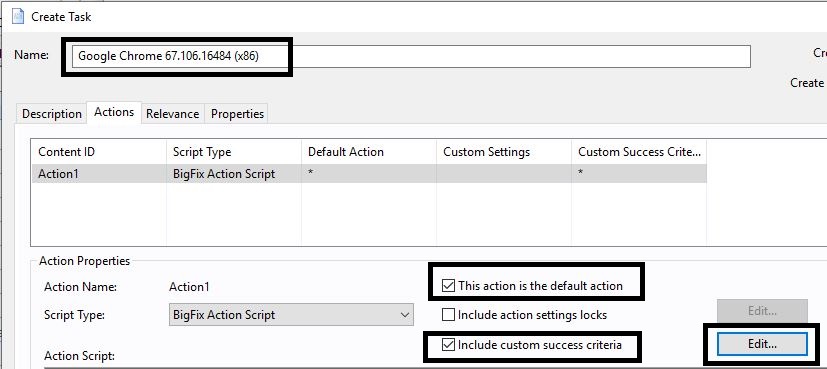
- Enter a name for the package (for example the one shown below to indicate that it is a 64-bit version).
- Select the This action is the default action check box and the Include Custom success criteria check box and click Edit.
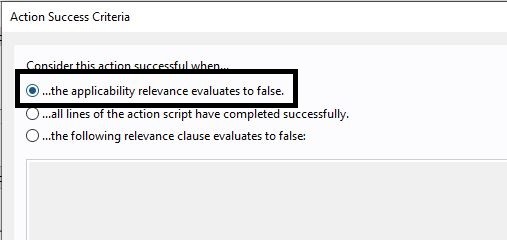
- Select the ..the applicability relevance evaluates to false option.
- Open the Relevance tab and remove the statement on Language. If you prefer, copy the following statement and replace yours:
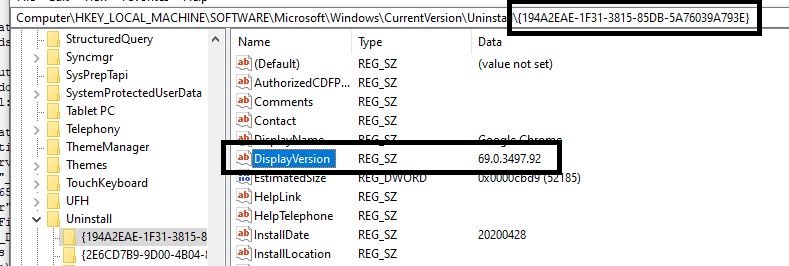
(disjunction of (NOT exists keys "{194A2EAE-1F31-3815-85DB-5A76039A793E}" whose ( value "DisplayVersion" of it as string as version >= "67.106.16476" as version ) of keys "HKEY_LOCAL_MACHINE\SOFTWARE\Microsoft\Windows\CurrentVersion\Uninstall" of ( x32 registry; (if exists x64 registry then x64 registry else nothing) )))
If you break down the relevance, it is looking for the key and the display version.
- Edit the relevance to meet your needs. You can also evaluate by using the Fixlet debugger.
The relevance should return "false" because the task is meant to be relevant only to the machines that do not have this specific version installed.
Since this is a 64-bit install, ensure that this only installs on 64-bit machines. Add the relevance given below to section 3.
/* Checks to see if its a 64 bit computer */

x64 of operating system
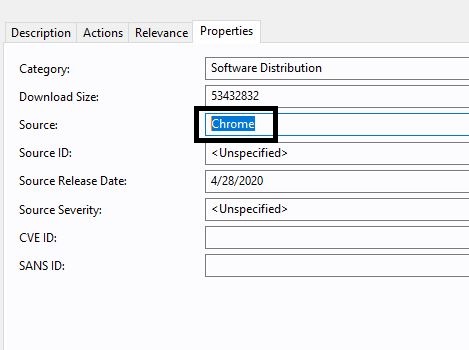
- Click the Properties tab and change the source to Google and press OK to complete the task.
- Repeat the steps to to create a 32-bit install task.
/* Checks to see if its a 32 bit computer */

not x64 of operating system
- Run the individual software deployment tasks on VMs to verify if they install correctly and report success.
- Check the 32-bit install on a 32 bit machine
- Check the 64-bit install on a 64 bit machine
- Copy each task to your software deployment sites.
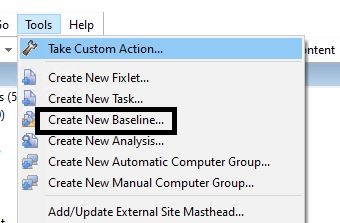
- In BigFix Console, go to Tools > Create Baseline.
- Enter a name for the baseline appropriately. Add it to the correct site.
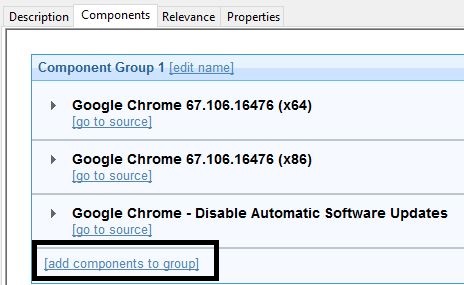
- Select add Components to group.
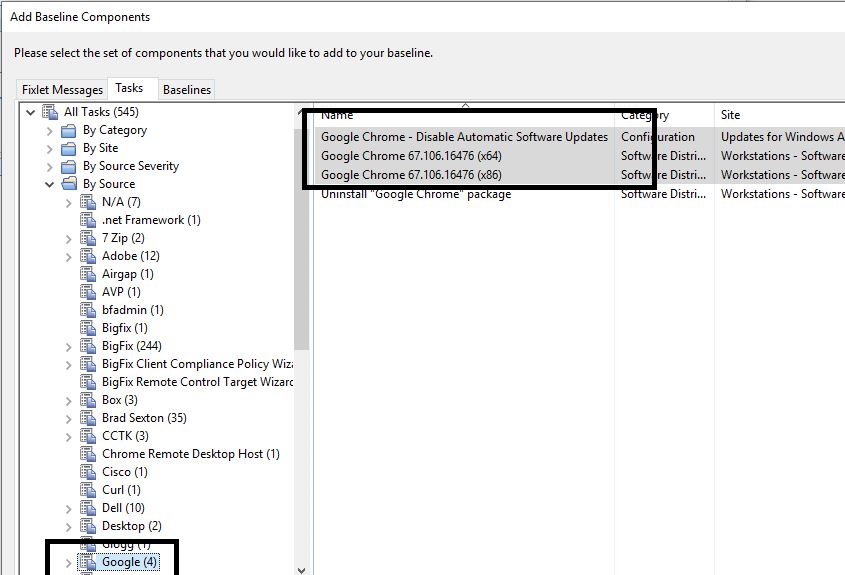
- Select the 2 tasks created earlier. Select the Disable Automatic software updates task too.
- Ensure that the "disable automatic software updates" is the last item in the baseline, and click add components to group.
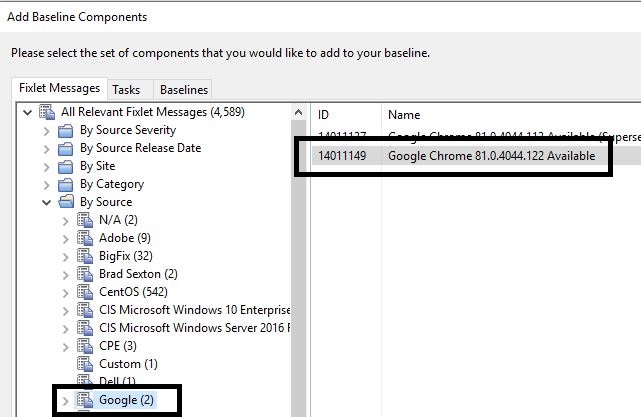
- Find the Fixlet for the latest version of Chrome to deploy and add it to the baseline.
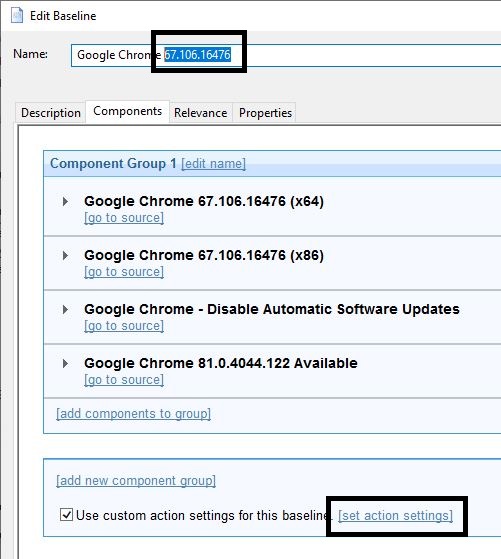
- Change the name of the package to the latest version and add custom action settings to the baseline so the package deploys the same way for each person deploying it.
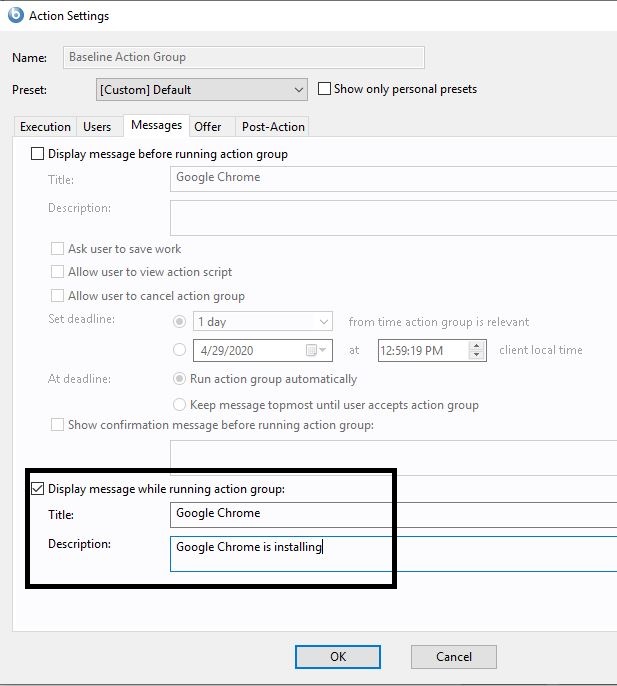
- Configure the package to display a message notifying the user that Google Chrome is installing. Select the set action settings.
- On the Message tab, select Display message while running action group check box and enter details as needed.
- Since the Fixlets and task are added to the same baseline, select Baseline will be relevant on applicable computers where this component is relevant check box for each task created:
When you take action on this Google Chrome package, it determines what needs to be installed based on the logic you set.
- If it is a 64-bit machine, it installs the 64-bit version
- If it is a 32-bit machine, it installs the 32-bit version
Chrome will no longer auto-update so you remain in control of when it should be updated. The package has the most up-to-date version so it installs the base package and then update to the latest version to deploy. You no longer have to package a new version of Chrome each month. Custom action settings have been configured too, so each time your Helpdesk deploys the software, it is the same branding and messaging by default. The software package is now complete.
For every package you create, you can also make that information available through a BigFix property. For example, when you deploy software, you might want to check how it is going and what versions you have.
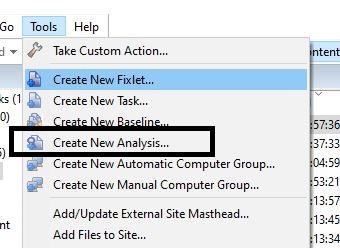
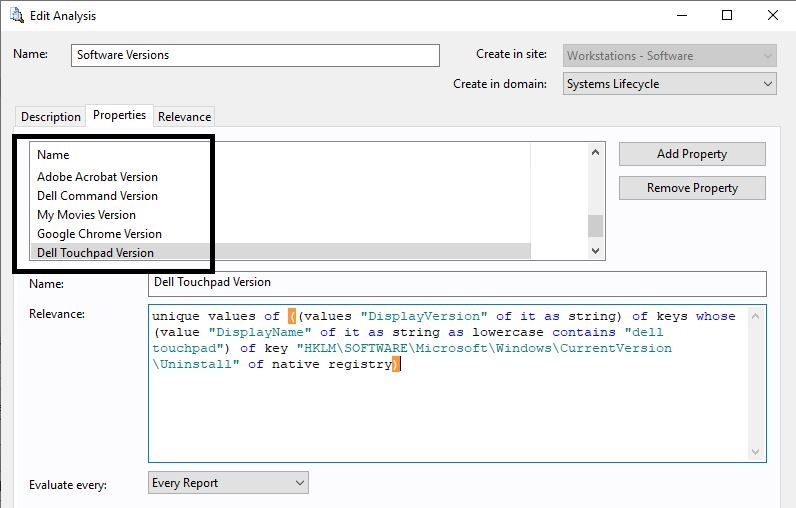
- In BigFix Console, go to Tools > Create New Analysis.
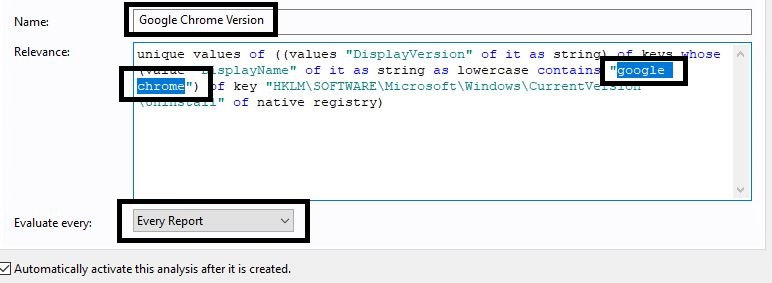
- Enter a name for the analysis - for example, "Software Versions". Create it in the site that your workstations can evaluate and report information.
- Click Add Property.
- Create a property called "Google Chrome Version".
Following is the relevance - you can copy it for the different software installed in your environment.
unique values of ((values "DisplayVersion" of it as string) of keys whose (value "DisplayName" of it as string as lowercase contains "google chrome") of key "HKLM\SOFTWARE\Microsoft\Windows\CurrentVersion\Uninstall" of native registry)
Note: The relevance looks for the version of the software called “google chrome”.
- Click OK to activate the analysis.
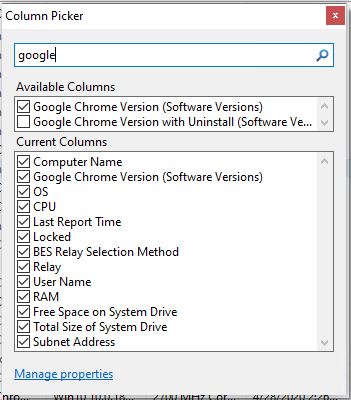
- In BigFix Console, in the Computers view, right-click the header and add the newly created property.
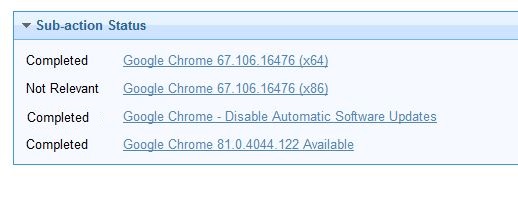
If you look at the action history of a Google Chrome deployment to a 64 bit machine, you will see the following:
- Google Chrome installed on the 64 bit machine
- Skipped the 32 bit machine
- Disabled Automatic Updates
- Updated Chrome to the latest version
You will also see the version installed in the property you activated:
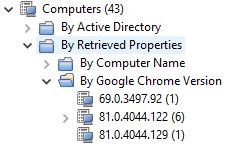
Target to the property and see the different versions of Google Chrome installed.
You can create a new property in this analysis for any software you deploy in my environment.
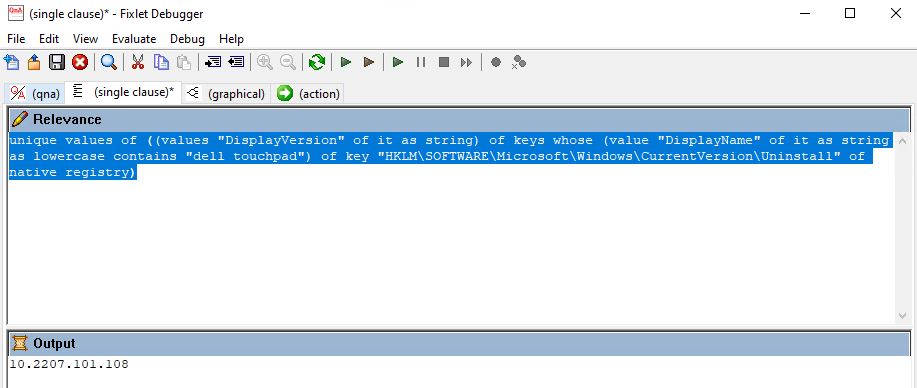
Test the relevance in Fixlet debugger to verify it fetches the data correctly.

