International companies often have issues with handling languages. It becomes a difficult task if the organization is global and requires maintaining multiple base versions of Windows and different languages.
You have deployed multiple language operating systems in your environment that might require you to patch with that language. Select a base language for your organization and then layer on the language packs as part of the process. For instance, if you only deployed the English USA version of the base ISO and then layered on language packs, you only need to deploy one version of the patches monthly because it is only looking for the base OS. This is much easier to manage and you are not required to store multiple large ISO files of the different base OSs. This article explains how to package language packs with BigFix.
- Download the language pack from the Microsoft Enterprise portal. Be sure to download the correct build that matches the version you want to deploy. For the example demonstrated in the article, the Spanish – Mexico language pack on Windows 10 1903 64 bit is used.
Note: Each build of Windows 10 has its own language pack and has to be packaged. Be sure to download the correct language pack to your corresponding build
- Open the ISO and browse to the correct architecture.
- Copy the cab file to be uploaded to BigFix.
- Create a software deployment in BigFix.
- In BigFix Console, open the Systems Lifecycle domain.

- Click Software Distribution > Manage Software Distribution.

- Click New Package to create a package. Enter a name for the package.


- Click Add Files to upload the cab file.

- Add the files to the package.
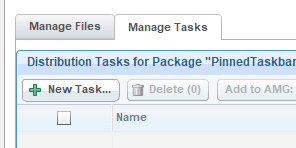
- Create a task to install the language pack. In the Manage Tasks tab, click New Task.
- Add the cab file to the task and click Next.

dism.exe /norestart /online /add-package /packagepath:"es-mx.cab"

- Add the 3 relevance statements to your new task:
operating system as string contains "1903"
system language does not contain "Spanish"
not exists key "HKEY_LOCAL_MACHINE\SYSTEM\CurrentControlSet\Control\MUI\UILanguages\es-mx" of registry

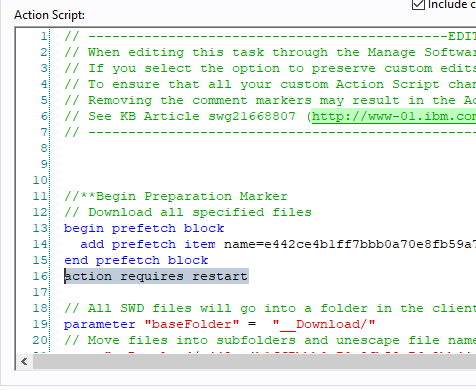
- Open the action script and add the following line after the end prefetch block:
action requires restart
- In BigFix Console, click Tools > Create a new Task to create a task.

- Add the following code to the action script. This creates an xml file and activates the language pack. You might need to run the script twice after a reboot.
Following is the action script (in Italics). Copy and paste into the BigFix Task. The items highlighted in bold need to be adjusted to the language you intend to deploy.
action uses wow64 redirection false
delete __createfile
Createfile until END_OF_FILE
<gs:GlobalizationServices xmlns:gs="urn:longhornGlobalizationUnattend">
<!--User List-->
<gs:UserList>
<gs:User UserID="Current" CopySettingsToDefaultUserAcct="true" CopySettingsToSystemAcct="true"/>
</gs:UserList>
<!-- user locale -->
<gs:UserLocale>
<gs:Locale Name="es-mx" SetAsCurrent="true"/>
</gs:UserLocale>
<!-- system locale -->
<gs:SystemLocale Name="es-mx"/>
<!-- GeoID -->
<gs:LocationPreferences>
<gs:GeoID Value="166"/>
</gs:LocationPreferences>
<gs:MUILanguagePreferences>
<gs:MUILanguage Value="es-mx"/>
<gs:MUIFallback Value="en-US"/>
</gs:MUILanguagePreferences>
<!-- input preferences -->
<gs:InputPreferences>
<!--es-mx-->
<gs:InputLanguageID Action="add" ID="080a:0000080a" Default="true"/>
<!--en-US-->
<gs:InputLanguageID Action="remove" ID="0409:00000409"/>
</gs:InputPreferences>
</gs:GlobalizationServices>
END_OF_FILE
delete es-mx.xml
move __createfile es-mx.xml
delete __createfile
waithidden control intl.cpl,, /f:"es-mx.xml"
This XML can be used with a variety of Windows 10 builds. You need not recreate it when you update the Windows build.
Note: To determine the correct Keyboard, Geo ID, and language name, refer to the following documentation. You might also need to change the keyboard and language if you are not using an English US OS.
- Edit the success criteria so it includes custom success criteria and click Edit.

- Select ... the applicability relevance evaluates to false option.

- Add the following 3 relevance statements to the task:
(if( name of operating system starts with "Win" ) then platform id of operating system != 3 else false) AND (if exists property "in proxy agent context" then ( not in proxy agent context ) else true )
not pending restart
exists key "HKEY_LOCAL_MACHINE\SYSTEM\CurrentControlSet\Control\MUI\UILanguages\es-MX" of registry

- Deploy the task. The first task created checks the relevance to see if the computer has the correct build of Windows installed and then installs the language pack. The second task that should be run next activates the language pack for the current users with profiles and the users who log in to the machine in the future. The activation performs better if the computer is restarted after the language pack install. You can set up a baseline to run these steps automatically and initiate 2 reboots.
Create a new baseline and add the two newly created tasks:

- Click set action settings.

- Select Reapply this action and whenever it becomes relevant again. Limit to 1 reapplication.

- In the Post-Action tab, select Restart computer after action completes.

When the baseline deploys the first time, you will see that the action is Pending Restart to install the language pack and not relevant for activation. Once the computer restarts, the activation will become relevant and activates the language pack and requests a second reboot.

You will also notice that the computer displays in the language of your choice.


You might want to set relevance for certain locations to install language packs by using a logic like "this location gets this language pack". For instance, if your OU structure is something similar where you separate each location, you can easily set relevance so certain locations get specific language packs.

Create an automatic group to create a relevance statement. In this example, an automatic group looks for the Active Directory path that contains "Mexico".

Once the group is created, you will see a relevance statement. You can add it to the baseline or task so that this language pack becomes relevant only for your Mexico locations.

(exists true whose (if true then (exists (if exists value of settings "_BESClient_ActiveDirectoryPathOverride" of client then value of setting "_BESClient_ActiveDirectoryPathOverride" of client else if exists true whose (if true then exists distinguished name of local computer of active directory else false) then distinguished name of local computer of active directory else "<none>") whose (it as string as lowercase contains "Mexico" as lowercase)) else false))
Edit the baseline or task to include the relevance that restricts installing the language pack to only your Mexico OU computers.

You can also provision languages packs as part of the OS Deployment. If you use BigFix OSD and have implemented the phases as described in Fat Images vs. Layered Images, the article now includes information about language packs too. If you have any questions, feel free to reach out.
~~~~~~~~~~~~~~~~~~~~~~~~~~~~~~~~~~~~~~~~~~~~~~~~~~~~~~~~~~~~~~~~~~~~~
Author
Brad Sexton is a BigFix technical advisor for the mid-Atlantic region. He was a BigFix administrator in a global enterprise for 7 years where he was using BigFix for OSD, Software Deployments, and patching. Brad joined the HCL BigFix team in 2018.
Review and editorial credits
Shivi Sivasubramanian is a senior-level technical author and editor with a demonstrated history of working in the technology industry. A firm believer in the magical power of words, she loves helping the community deliver expressive, minimalist, and user-friendly content. Shivi currently leads a team of information developers in BigFix.
Modificato il da Brad Sexton 64576A77-B31D-BF00-0025-86070027DBEC bsexton@hcltechsw.com
|
Software patches are released by vendors every month and you need to test them before deploying them to the production machines. You can plan to select the patches you want to deploy; take action and deploy them to the test group, and then do the same for the production machines. Patching has become a repetitive act and now with BigFix Patch Policies, you can automate the steps This will save you a lot of time and money and allows you to be more productive. With BigFix, you can do more with less and automate such tedious routines.
Set the criteria of what patches and to what machines and when and let BigFix take care of the rest. This allows you to accomplish more with less and help keep your endpoints continuously compliant and secure. This article shows how easily it is to set up patch policies and how granular the patch schedules can be and to deploy patches to fit your organization’s needs.
- Go to BigFix WebUI and click Apps > Patch Policies.

- Click Add Policy in the top right corner.

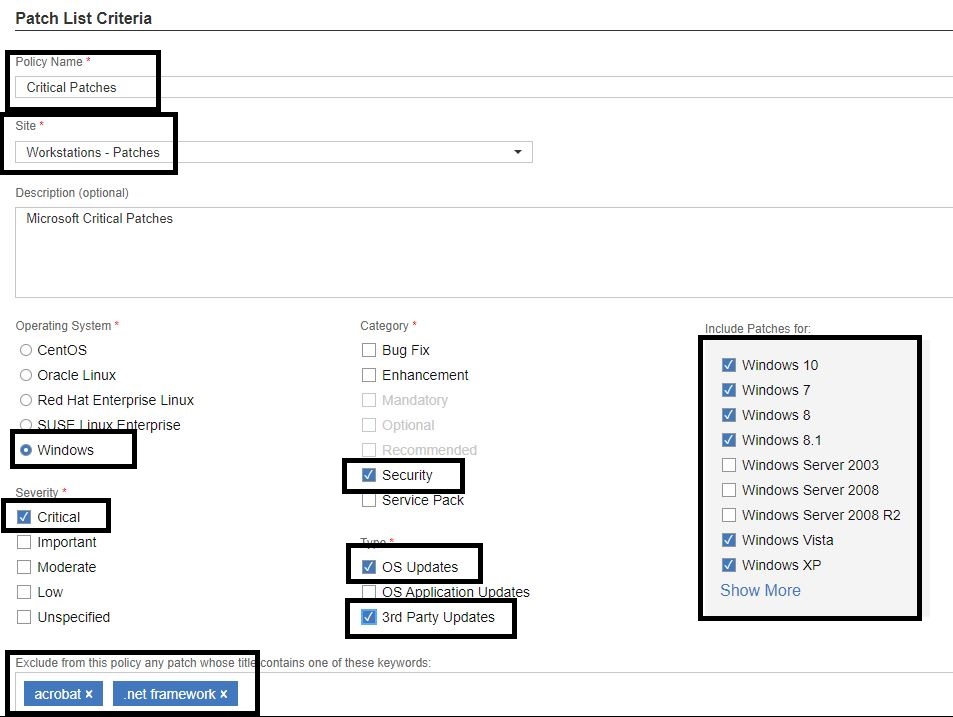
- Create a policy that sets the criteria of the patches you want to deploy.
- Enter a name for the policy.
- Select a site in which you want to create your deployments.
- Select a operating system type.
- Select the severity. This is determined by the vendor and their classification of patch.
- Select a category.
- Select the type of updates
- Select the OS types to filter.
You can exclude certain patches as part of the policy. For example, enter keywords such as "Acrobat" or ".net framework" to exclude their patches from the policy.
- Configure when the policy refresh - how often BigFix should refresh the policy and look for new content. In this example, 2nd Monday of each month is selected, which is otherwise known as Patch Tuesday. This is the day BigFix looks for new patches. You can also use the auto-refresh feature so that patches auto-refresh and be ready for the criteria you set. You can also manually refresh the policy when you want to.
Note: Microsoft releases patches later in the month - if you refresh weekly, you could deploy patches to your test groups and then a week later when you deploy to production, it could be patches that are not tested. So it is best to run a monthly refresh.
- Click Add at the top right corner.

- Set schedules for deploying the patch policy. You typically want to test patches before deploying to the production systems. Set up multiple deployments and schedules for when to deploy patches to certain groups.
Click Add a schedule.

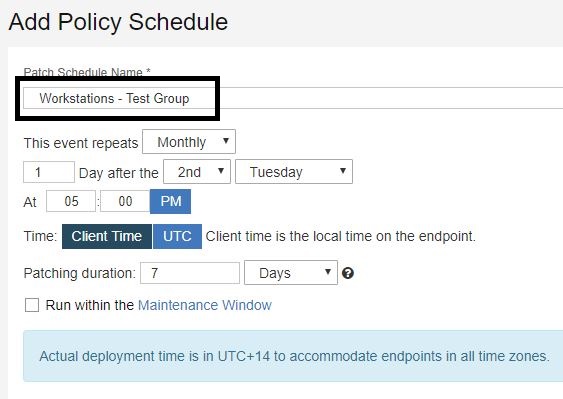
- Enter a name for the schedule. This example schedule will deploy the patches 1 day following the 2nd Tuesday at 5PM. This is the day after Patch Tuesday.
- Set the duration for which you want the deployment to be open. 7 days is the default.
You can also run predefined maintenance windows through BigFix. For details, see Maintenance Windows Dashboard.
- Set the criteria for how the patches are deployed. You can have the patches pre-cache and download ahead of time.
- Stagger the patching start time to limit the network load.
- Skip errors
- Retry the patch and wait until the computer has rebooted
Note: With the size of the cumulative updates, if a patch fails to install, it is most likely due to the machine having a pending restart. Selecting this option allows the patch to try installing and then if there is a failure it tries again after a fresh restart. If you force the users to restart their machines after the patches deploy, they could be prompted to restart multiple times if there is a failure with these options selected.
- You can type in a custom message for prompting the users for a pending restart
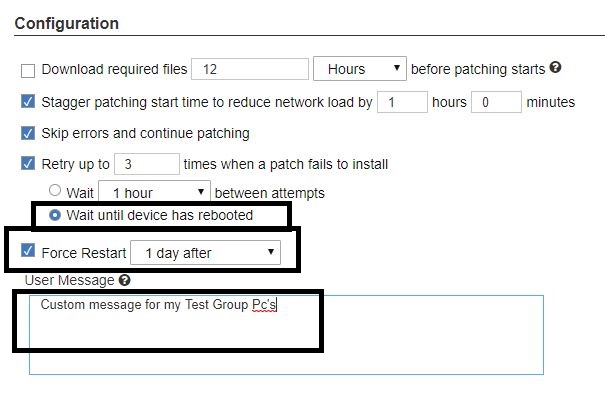
- When done, click OK in the top right corner.

- Select the targets to which the schedule should be deployed. Click Add Targets.

- Open the Target By Groups tab.
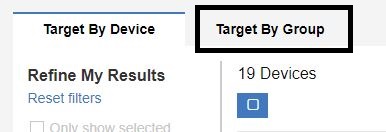
- Search and select a test group from the list.

- Click OK at the bottom right corner.

The first test group is defined and scheduled.

Add more groups and schedules as needed.
The following section is on setting up a policy schedule for production machines.
- Click Add Schedule.

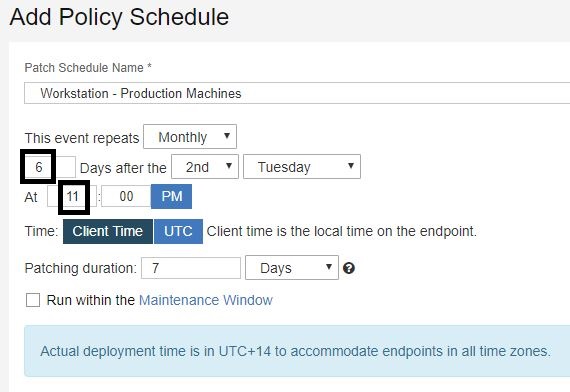
- Enter a name for the schedule. In this example, I selected 6 days after the 2nd Tuesday at 11 PM. The patches deploy to my production users on the first Monday after Patch Tuesday. This gives me time to test and verify that the patching went smoothly on my test machines before I patch the production machines.
Note: Each environment is different and requires different levels of testing and schedules may vary.
- Select the option to download the patches 3 days in advance. This way, the patches begin downloading on to the PCs 3 days before they are ready to install. It is all done in the background and does not impact the users. This also speeds up the deployment of my patches because they do not have to wait to download on the users' PCs.
- Select Retry the patch and wait until the computer has rebooted
Note: With the size of the cumulative updates, if a patch fails to install, it is most likely due to the machine having a pending restart. Selecting this option allows the patch to try installing and then if there is a failure it tries again after a fresh restart. If you force the users to restart their machines after the patches deploy, they could be prompted to restart multiple times if there is a failure with these options selected.
- Give the users 7 days to restart their machine.
- Type in a custom message for prompting the users for a pending restart.
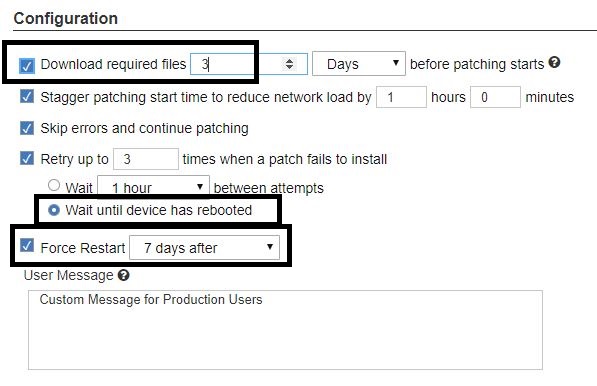
- Click OK at the bottom right corner.

- Add targets to the production machine schedule.

- Open the Target By Groups tab.

- Filter groups by typing the name of the production machine groups. Select the Workstations-All check box.

- Click OK at the bottom right corner.

You now have two schedules set up to deploy your criteria. The test group will deploy the day after the first Tuesday. The production group will deploy the Monday after the first Tuesday. Each month the policy refreshes to add new patches. Deployments automatically deploy the same patches to your test groups as well as your production groups.

- Click Activate (at the top right corner) to activate the patch policies.

For more details on setting up patch policies, see this video: https://www.youtube.com/watch?v=gkWjobsj15I. Feel free to reach out if you have any questions or need help with BigFix.
~~~~~~~~~~~~~~~~~~~~~~~~~~~~~~~~~~~~~~~~~~~~~~~~~~~~~~~~~~~~~~~~~~~~~
Author
Brad Sexton is a BigFix technical advisor for the mid-Atlantic region. He was a BigFix administrator in a global enterprise for 7 years where he was using BigFix for OSD, Software Deployments, and patching. Brad joined the HCL BigFix team in 2018.
Review and editorial credits
Shivi Sivasubramanian is a senior-level technical author and editor with a demonstrated history of working in the technology industry. A firm believer in the magical power of words, she loves helping the community deliver expressive, minimalist, and user-friendly content. Shivi currently leads a team of information developers in BigFix.
Modificato il da Brad Sexton 64576A77-B31D-BF00-0025-86070027DBEC bsexton@hcltechsw.com
|
With BigFix, you can easily set up a relay on your DMZ to do everything they do as if they were on the network. By opening a port and making a few configuration changes, this is possible. Regardless of whether you are in a domain or on the internal network, BigFix can help manage devices securely over the internet. Following is a guide on how quickly you can get this set up.
For advanced configurations, see https://help.hcltechsw.com/bigfix/9.5/platform/Platform/Installation/c_relays.html.
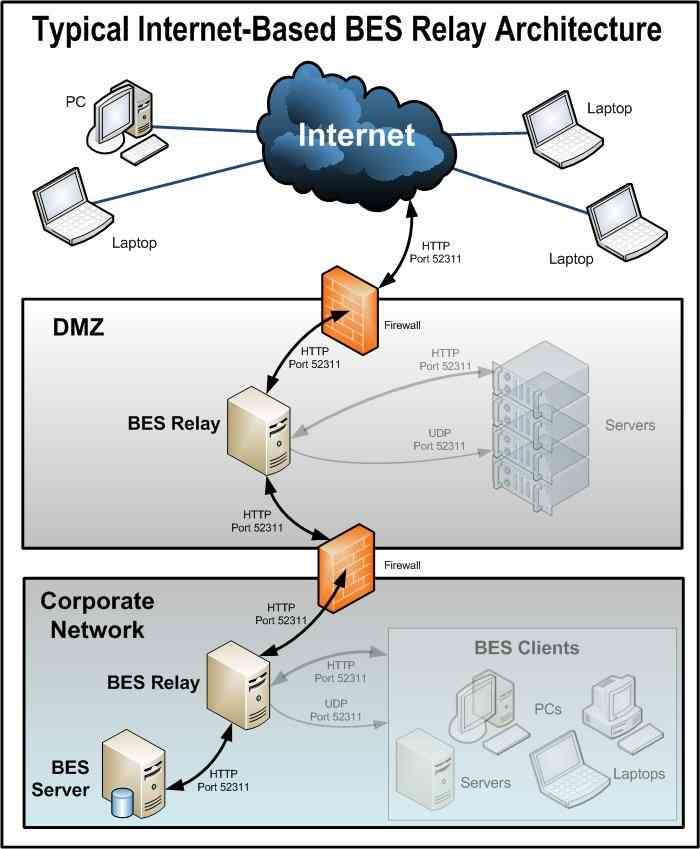
- Create a DNS alias for the name of your DMZ relay.
- Open port 52311 and ICMP traffic from your external firewall to your DMZ relay defined within your DMZ.
- Install BigFix Relay on the machine that lies in your DMZ.

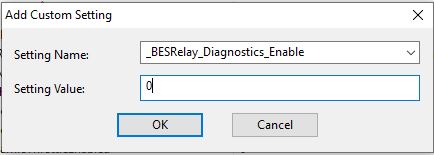
- Add client settings to the DMZ relay machine.

This disables the relay diagnostics page.
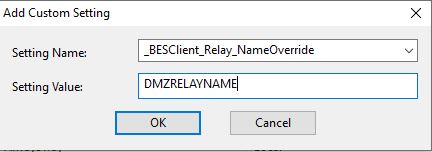
This setting allows you to enter a common name for the relay and not the actual PC name. It is the same name you set in the DNS alias earlier.
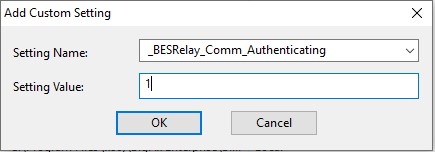
This only allows trusted agents to gather content or post reports. For details, see https://help.hcltechsw.com/bigfix/9.5/platform/Platform/Console/AuthenticatingRelays.html#Authenticatingrelays
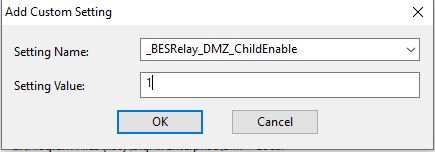
This step enables persistent connections on the DMZ relay since UDP is often unreliable in DMZ. Enable _BESRelay_DMZ_ParentEnable on the relay the DMZ relay communicates to.
For details, see https://help.hcltechsw.com/bigfix/9.5/platform/Platform/Config/c_persistenconn2.html
Another setting that adds an additional level of security, so only devices with this password can register is the following: _BESRelay_Comm_KeyExchangePassword
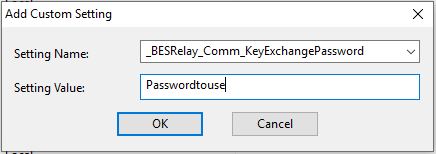
Note: The client must have the _BESClient_SecureRegistration client setting with the corresponding password in order to register. For details, see https://help.hcltechsw.com/bigfix/9.5/platform/Platform/Console/ManualKeyExchange.html#Manualkeyexchange
- Open the BESAdmin tool on your BigFix server.
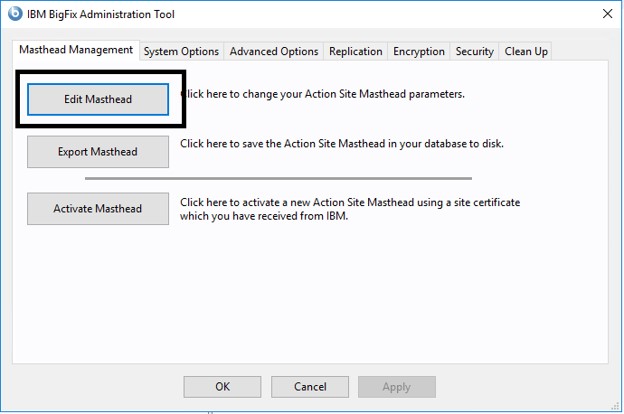
- Add your DMZ relay information to the Last fallback relay for all clients (replacing the root server) parameter. This updates the masthead and if they are unable to resolve the main BigFix server, they fallback to the DMZ relay for communication.
Note: Add the DNS name or the alias and nothing else for the fallback.
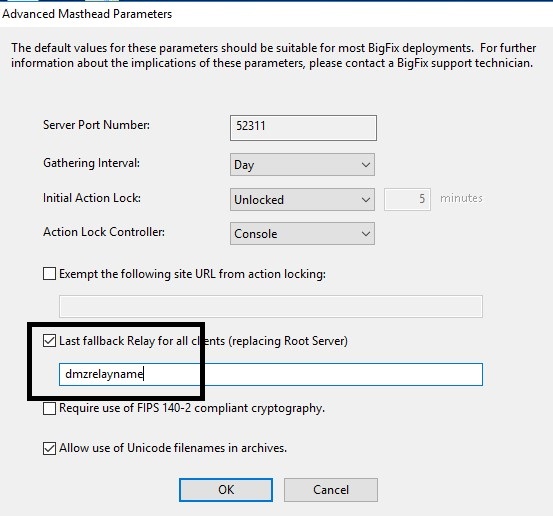
Note: This fallback relay needs to be resolved both internally and externally.
- Create an automatic group for clients connecting to the DMZ relay.
- Create a new automatic group with the relay property that contains your DMZRELAYNAME (replace with the friendly name you set earlier).
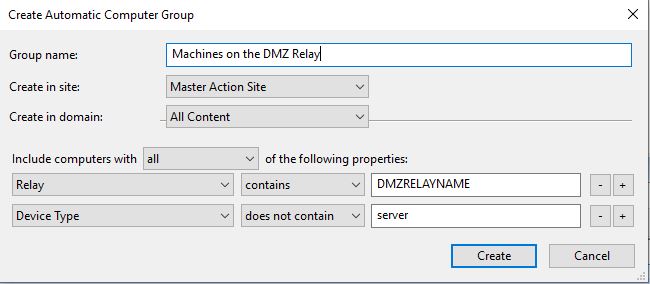
- Create a group for the clients on your internal network.
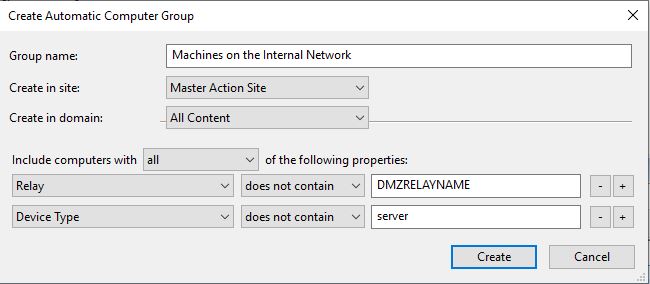
- Set up internal client settings that tell it to communicate with the DMZ relay when its off the network
Deploy the following settings to your clients on the DMZ:
- _BESClient_Comm_CommandPollIntervalSeconds
- _BESClient_Comm_CommandPollEnable
- _BESClient_RelaySelect_FailoverRelayList
Since UDP is often blocked through DMZ, the settings enable the BigFix agent to check in every 30 minutes through command polling. The failover list indiates to the client if it cannot resolve a relay. It then fails over to the relays on the list.
Following is an example of a client settings policy you can deploy to your machines on your DMZ: https://bigfix.me/fixlet/details/26677
- replace the relevance in expression 3 with your DMZRELAYNAME
- replace the relevance in expression 4 with your DMZRELAYNAME
- edit the action script along with the corresponding relevance statement in the action script with your DMZRELAYNAME.
This will be deployed to the group created earlier - “Machines on the DMZ relay”
- Set up a policy once they come back on the network. These settings change back for internal communications so that it polls every 12 hours and not 30 minutes.
- _BESClient_Comm_CommandPollIntervalSeconds
- _BESClient_Comm_CommandPollEnable
Following is a guide on how to create client settings policies: https://www.linkedin.com/pulse/bigfix-tune-control-your-client-fit-needs-brad-sexton/
- replace the relevance in expression 3 with your DMZRELAYNAME
- replace the relevance in expression 4 with your DMZRELAYNAME
- edit the action script along with the corresponding relevance statement in the action script with your DMZRELAYNAME
This will be deployed to your machines in the group created earlier - “Machines on the internal network”
These actions will change the settings for how the agent performs on the DMZ and then once the computers come back on the internal network switch back. This will help them perform efficient both internally and externally.
Once your relay is set up, you can then use your DMZ relay for your mergers and acquisitions. You could create a relay on a separate network and then have that relay communicate with your DMZ relay regardless of what domain your machines are in the network. For more information on how to set up and use your DMZ relay for mergers and acquisitions, refer to this post: https://www.linkedin.com/pulse/bigfix-use-mergers-acquisitions-brad-sexton/
~~~~~~~~~~~~~~~~~~~~~~~~~~~~~~~~~~~~~~~~~~~~~~~~~~~~~~~~~~~~~~~~~~~~~
Author
Brad Sexton is a BigFix technical advisor for the mid-Atlantic region. He was a BigFix administrator in a global enterprise for 7 years where he was using BigFix for OSD, Software Deployments, and patching. Brad joined the HCL BigFix team in 2018.
Review and editorial credits
Shivi Sivasubramanian is a senior-level technical author and editor with a demonstrated history of working in the technology industry. A firm believer in the magical power of words, she loves helping the community deliver expressive, minimalist, and user-friendly content. Shivi currently leads a team of information developers in BigFix.
Modificato il da Brad Sexton 64576A77-B31D-BF00-0025-86070027DBEC bsexton@hcltechsw.com
|
Many organizations use Bitlocker to encrypt the hard drives of computers. This is typically done through a group policy requiring drive encryption and backing up the key to the Active Directory object. However, often times group policy is not available for remote users or unreliable due to the involvement of a VPN connection. With BigFix however, you can use Bitlocker with a series of steps to help you manage these remote workers and ensure that they are compliant with their drive encryption. Bitlocker requires you to have your TPM chip enabled and activated. Using a series of properties created by Strawgate, you can find candidates that have these settings enabled in the BIOS and encrypt the drive from BigFix. Strawgate also creates a method to store the Bitlocker key as a BigFix Property and view that data within the Console.
- Go to Bigfix.me and download the TPM – Status: https://bigfix.me/analysis/details/2998637
- Activate the analysis
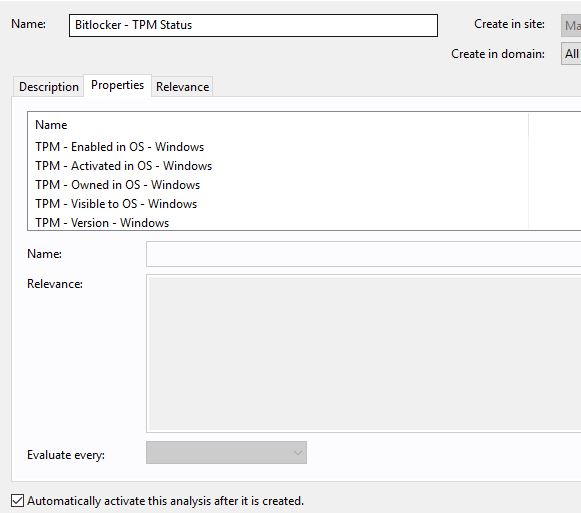
This activates the TPM Analysis that provides valuable information.

Strawgate has created great content for Bitlocker for Windows 10:
- Open the zip file it creates and open the analyses folder.
- Import the following into BigFix Console.
- Bitlocker - Audit - Windows.bes
- Bitlocker - Recovery Password - Windows.bes
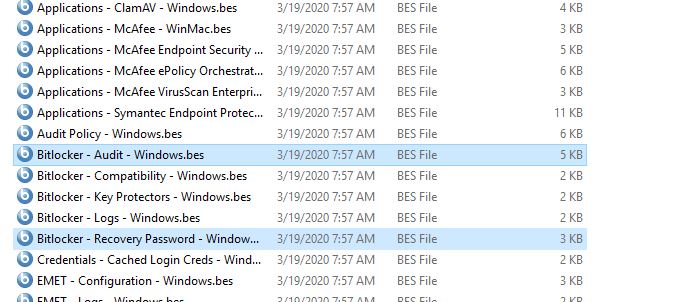
- Go to the Fixlets section and import the following Fixlets into BigFix Console.
- Invoke - Bitlocker Configuration Probe - Windows.bes
- Invoke - Bitlocker Encrypt Secondary Volume - Windows.bes
- Invoke - Bitlocker Encrypt System Volume - Windows.bes
- Invoke - Bitlocker Recovery Password Backup to Active Directory - Windows.bes
- Invoke - Bitlocker Recovery Password Probe - Windows.bes
- Invoke - Bitlocker Refresh System Drive Encryption - Windows.bes
- Invoke - Bitlocker Resume System Drive Encryption - Windows.bes
- Invoke - Bitlocker Suspend System Drive Encryption - Windows.bes
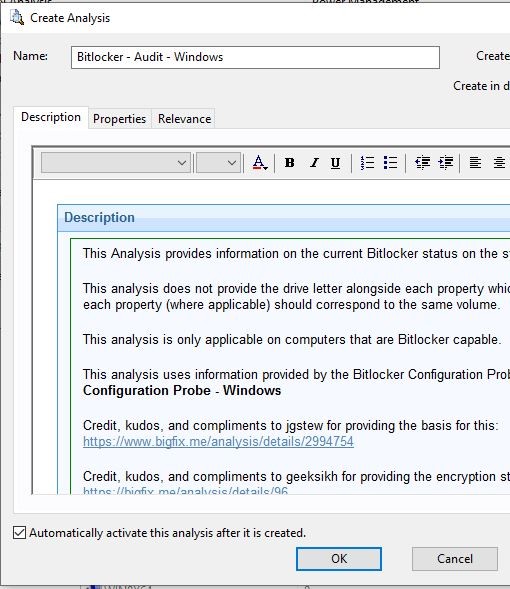
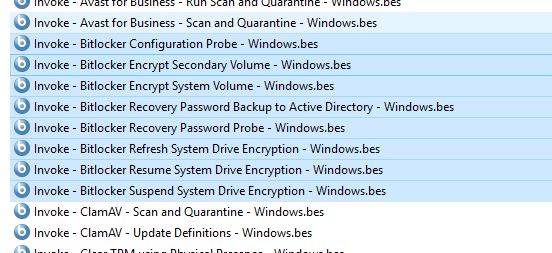
You now have the content you need for gathering information about what PC’s are ready for encryption. The machines that can be encrypted are the ones that have their TPM chip enabled and activated.
- Check the TPM – Status and then correlate that data with the machines that are still fully Decrypted.

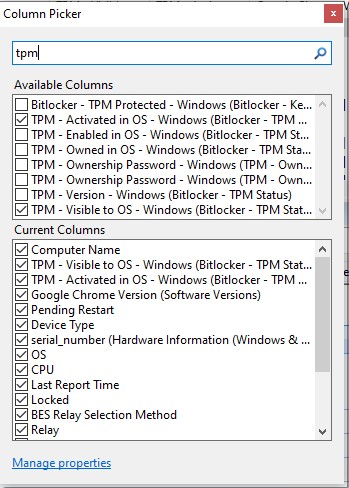
- In the Computers view in BigFix Console, add the properties:
- TPM – Activated in OS
- TPM – Visible to OS – Windows
- Bitlocker – Status - Windows
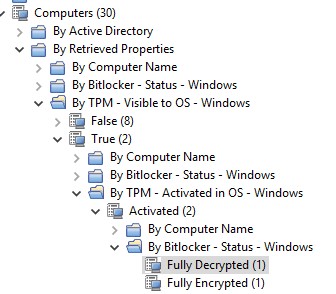
- Filter to display the PCs that are ready to be encrypted.
- TPM – Visible to OS – True
- TPM – Activated in OS – Activated
- Bitlocker – Status – Windows – Fully Decrypted
- Take action on the task Invoke – Bitlocker Encrypt System Volume – Windows on these PCs.
Note :Verify and test the action within your environment before deploying to multiple machines.
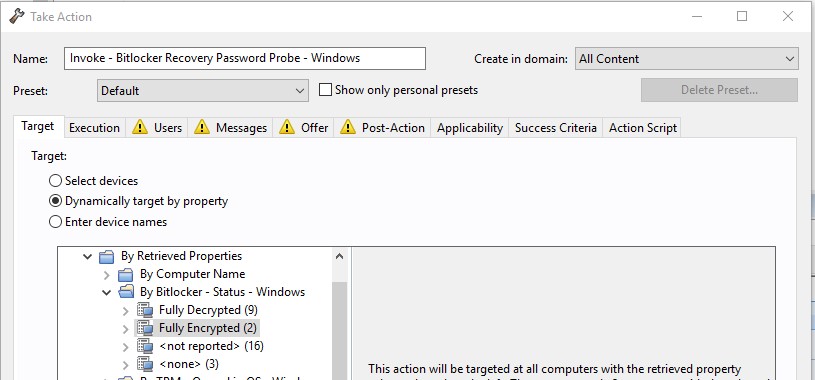
This encrypts the system drive of PCs.
- Ensure that the key is backed up by creating a policy action for the task Invoke – Bitlocker Recovery Password Probe – Windows.
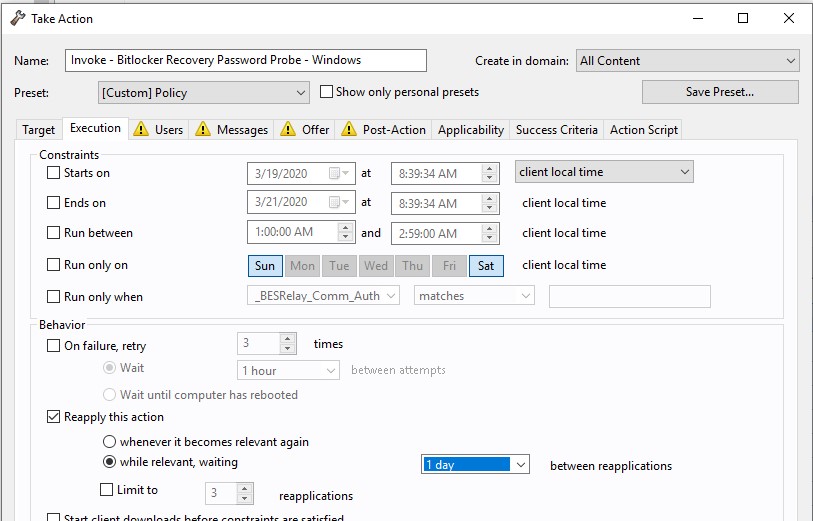
Once this probe runs, add your bitlocker key as a property in BigFix.

For machines that do not have TPM enabled or activated, enable each of these items by creating a package in BigFix. For instance Dell has a utility called Dell Command Configure that allows you to create packages to update the BIOS. Other manufactures have similar utilities. Following is a procedure that explains how to enable TPM chips and activate it on Dell machines.
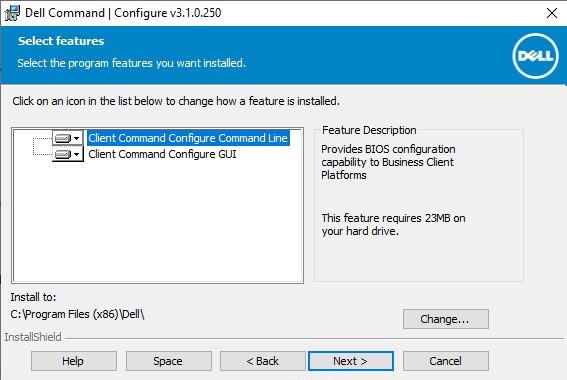
- Download and install the Dell Command Configure from http://downloads.dell.com/FOLDER03164404M/1
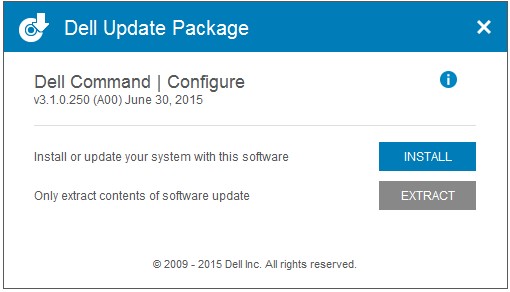
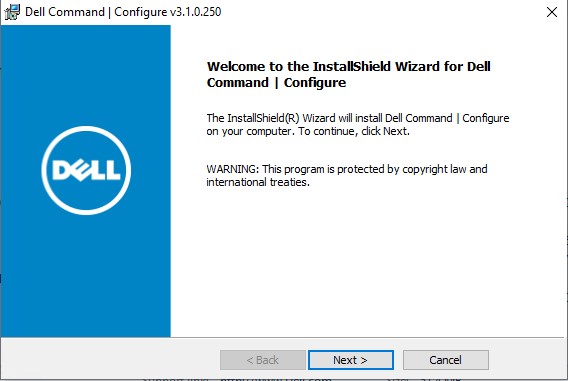
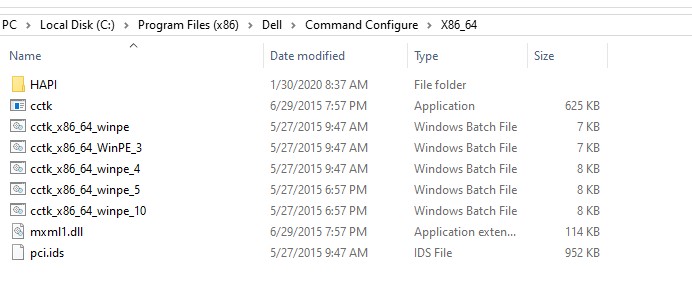
- Copy the files from C:\Program Files (x86)\Dell\Command Configure\X86_64 to a location from where you can upload them to BigFix
- In BigFix Console, go to the System Lifecycle domain.

- Click Software Distribution > Manage Software Distribution.

- Click New Package. Enter a name for the package.
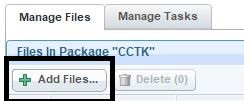
- Add files to the package.
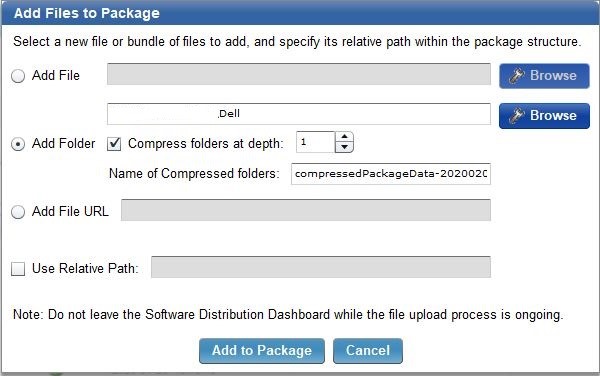
- Click Add to Package to add the folder you saved earlier with the Dell CCTK files.
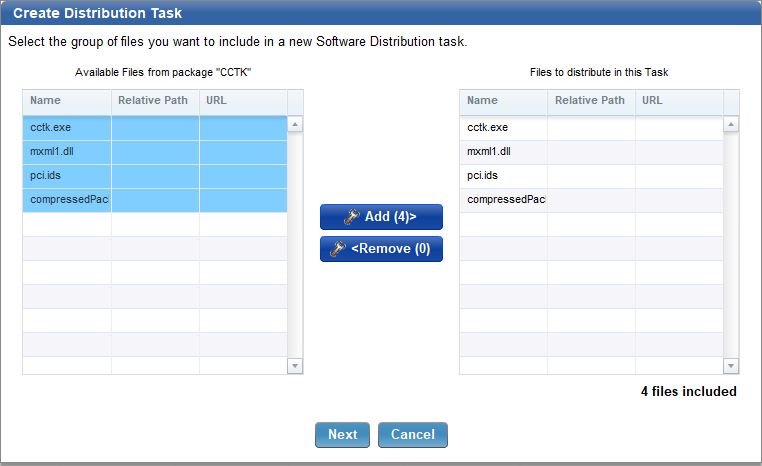
- Add the files.
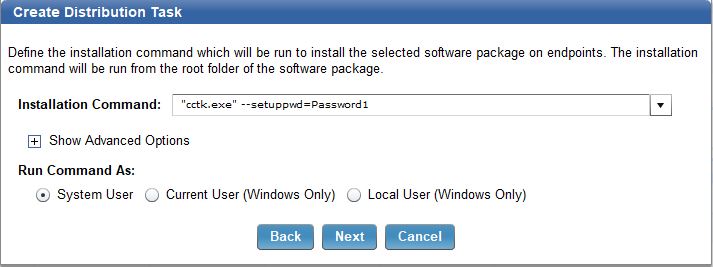
- Add the command "cctk.exe" --setuppwd=Password1 and click Next.
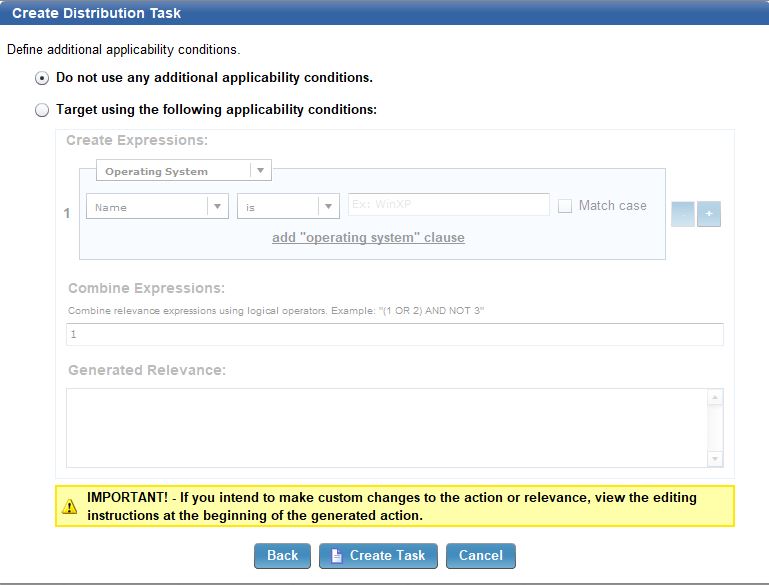
- Click Create Task
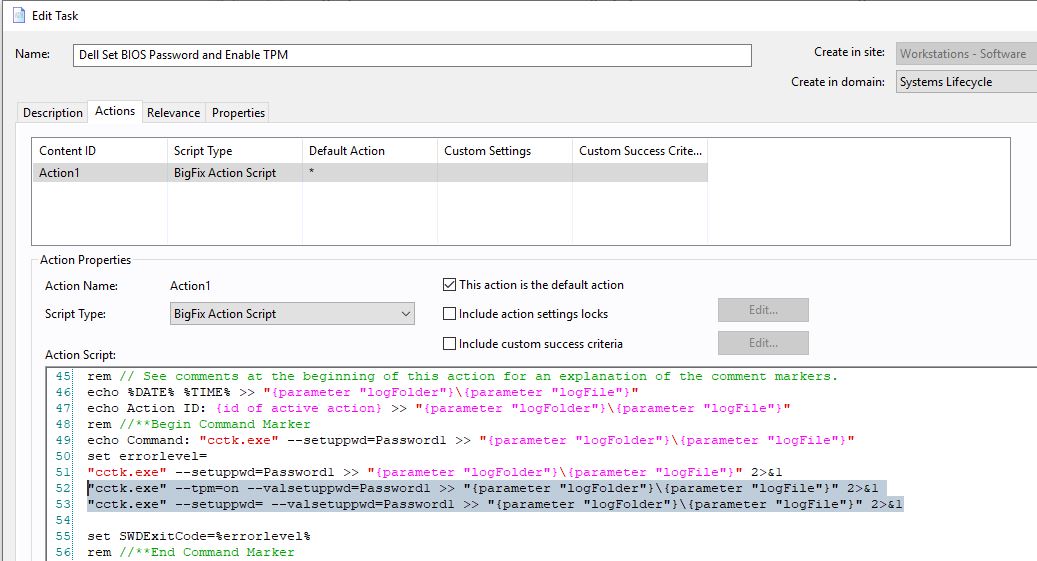
- Scroll down to line 51 and add two lines under the first command.
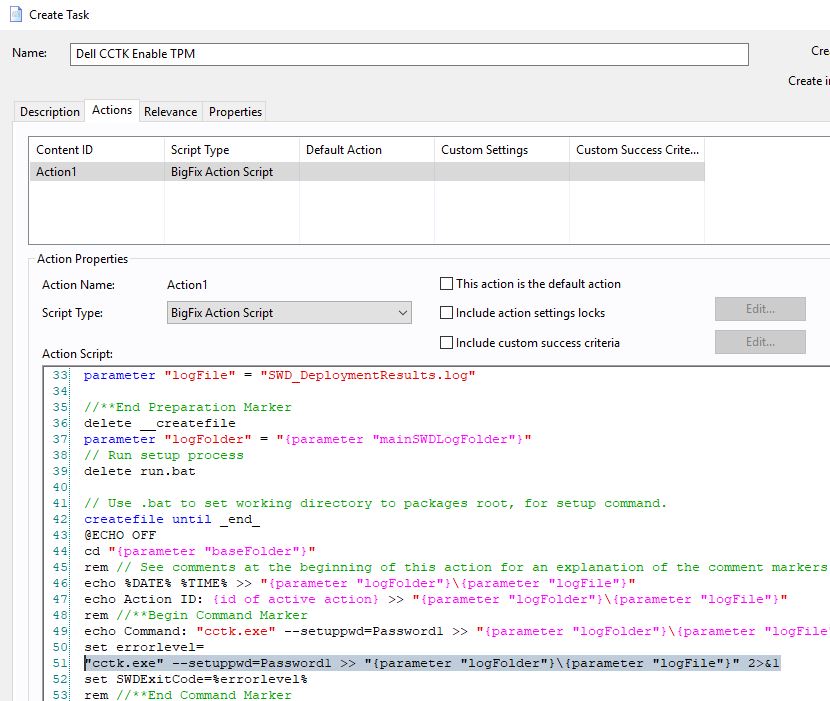
"cctk.exe" --tpm=on --valsetuppwd=Password1 >> "{parameter "logFolder"}\{parameter "logFile"}" 2>&1

"cctk.exe" --setuppwd= --valsetuppwd=Password1 >> "{parameter "logFolder"}\{parameter "logFile"}" 2>&1
The action script should look like this:
- Open the Relevance tab.

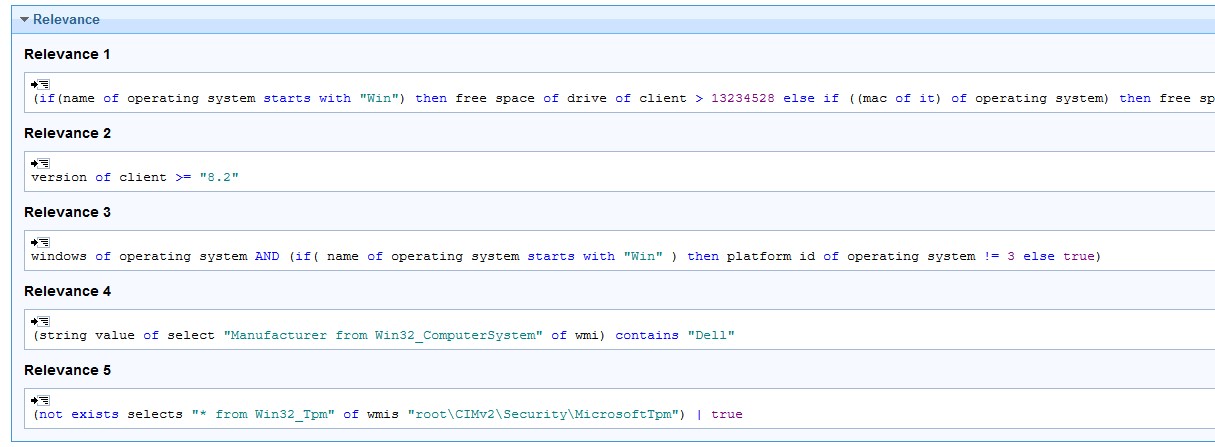
- Add the following statement to line 4:
(string value of select "Manufacturer from Win32_ComputerSystem" of wmi) contains "Dell"
- Add the following statement to line 5:
(not exists selects "* from Win32_Tpm" of wmis "root\CIMv2\Security\MicrosoftTpm") | true
- Save the task.
- Create a copy of the task - click Copy.

- Scroll down to the action script and edit the line 52.

- Replace the text on line 52 with the following text:
"cctk.exe" --tpmactivation=activate --valsetuppwd=Password1 >> "{parameter "logFolder"}\{parameter "logFile"}" 2>&1
Your action script should look like this:

- Open the Relevance tab.

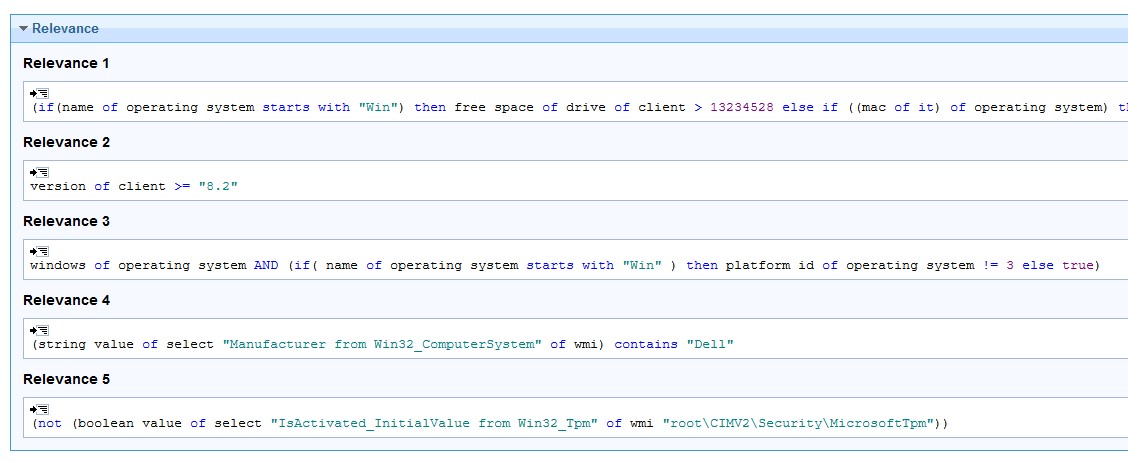
- Add the statement to line 4.
(string value of select "Manufacturer from Win32_ComputerSystem" of wmi) contains "Dell"
- Add the statement to line 5.
(not (boolean value of select "IsActivated_InitialValue from Win32_Tpm" of wmi "root\CIMV2\Security\MicrosoftTpm"))
- Enter a name for the task. For example, "Dell Activate TPM' and save the task.
The task should look like this:
- Create a baseline with the two newly created tasks and save it.
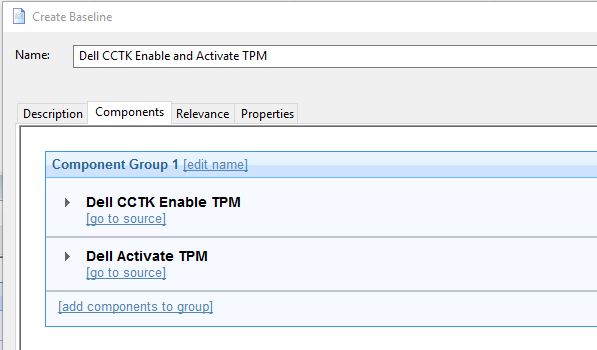
- Click set action settings for the baseline.
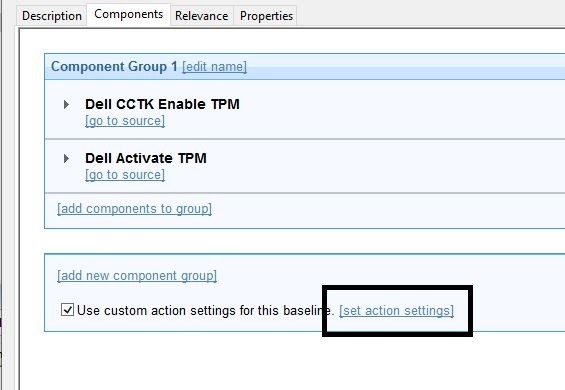
- Open the Execution tab and select the Reapply this action and whenever it becomes relevant again options.

- Open the Post Action tab and select the Restart the computer after the action completes option.
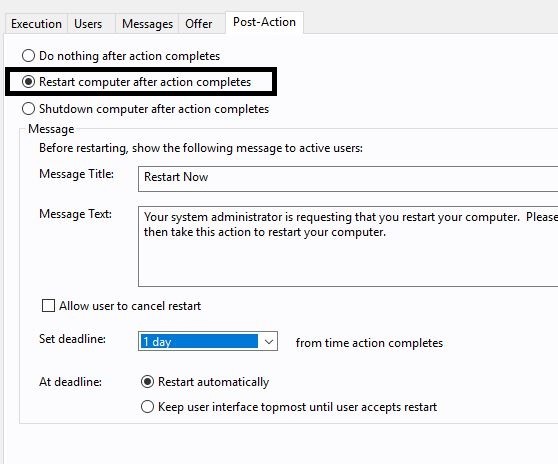
You can apply this action to any PC that does not have TPM Enabled or TPM Activated. This will enable TPM and if TPM does not activate, it will activate and prompt for a second reboot. You can now encrypt the drive with Bitlocker.
Note: Users may receive a prompt outside of BigFix that might ask them to restart their machine.
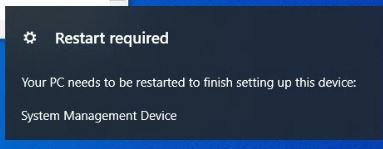
If by chance the TPM chip does not activate, it could be that the ownership needs to be cleared. Due to the TPM standards, this might require manual intervention.
~~~~~~~~~~~~~~~~~~~~~~~~~~~~~~~~~~~~~~~~~~~~~~~~~~~~~~~~~~~~~~~~~~~~~
Author
Brad Sexton is a BigFix technical advisor for the mid-Atlantic region. He was a BigFix administrator in a global enterprise for 7 years where he was using BigFix for OSD, Software Deployments, and patching. Brad joined the HCL BigFix team in 2018.
Review and editorial credits
Shivi Sivasubramanian is a senior-level technical author and editor with a demonstrated history of working in the technology industry. A firm believer in the magical power of words, she loves helping the community deliver expressive, minimalist, and user-friendly content. Shivi currently leads a team of information developers in BigFix.
Modificato il da Brad Sexton 64576A77-B31D-BF00-0025-86070027DBEC bsexton@hcltechsw.com
|
You can easily create software packages and deploy them with the BigFix Lifecycle module. At the same time, you can also determine if a package is installed based on a logic with the power of relevance. You can check if it is a registered app, a file, or a registry entry so as to determine if it is installed. BigFix determines if it is installed based on the relevance and either skips the install, upgrade, or install. The article demonstrates how software can be packaged in BigFix in a way there is no need for deploying an individual software task. It also explains how to create a dynamic package so BigFix can independently determine what to install on that particular machine. The article also explains how to create a property so you have that software version readily available on the BigFix Console so you can quickly see whether they exist on your machines and the version of the software.
In this example, I will create a package for Google Chrome - package a 32-bit version and a 64-bit version and then add them to one single package. This way, your IT Helpdesk does not need to determine if the machine is 64-bit or 32-bit and they need to only deploy one package and BigFix uses logic to pick what that machine actually needs. I also demonstrate how to add the built-in content in BigFix to disable Chrome from updating and then deploy the patch to bring Chrome up to the latest version. This way, you do not need to create a new package each time Chrome releases a new version - you only need to add the new patch to the package to update it.
- In BigFix Console, go to Systems Lifecycle.
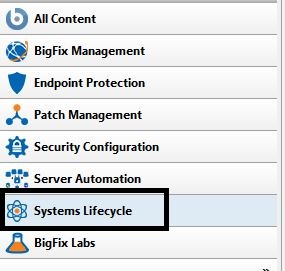
- Go to Software Distribution and click Manage Software Distribution.
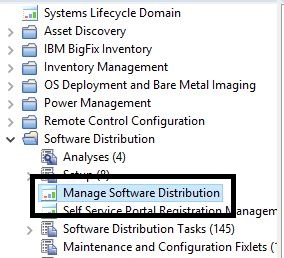
- Click New Package.

- Name the package and enter a version.

- Click Add Files.
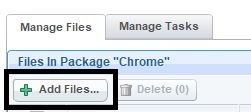
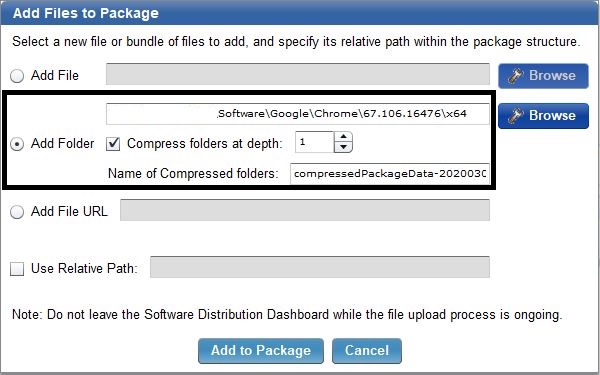
- Upload the installer(s) and click Add to Package.
- Open the Manage Tasks tab and click New Task.
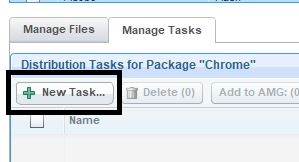
- Add the 64-bit installer for just this task and click Add.
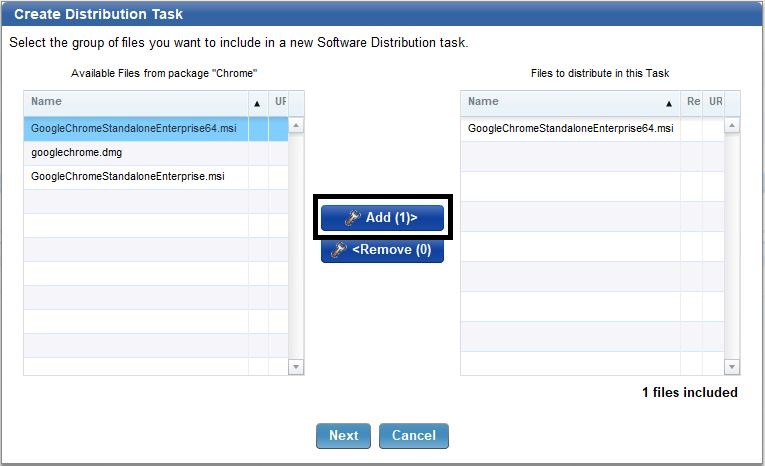
Since it is an MSI, it automatically detects the installation command.
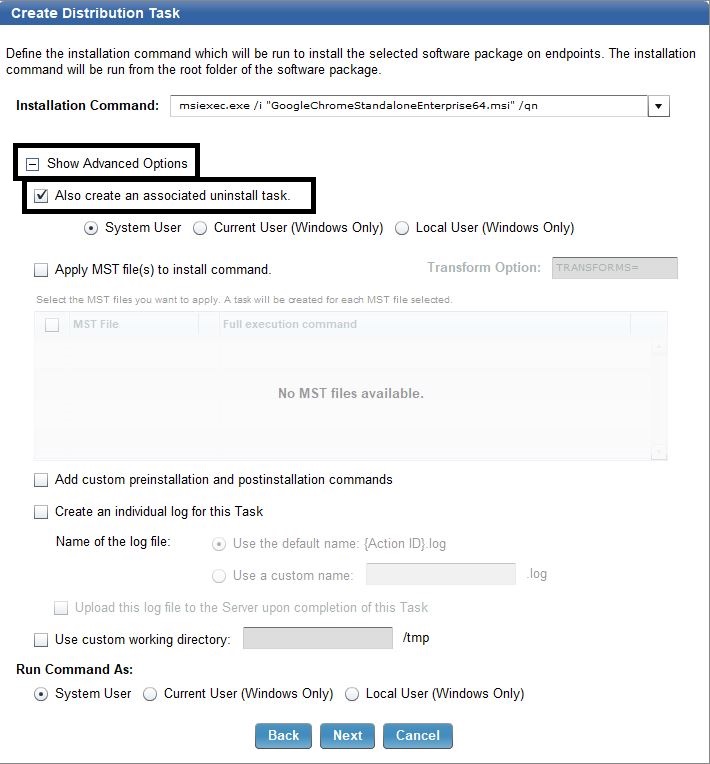
- Click Show Advanced Options. Check the Also create an associated uninstall task check box and click Next.
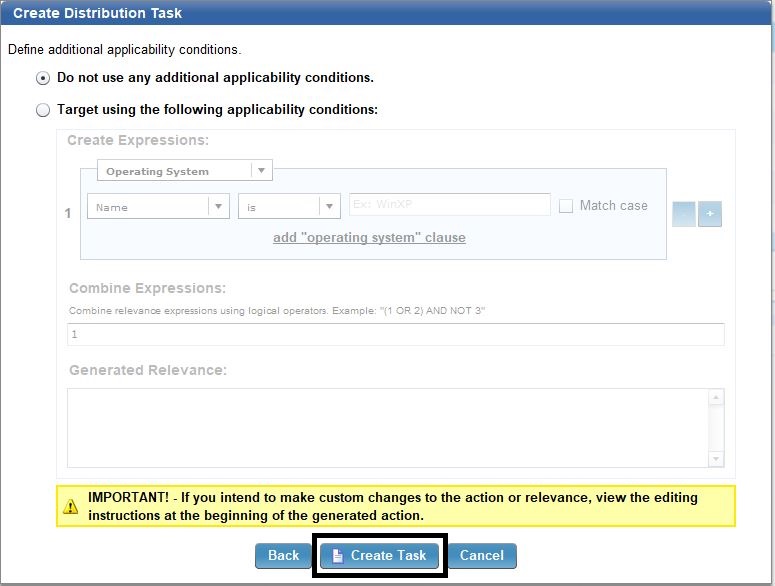
- Click Create Task.
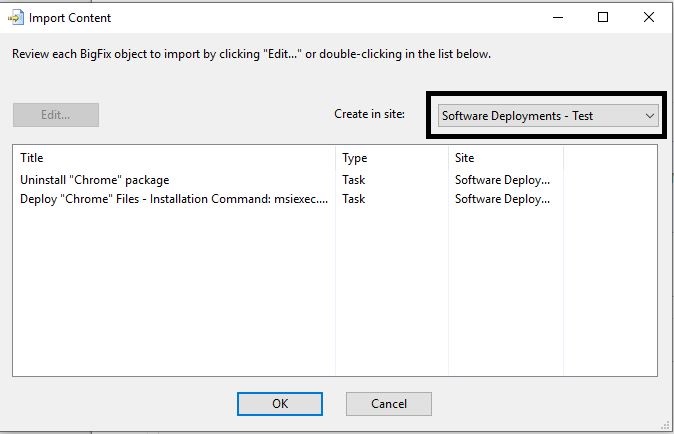
- Create two new tasks in your Software Deployment – Test site if you have one. I prefer organizing my software deployments in 3 sites:
- Software Deployments – Test (only my software packages have access to this site)
- Software Deployments – Licensed (for licensed software that might require an additional approval before they are deployed)
- Software Deployments – All (free software or enterprise licensed software that do not require an additional approval)
- Click the deploy task and then Edit.


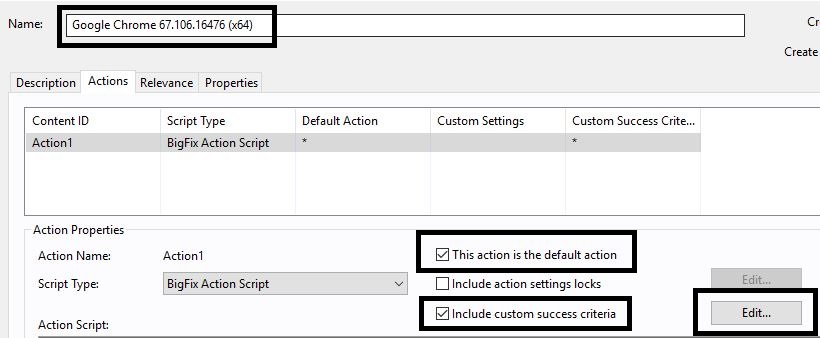
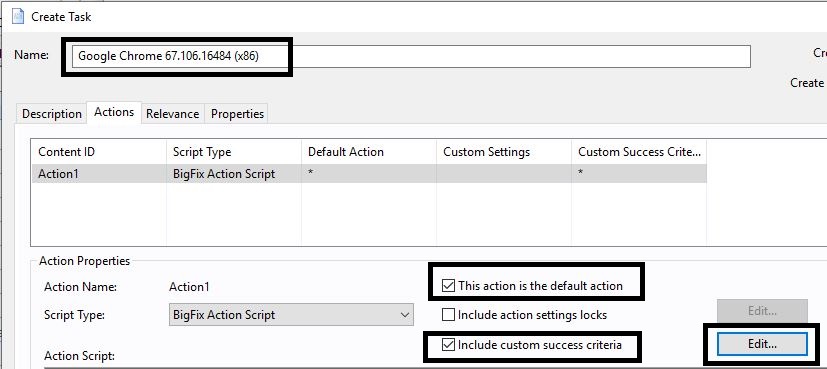
- Enter a name for the package (for example the one shown below to indicate that it is a 64-bit version).
- Select the This action is the default action check box and the Include Custom success criteria check box and click Edit.
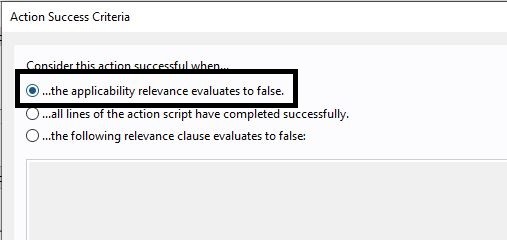
- Select the ..the applicability relevance evaluates to false option.
- Open the Relevance tab and remove the statement on Language. If you prefer, copy the following statement and replace yours:
(disjunction of (NOT exists keys "{194A2EAE-1F31-3815-85DB-5A76039A793E}" whose ( value "DisplayVersion" of it as string as version >= "67.106.16476" as version ) of keys "HKEY_LOCAL_MACHINE\SOFTWARE\Microsoft\Windows\CurrentVersion\Uninstall" of ( x32 registry; (if exists x64 registry then x64 registry else nothing) )))

If you break down the relevance, it is looking for the key and the display version.
- Edit the relevance to meet your needs. You can also evaluate by using the Fixlet debugger.
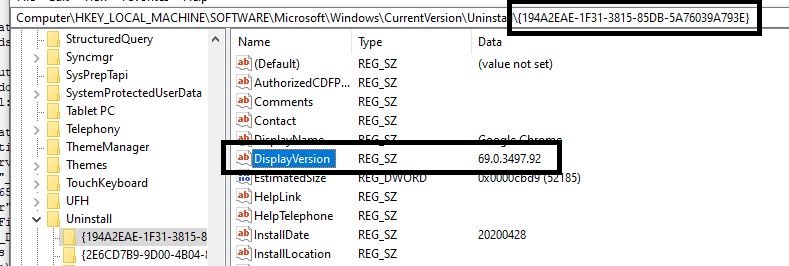
The relevance should return "false" because the task is meant to be relevant only to the machines that do not have this specific version installed.

Since this is a 64-bit install, ensure that this only installs on 64-bit machines. Add the relevance given below to section 3.
/* Checks to see if its a 64 bit computer */

x64 of operating system

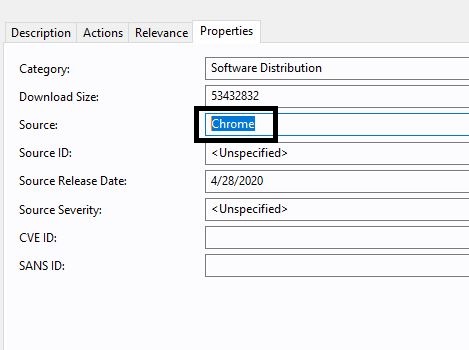
- Click the Properties tab and change the source to Google and press OK to complete the task.
- Repeat the steps to to create a 32-bit install task.

/* Checks to see if its a 32 bit computer */

not x64 of operating system

- Run the individual software deployment tasks on VMs to verify if they install correctly and report success.
- Check the 32-bit install on a 32 bit machine
- Check the 64-bit install on a 64 bit machine
- Copy each task to your software deployment sites.

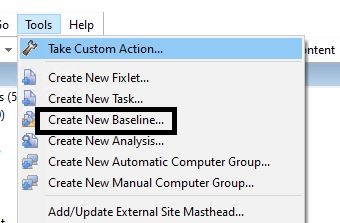
- In BigFix Console, go to Tools > Create Baseline.

- Enter a name for the baseline appropriately. Add it to the correct site.
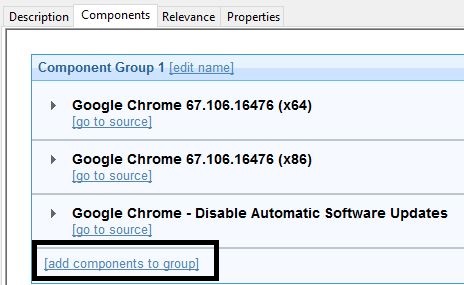
- Select add Components to group.
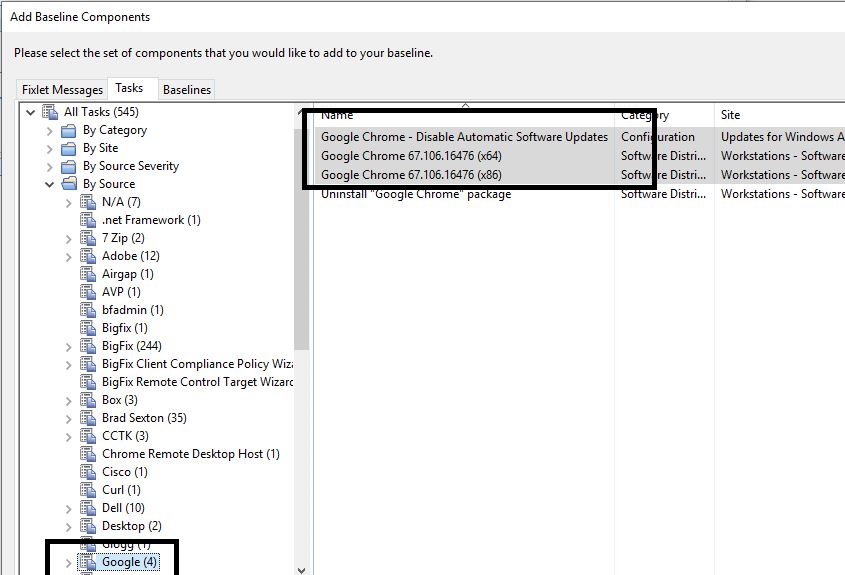
- Select the 2 tasks created earlier. Select the Disable Automatic software updates task too.
- Ensure that the "disable automatic software updates" is the last item in the baseline, and click add components to group.
- Find the Fixlet for the latest version of Chrome to deploy and add it to the baseline.
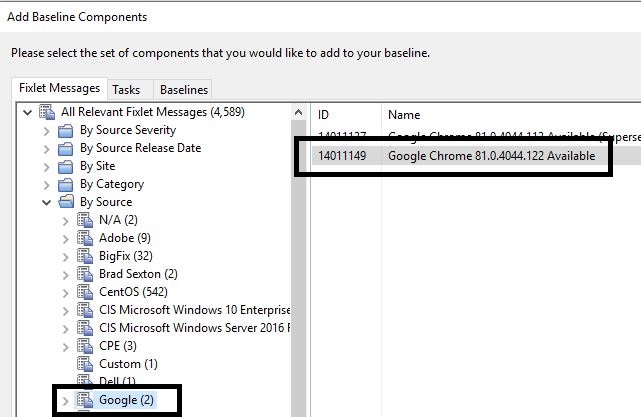
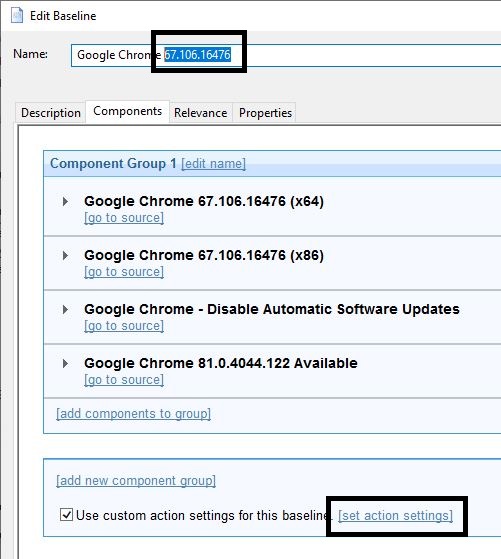
- Change the name of the package to the latest version and add custom action settings to the baseline so the package deploys the same way for each person deploying it.
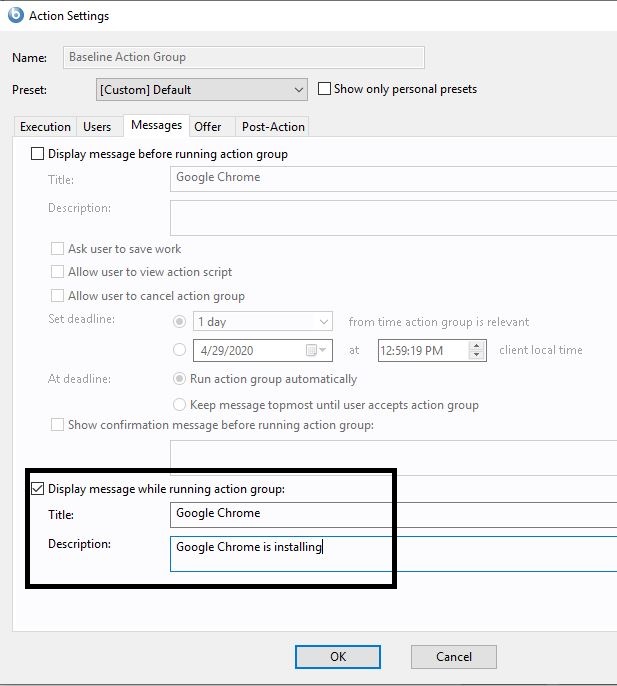
- Configure the package to display a message notifying the user that Google Chrome is installing. Select the set action settings.
- On the Message tab, select Display message while running action group check box and enter details as needed.
- Since the Fixlets and task are added to the same baseline, select Baseline will be relevant on applicable computers where this component is relevant check box for each task created:

When you take action on this Google Chrome package, it determines what needs to be installed based on the logic you set.
- If it is a 64-bit machine, it installs the 64-bit version
- If it is a 32-bit machine, it installs the 32-bit version
Chrome will no longer auto-update so you remain in control of when it should be updated. The package has the most up-to-date version so it installs the base package and then update to the latest version to deploy. You no longer have to package a new version of Chrome each month. Custom action settings have been configured too, so each time your Helpdesk deploys the software, it is the same branding and messaging by default. The software package is now complete.
For every package you create, you can also make that information available through a BigFix property. For example, when you deploy software, you might want to check how it is going and what versions you have.
- In BigFix Console, go to Tools > Create New Analysis.
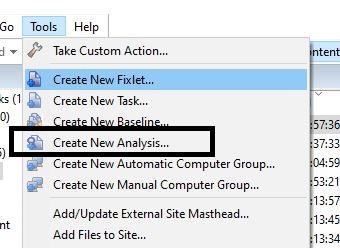
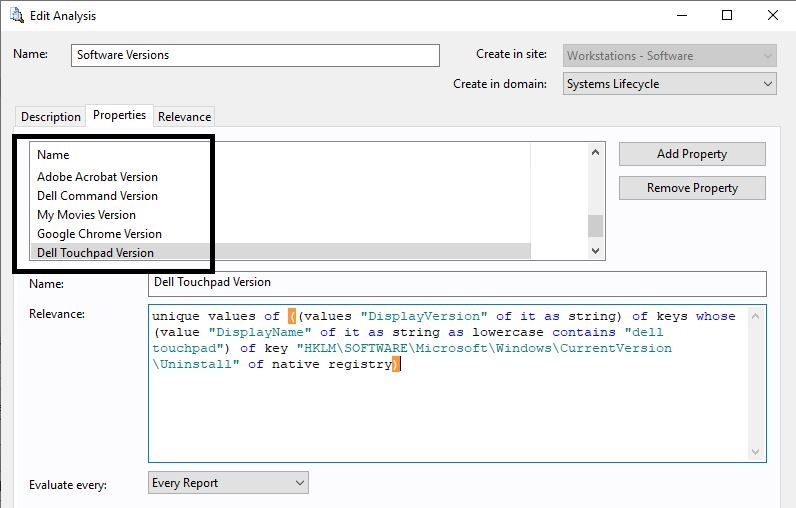
- Enter a name for the analysis - for example, "Software Versions". Create it in the site that your workstations can evaluate and report information.
- Click Add Property.

- Create a property called "Google Chrome Version".
Following is the relevance - you can copy it for the different software installed in your environment.
unique values of ((values "DisplayVersion" of it as string) of keys whose (value "DisplayName" of it as string as lowercase contains "google chrome") of key "HKLM\SOFTWARE\Microsoft\Windows\CurrentVersion\Uninstall" of native registry)
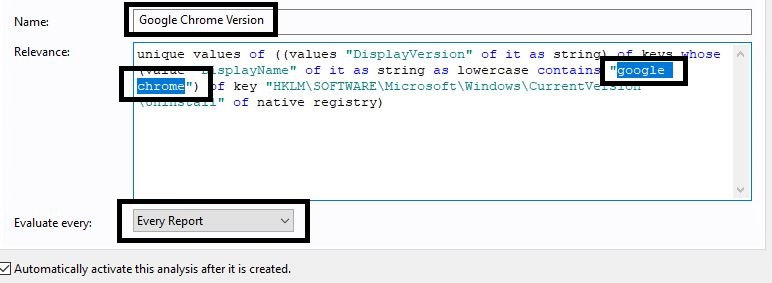
Note: The relevance looks for the version of the software called “google chrome”.
- Click OK to activate the analysis.
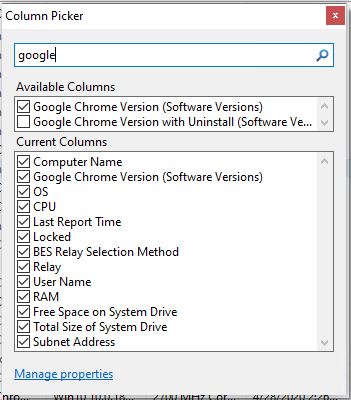
- In BigFix Console, in the Computers view, right-click the header and add the newly created property.
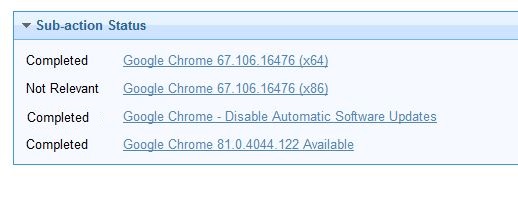
If you look at the action history of a Google Chrome deployment to a 64 bit machine, you will see the following:
- Google Chrome installed on the 64 bit machine
- Skipped the 32 bit machine
- Disabled Automatic Updates
- Updated Chrome to the latest version
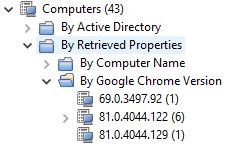
You will also see the version installed in the property you activated:

Target to the property and see the different versions of Google Chrome installed.
You can create a new property in this analysis for any software you deploy in my environment.
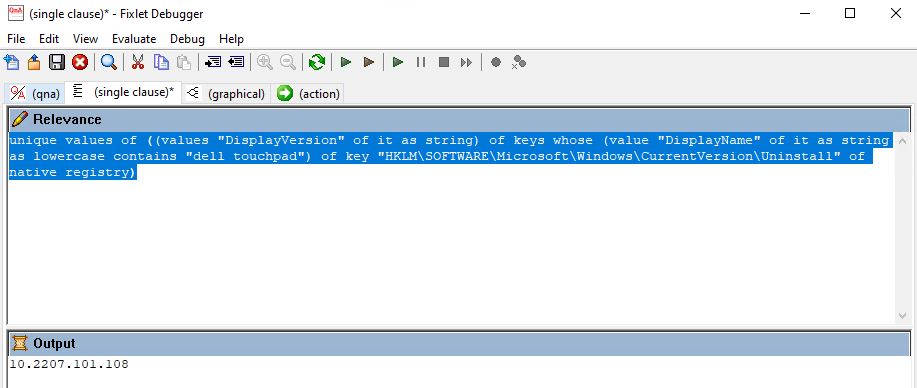
Test the relevance in Fixlet debugger to verify it fetches the data correctly.
~~~~~~~~~~~~~~~~~~~~~~~~~~~~~~~~~~~~~~~~~~~~~~~~~~~~~~~~~~~~~~~~~~~~~
Author
Brad Sexton is a BigFix technical advisor for the mid-Atlantic region. He was a BigFix administrator in a global enterprise for 7 years where he was using BigFix for OSD, Software Deployments, and patching. Brad joined the HCL BigFix team in 2018.
Review and editorial credits
Shivi Sivasubramanian is a senior-level technical author and editor with a demonstrated history of working in the technology industry. A firm believer in the magical power of words, she loves helping the community deliver expressive, minimalist, and user-friendly content. Shivi currently leads a team of information developers in BigFix.
Modificato il da Brad Sexton 64576A77-B31D-BF00-0025-86070027DBEC bsexton@hcltechsw.com
|
BigFix OSD and Bare Metal Imaging is a tool that combines the power of BigFix with utilizing MDT. The tool offers the best of both worlds where you do not need to build a complex yet separate infrastructure for imaging but utilize your current BigFix infrastructure. BigFix has simplified the process for you and removed the complex steps needed to set up a separate MDT environment.
Outlined below is the basic procedure of setting up OSD and Bare Metal Imaging. There are many more advanced configurations you can do with BigFix OSD. Once these steps are complete, you can set up Bare Metal Imaging and reimage existing machines in your environment. With BigFix, you can maintain a driver library to create hardware-independent images, capture images, perform in-place upgrades for Windows 7 to Windows 10 or in-place upgrades for the different builds of Windows 10, deploy custom images, and re-image machines over the internet where it captures the user's profile and restore the user's profile during the process.
With BigFix, I created a single image for a global organization that would name the machine depending on the location, set the correct time zone, join the machine to the domain and correct OU depending on the location, set the correct keyboard, load specific software depending on the location, install language packs and patch the machine 100%, all in the same process. Feel free to reach out, if you have any questions and I'd be glad to help.
- Open the BigFix Console and go to the BigFix Management site.

- Under the Lifecycle domain, enable OS Deployment and Bare Metal Imaging.

- After the site is enabled, click OS Deployment and Bare Metal Imaging. Wait for the site to gather (You will notice the site gathering in the right hand corner of your console). Once the gather is complete, click the Computer Subscriptions tab and subscribe all computers to the site.


- Change it from No Computers to All Computers and click Save Changes.

- Go to the system lifecycle domain. Select OS Deployment and Bare Metal and select the Health Checks dashboard.


- Activate the 5 Analyses: SSL Encryption Analysis for OS Deployment, Hardware Information, OS Deployment Server Information, Reimage Failure Information, and Bare Metal Target Information

- Update the server Whitelist for OS Deployment by running the Update Server Whitelist for OS Deployment Fixlet.


- Update your relay cache size.

- Run the Relay setting _BESGather_Download_CacheLimitMB_Too_Conservative Fixlet.

- Select the action to make it 25 GB.
- Select the servers you plan on using as an OSD relay.

This next step is to create an MDT Bundle. The MDT Bundle is basically the Windows PE environment. This will be where machines will boot into to capture and deploy images. My recommendation would be to just use a virtual machine that has the base Windows build you want to deploy. You will only need to create new bundles when you want to change versions of Windows or builds of Windows. Once the bundle is uploaded, you can power off the machine or VM until you are ready to upgrade to a new version of Windows.
- In the system Lifecycle Domain, go to OS Deployment and Bare Metal Imaging > Setup > Bundle and Media Manager dashboard.

- Activate the Bundle and Media Manager Analysis if it isn’t already active.

- Select the MDT Bundle and Creators and Windows Media tab.

- Click Install MDT Bundle Creator.
- Select the version you want to install and click Next.

- Select I have read and agree to the license statements and click Submit.

- Select the machine to which you want to deploy the Bundle Creator.

Now that you have a PC with the Bundle Creator and Windows ADK, you can generate a bundle.
- Create a folder on the machine you deployed the MDT Bundle Creator to C:\OSDISO and copy a Windows 10 ISO to that folder.

- In system Lifecycle, go to OS Deployment and Bare Metal Imaging > Setup > Bundle and Media Manager

- On the MDT Bundle and Creators and Windows Media tab, select the machine to which you deployed the Bundle Creator.

- Click Create MDT Bundle.

- Select Create both MDT Bundle and OS Resources. Select the Include all ISO images from this path check box.

- Click Submit to start the action.
Once the action completes, upload your newly created bundle.

Note: If required, install the BigFix Console on the bundle machine and upload the bundle from there.
- Go back to Bundle and Media Manager Dashboard.
- Open the MDT Bundle Creators and Windows Media tab and click the upload button.

- Click Upload.

- Enter a name for the MDT Bundle and click Finish.


Once your MDT Bundle is uploaded you can now import and ISO or capture and upload a wim file.
- Go to OS Deployment and Bare Metal and Imaging > Manage Images and Drivers > Image Library.

- Click Import Image.

- Select the image file you want to import and click Analyze.
Note: It is recommended to use an ISO file downloaded from the Microsoft Enterprise site. You cannot upload an ISO file that was created by using Microsoft Media Creator.


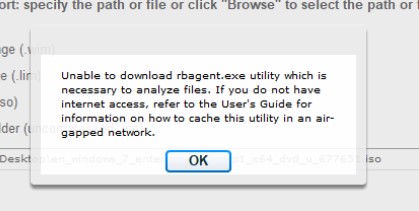
Note: If you receive the error message below, you might need to precache the OSD utilities to your Windows user profile that you used to launch the console. For help with downloading the files manually, see Setting up OS Deployment in an air-gapped network.
- Once the image is uploaded, you can create an image profile. Click Create Bare Metal Profile.

- Enter values for the Bare Metal profile parameters and click OK.
Note: Setting a password for your image deployments is recommended. This helps prevent users from inadvertently booting to network and mistakenly selecting an image job, and also from imaging a machine by mistake.

This next step is to create Bare Metal Relays. You can use your existing relay infrastructure and add an extra layer to the relays with which you want to image. Once you promote a relay to an OSD relay, that subnet will listen for PXE request. You can also edit your DHCP settings to allow multiple subnets to PXE boot to that relay as well. And then, promote one of the Relays to a Bare Metal Server.
- Click OS Deployment and Bare Metal Imaging > Manage Bare Metal > Server Management.

- Click install.


- Enter a username and password for your OSD relay. This is a local password and is independent and a local password.
Note: Save the password. It will be needed in case you need to troubleshoot a failed image job. This account and password is independent from other password you set, so be sure to note this down too.


- Deploy your Bare Metal Profile to the newly created OSD relay. Go to OSD Deployment and Bare Metal Imaging > Manage Images and Drivers > Image Library.

- Select the image profile and click Send to Server. Select the relays on which you want the image profile stored.

- Once the image is distributed to the relay, image a machine on that OSD subnet through boot to network.


~~~~~~~~~~~~~~~~~~~~~~~~~~~~~~~~~~~~~~~~~~~~~~~~~~~~~~~~~~~~~~~~~~~~~
Author
Brad Sexton
Brad Sexton is a BigFix technical advisor for the mid-Atlantic region. He was a BigFix administrator in a global enterprise for 7 years where he was using BigFix for OSD, Software Deployments and patching. Brad joined the HCL BigFix team in 2018.
Review and editorial credits
Shivi Sivasubramanian is a senior-level technical author and editor with a demonstrated history of working in the technology industry. A firm believer in the magical power of words, she loves helping the community deliver expressive, minimalist, and user-friendly content. Shivi currently leads a team of information developers in BigFix.
Modificato il da Brad Sexton 64576A77-B31D-BF00-0025-86070027DBEC bsexton@hcltechsw.com
|
With BigFix, you can easily gather information about your environment such as the amount of RAM in use, software installed, disk space, whether the machine has a pending restart, registry settings, even to a specific line in a text file. You can also have BigFix alert you or generate a Helpdesk ticket if any of that information changes. For example, with WebReports, you can be notified if and when your Relay runs out of disk space. The same is possible if a service stops on a particular machine, a server is running low on disk space, a machine is rebooted, and so on. This article will tell you how to accomplish this.
Create a Fixlet to check for the data you want to be notified of. In this exercise, a built-in Fixlet called “WARNING: BES Relay is Low on Free Disk Space" is used.
- Log in to WebReports and click Explore Data.

- Click Content.

- Add to a filter by selecting the + symbol.

- Click the drop-down and select Content.
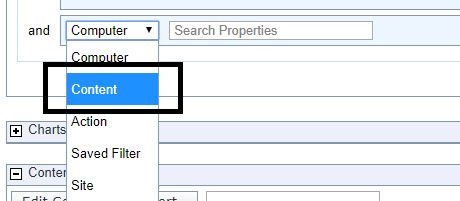
- Select Name from the Property drop-down.
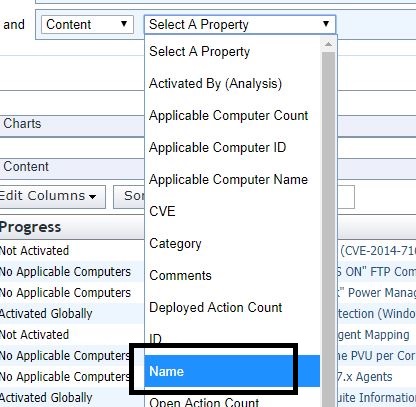
- Enter "warning: bes relay is low" in contains.

- Click Apply Filter.

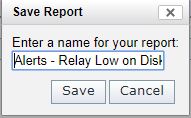
- Click Save Report.

- Enter a name for the report. For example, "Alerts – Relay Low on Disk Space".
- Click Report List.

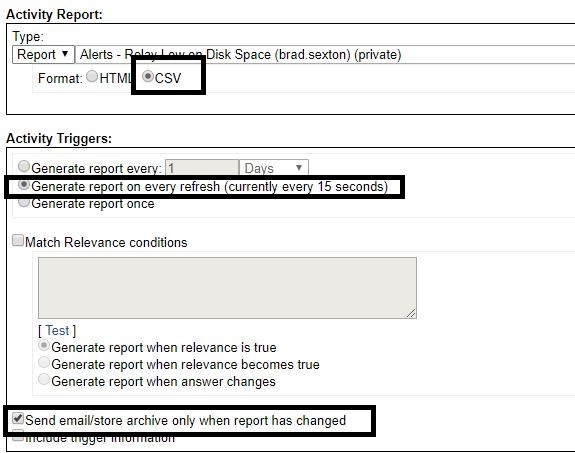
- Find the newly created report and select the Scheduled option that is set to "no".

- Select CSV and Generate reports on every refresh. Also select Send/email store archive only when report has changed.
- Add your email (If you want to generate a Helpdesk ticket with an alert). Enter a title for the report.
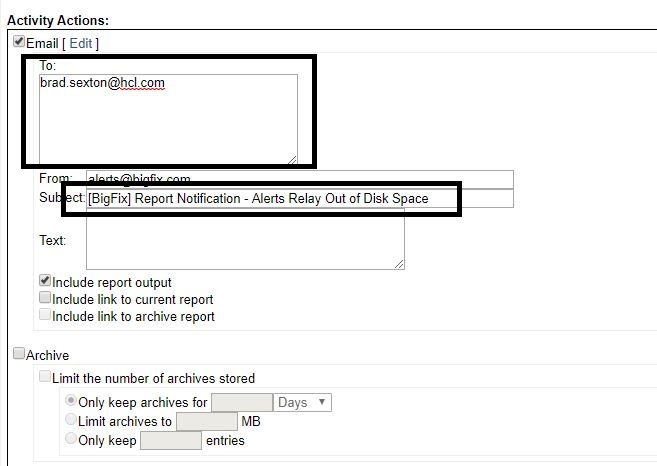
Every time one of your Relays runs out of disk space, you will get an email alert. Following are other possibilities you can set up for alerts for that can be very useful:
- When the clients that have a large evaluation loop from a property from this analysis Evaluation Loop Average - https://bigfix.me/analysis/details/2994765
- Built-in Free Space on System Drive property to alert you when clients run out of disk space
- Custom Fixlets for the status of a windows service using the relevance statement "not exists running service "servicename"
- Machines powered on for too long without a restart using the "Uptime - Windows" property
~~~~~~~~~~~~~~~~~~~~~~~~~~~~~~~~~~~~~~~~~~~~~~~~~~~~~~~~~~~~~~~~~~~~~
Author
Brad Sexton is a BigFix technical advisor for the mid-Atlantic region. He was a BigFix administrator in a global enterprise for 7 years where he was using BigFix for OSD, Software Deployments, and patching. Brad joined the HCL BigFix team in 2018.
Review and editorial credits
Shivi Sivasubramanian is a senior-level technical author and editor with a demonstrated history of working in the technology industry. A firm believer in the magical power of words, she loves helping the community deliver expressive, minimalist, and user-friendly content. Shivi currently leads a team of information developers in BigFix.
Modificato il da Brad Sexton 64576A77-B31D-BF00-0025-86070027DBEC bsexton@hcltechsw.com
|
With BigFix Asset Discovery, you can find devices on your network that are powered on, identify the OS, and install the agent to manage them with BigFix. For details, see https://help.hcltechsw.com/bigfix/9.5/platform/Platform/Asset_Discovery/c_using_asset_discovery.html. You can also clean up stale computers by running the BES Computer remover tool. The removal can be scheduled to run nightly for computers that have not checked in, in a specific duration. For details on the tool, https://help.hcltechsw.com/bigfix/9.5/platform/Platform/Installation/c_clean_up_computer.html
Unfortunately, Active Directory does not support automatic ways of removing old objects. The article explains how you can use BigFix to clean up stale objects in Active Directory. You can also learn how to find computers that are in your Active Directory and not in BigFix. If you have an active machine in BigFix but it has not reported to Active Directory, it could be a machine that is not trustworthy or the user is not connected to the VPN. This procedure also helps you identify what objects are in BigFix but have not joined your domain.
You might want to purchase an Excel add-on that comes in handy when comparing two spreadsheets that is needed for this exercise: Ablebits Ultimate Suite.
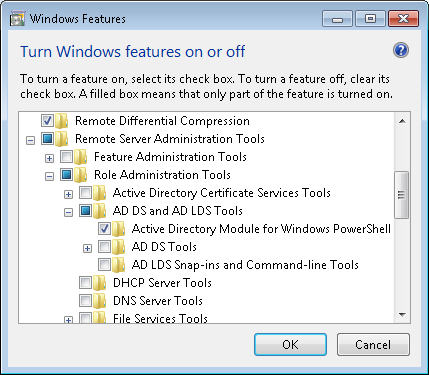
- If you are on Windows 10 1809 build or below, install the RSAT tools. Enable the Active Directory module:
- For Windows 10 1809 and above, run the command in Powershell to import the Active Directory module.
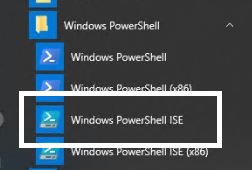
- Run the command from the elevated PowerShell window:
Add-WindowsCapability -Online -Name Rsat.ActiveDirectory.DS-LDS.Tools~~~~0.0.1.0

- Reboot the machine and open PowerShell again.
- Run the following command: get-adcomputer –filter * | format-list name | out-file c:\tools\computers.txt

This command creates a text file of a list of all computers in your Active Directory.
- Open the text file in MS Excel. The following dialog appears:
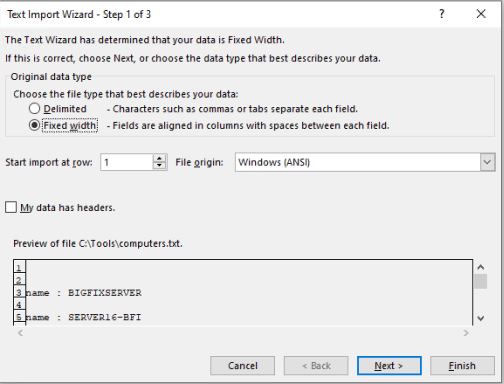
- Click Finish.
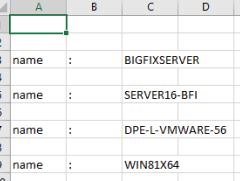
- Delete Columns A and B and sort column C and save the file and exit Excel
You should just see a list of all the computers.

- Copy the script to the powershell window:
# Sets the 'ErrorActionPreference' to continue if an error is encountered.

$ErrorActionPreference = "SilentlyContinue"

# Defines the output file as being an Excel spreadsheet.

$file = New-Object -comobject Excel.Application

$file.visible = $True

# Sets the workbook properties of the spreadsheet.

$workbook = $file.Workbooks.Add()

$cell = $workbook.Worksheets.Item(1)

# Defines the cell labels to be used.

$cell.Cells.Item(1,1) = "Host Name"

$cell.Cells.Item(1,2) = "IP v4 Address"

$cell.Cells.Item(1,3) = "Operating System"

$cell.Cells.Item(1,4) = "Organizational Unit (OU)"

$cell.Cells.Item(1,5) = "Enabled"

$cell.Cells.Item(1,6) = "Last Logon Time Stamp"

$cell.Cells.Item(1,7) = "Notes"

# Defines the range configuration.

$range = $cell.UsedRange

$range.Interior.ColorIndex = 19

$range.Font.ColorIndex = 11

$range.Font.Bold = $True

# Starts the processing at Row 2 of the defined workbook.

$intRow = 2

# Sets the input path for computer accounts to be queries (This MUST be

# pre-populated via a Get-ADComputer or Get-QADComputer query and manually piped

# into the input file.

$input = Get-Content "<PATH to computers.txt file>

# Begins the query, which will populate the spreadsheet as it parses through the

# predefined "$input" file.

ForEach ($comp in $input) {

   $sys = Get-ADComputer $comp -Properties *

       $cell.Cells.Item($intRow,1) = $($sys.Name)

       $cell.Cells.Item($intRow,2) = $($sys.IPv4Address)

       $cell.Cells.Item($intRow,3) = $($sys.OperatingSystem)

       $cell.Cells.Item($intRow,4) = $($sys.CanonicalName)

       $cell.Cells.Item($intRow,5) = $($sys.Enabled)

       $cell.Cells.Item($intRow,6) = $($sys.LastLogonDate)

            $intRow = $intRow + 1

# Upon completion, the columns will resize via an auto-fit for the data in each

#column within the workbook.

$range.EntireColumn.AutoFit()
- Update line 33 of the path of the computers.txt file created earlier:
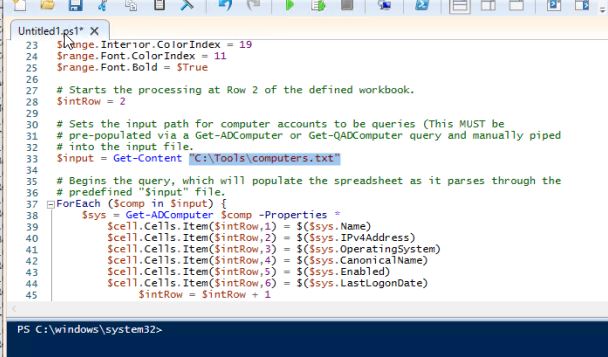
- Run the script by pressing the play button.

This launches Excel and starts creating a file with information of all of your PCs, such as IP address, OS, OU, If they are enabled, and the last time they checked in the domain, and so on.

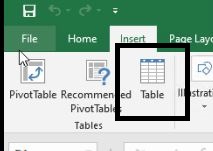
Once the script completes, select the top line and insert a table:
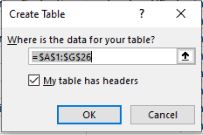
- Select My table has headers and click OK.
- Save the file and Close Excel.
- Log in to WebReports and extract the list of computers in to BigFix.
- Select Explore Data
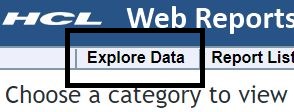
- Add any properties for your report and export to CSV.
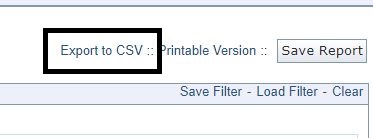
- Open the file and select the top row and insert a table.


- Save the file as an excel workbook and close Excel.

- Open the AD Computers file saved earlier.
- Click the Ablebits data tab in Excel.

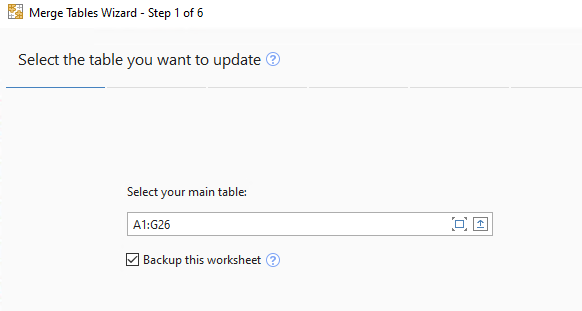
- Click Merge two Tables.

- Select the AD computers worksheet for the first table:
- Select the BigFix table worksheet for merging:
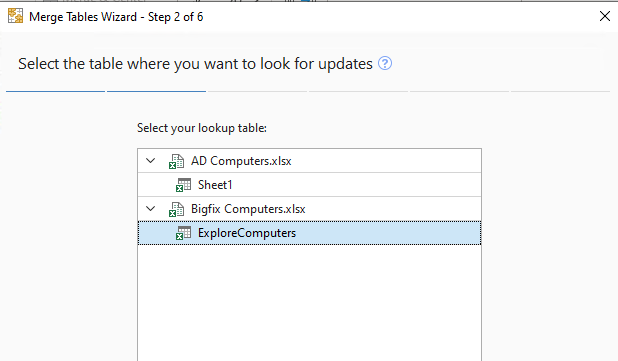
- Select Host Name as the lookup table to merge with the Computer Name column.
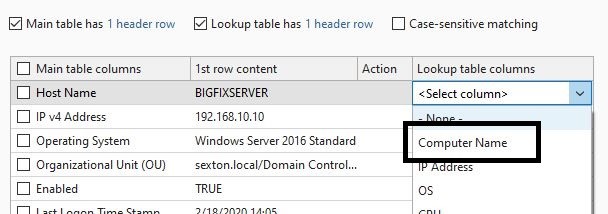
- Click Next when you are prompted to choose the tables you want to update:
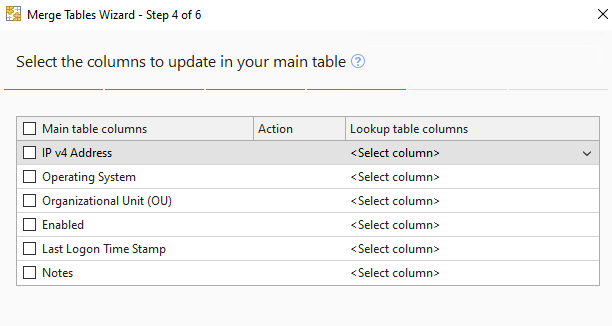
- Select the properties you would like to add to the report:
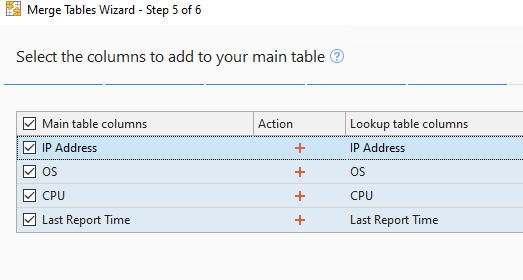
- Click Finish.
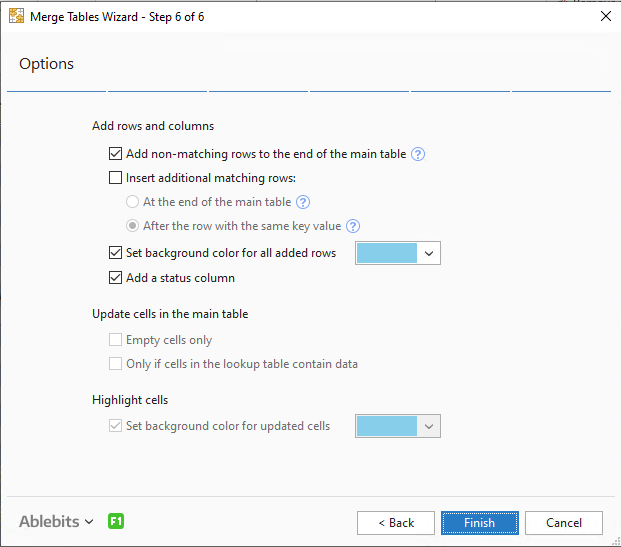
Ablebits merges the two reports by Computer Name:
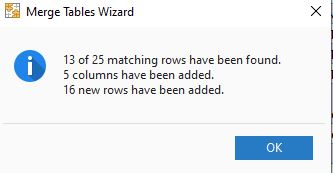
- Check the status column of the merged Excel worksheets.
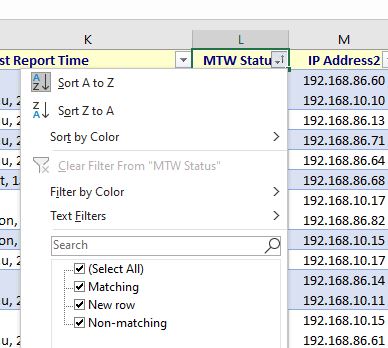
- Matching – Computer is in AD and BigFix
- Non-Matching – Computer is in AD but not in BigFix. This could be due to a stale AD object or the BigFix agent was never installed. Investigation might be required.
- New Rows – Computers that are in BigFix but not joined to the domain or no longer on the domain. Domain membership will need to be investigated.
~~~~~~~~~~~~~~~~~~~~~~~~~~~~~~~~~~~~~~~~~~~~~~~~~~~~~~~~~~~~~~~~~~~~~
Author
Brad Sexton is a BigFix technical advisor for the mid-Atlantic region. He was a BigFix administrator in a global enterprise for 7 years where he was using BigFix for OSD, Software Deployments, and patching. Brad joined the HCL BigFix team in 2018.
Review and editorial credits
Shivi Sivasubramanian is a senior-level technical author and editor with a demonstrated history of working in the technology industry. A firm believer in the magical power of words, she loves helping the community deliver expressive, minimalist, and user-friendly content. Shivi currently leads a team of information developers in BigFix.
Modificato il da Brad Sexton 64576A77-B31D-BF00-0025-86070027DBEC bsexton@hcltechsw.com
|
This article presents a method to import the default app associations for PCs. For example, you might not want Microsoft Edge to be your PDF reader but Adobe reader. You can change such default app associations in BigFix and use the configuration during Phase 1 of the OSD process. For details on how to set up OSD phases, see Fat Images vs. Layered Images.
Creating custom app associations
- Log in with a local administrator account and make the file association changes as required.
- Run the command under elevated command prompt.
Dism /Online /Export-DefaultAppAssociations:C:\Windows\Temp\AppAssoc.xml
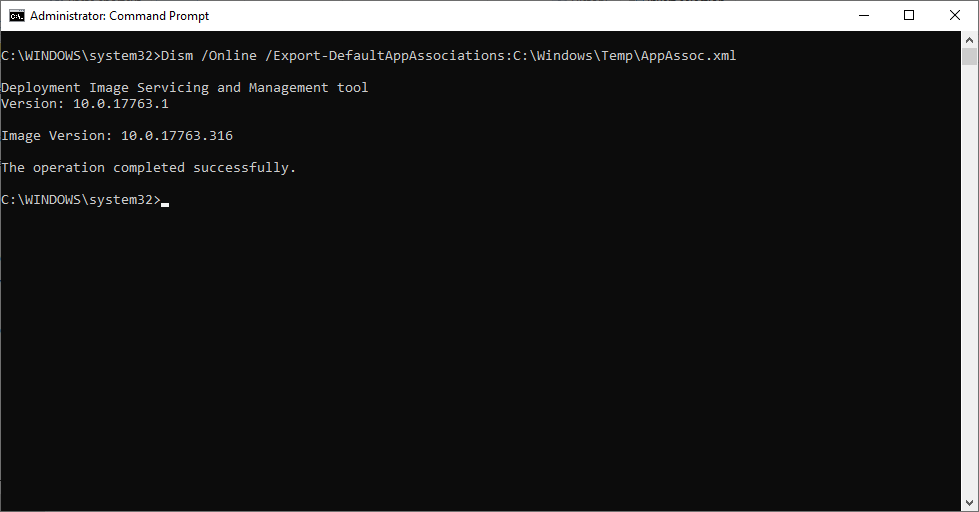
- Open the following xml file C:\Windows\Temp\AppAssoc.xml in an app like Notepad.
- In BigFix, create a new Task called "OSD – AppAssoc.xml".
- Open the Actions tab.
- Copy and paste the lines:
action uses wow64 redirection false

delete __createfile

Createfile until END_OF_FILE

<PASTE THE XML FILE HERE>

END_OF_FILE

delete AppAssoc.xml

move __createfile AppAssoc.xml

delete __createfile

// Log setup

parameter "mainSWDLogFolder" = "{parent folder of client folder of current site}/__Global/SWDDeployData"

folder create "{parameter "mainSWDLogFolder"}"

parameter "logFile" = "SWD_DeploymentResults.log"

waithidden C:\WINDOWS\SYSNATIVE\DISM.EXE /online /Import-DefaultAppAssociations:AppAssoc.xml
- Open Notepad. Select all the contents of the xml file and copy them.
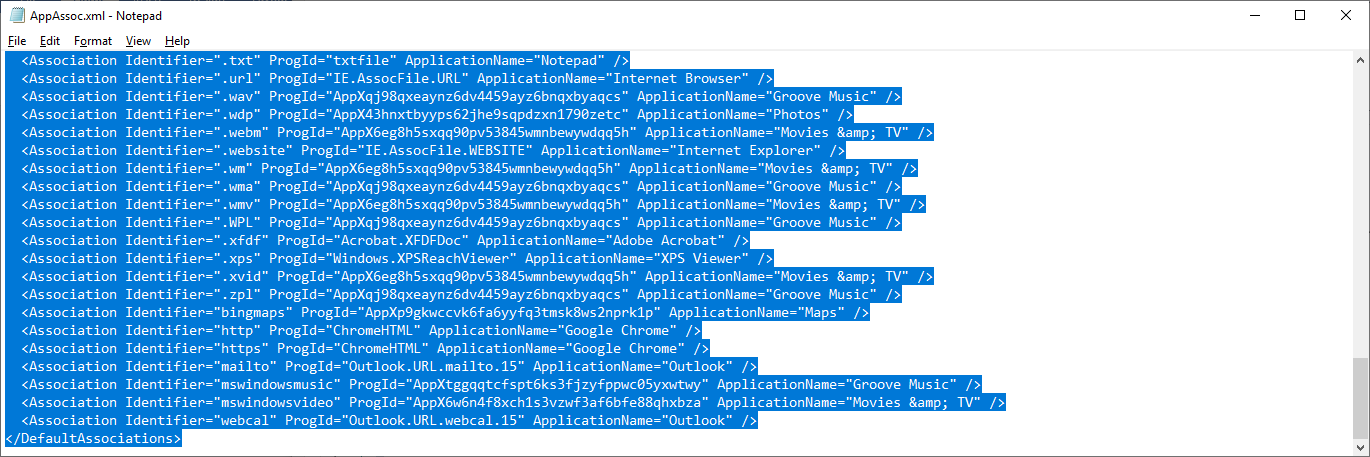
- In the BigFix Task, select the section <PASTE YOUR XML FILE HERE> and replace it will the contents of the XML file.
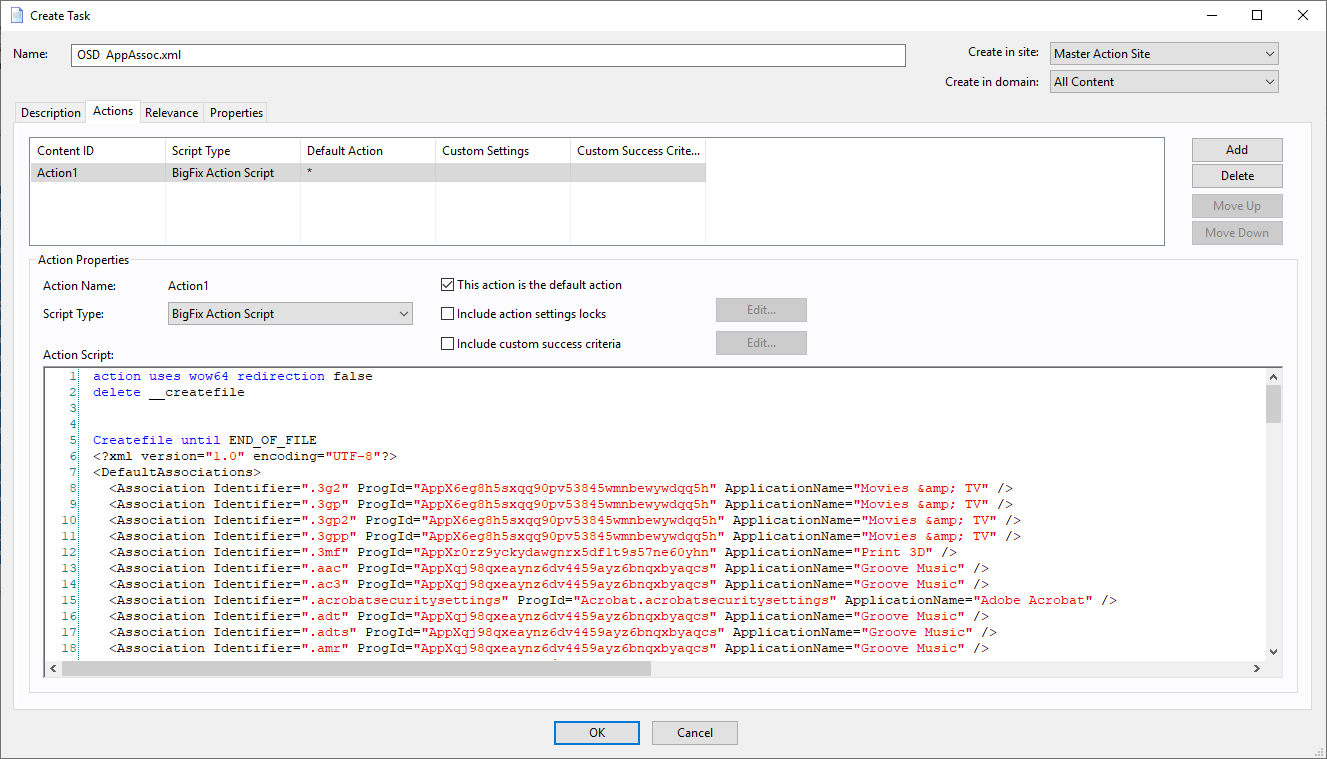
The Task should look like this:
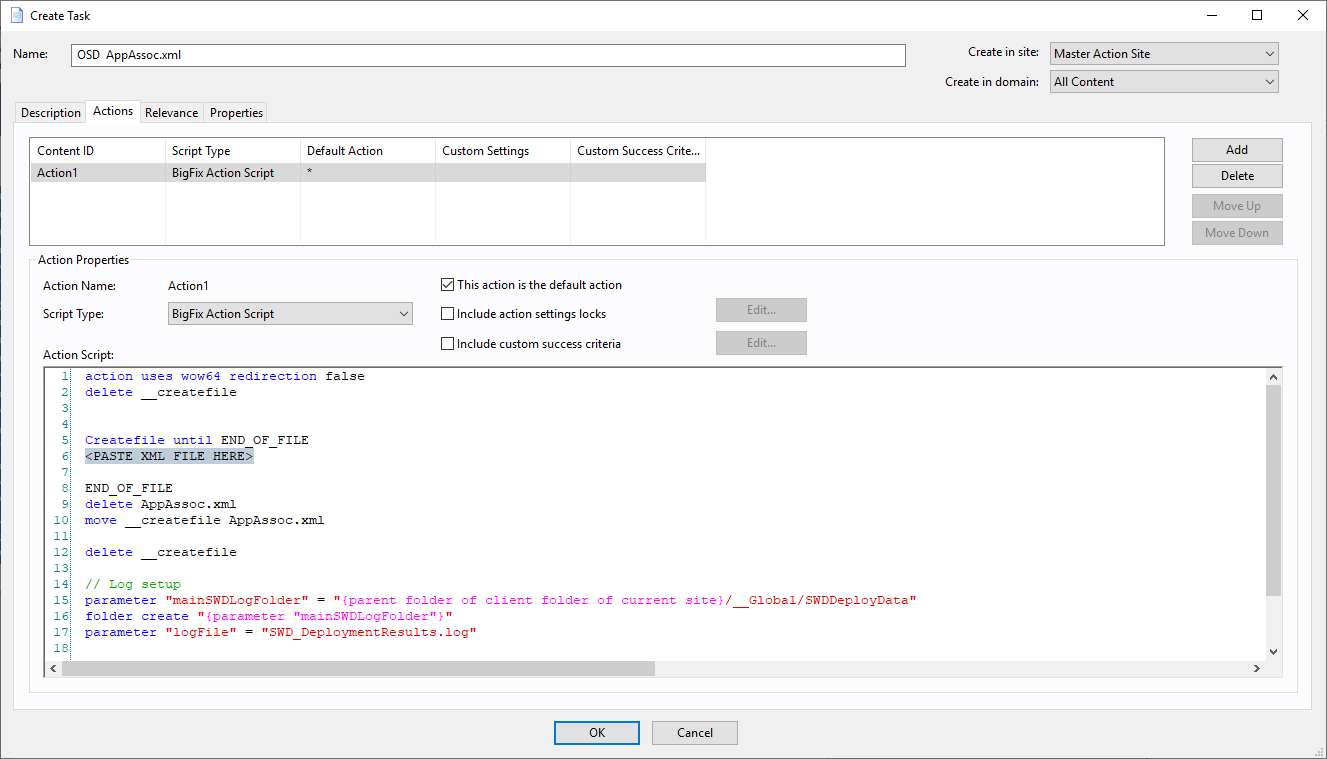
Add the task to your OSD – Phase 1 section and Take Action for Phase 1 as described in the previous OSD Phases setup. This step updates the file associations in phase 1 of the OSD deployment.
~~~~~~~~~~~~~~~~~~~~~~~~~~~~~~~~~~~~~~~~~~~~~~~~~~~~~~~~~~~~~~~~~~~~~
Author
Brad Sexton is a BigFix technical advisor for the mid-Atlantic region. He was a BigFix administrator in a global enterprise for 7 years where he was using BigFix for OSD, Software Deployments, and patching. Brad joined the HCL BigFix team in 2018.
Review and editorial credits
Shivi Sivasubramanian is a senior-level technical author and editor with a demonstrated history of working in the technology industry. A firm believer in the magical power of words, she loves helping the community deliver expressive, minimalist, and user-friendly content. Shivi currently leads a team of information developers in BigFix.
Modificato il da Brad Sexton 64576A77-B31D-BF00-0025-86070027DBEC bsexton@hcltechsw.com
|
BigFix allows you to capture fat images and then deploy them throughout your environment with the Systems Lifecycle domain. A fat image contains all applications, settings, branding, patches, and so and then captures that state. These can also be quite large with all of the applications in your environment. Once you capture the image, you can deploy by using the relay infrastructure and bare-metal and reimage over the wire. This is the traditional way of imaging a computer and with the advent of Windows 10 that is a thing of the past. Doing a fat image, you are unable to be dynamic, so anytime an application updates or a patch needs to be installed, you have to recapture the image. This is a tedious and inefficient process.
This article demonstrates how to use BigFix to set up post-configuration steps that are 100% ready from day one. You can utilize the power of BigFix relevance during the deployment process. BigFix uses MDT in the background to deploy Windows images; although that is a powerful technology, there are some limitations. The article explains how to use the best of both the worlds where you are layering down a Windows ISO or image and then installing the necessary software, patches, drivers, and branding so the PC or server is 100% compliant.
The method explained in this article allows you to be dynamic with your images and be much more efficient. You do not need to spend your time updating and capturing a new image if there are new patches or software updates needed on the image. All you have to do is update the software package and or add the patches to the basic windows ISO as part of the process. You just need 5 minutes to update the baselines as opposed to a couple of hours on capturing and deploying the images.
Being a former customer, I could employ this method to build one single image for a global company - install the necessary base software, branding, patches, and language packs and also used relevance so if a certain site needed software, it would only install that software on that site and not the rest of the company. The same applies to language packs - we would ensure a Chinese computer only had Chinese installed and display Chinese when the computer was built.
Before creating phases, be sure to complete the steps outlined in Setting up Bigfix OSD and Bare Metal Imaging.
Creating OSD phases
The following steps will help you create a custom site OSD and create a series of steps so it runs through 3 baselines called Phases 1, Phases 2, and Phases 3 after a computer is imaged. The reason for multiple baselines is to organize the process. If you have one large baseline, it can get complex. You can add more phases as well depending on your specific requirements.
Guide to setup removing unwanted ModernUI Apps
Guide to create a custom start menu during the imaging process
Custom App Associations
- Phase 3 – Patches not in the image. Phase 3 reboots the computer so once it is at the CTRL + ALT + DEL screen, you know the PC is completely imaged.
- Create a new Custom Site called OSD.
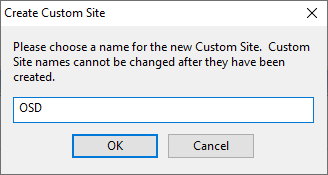
- Change computer subscriptions to match a Relevance Expression that returns true.

- Click Edit Relevance.
- Add the statement given below and click OK.
(exists settings "OSD" whose( (it = "Phase1") of (it as string ) of values of it ) of client ) OR
(exists settings "OSD" whose( (it = "Phase2") of (it as string ) of values of it ) of client ) OR
(exists settings "OSD" whose( (it = "Phase3") of (it as string ) of values of it ) of client ) OR
(exists settings "OSD" whose( (it = "Phase4") of (it as string ) of values of it ) of client )
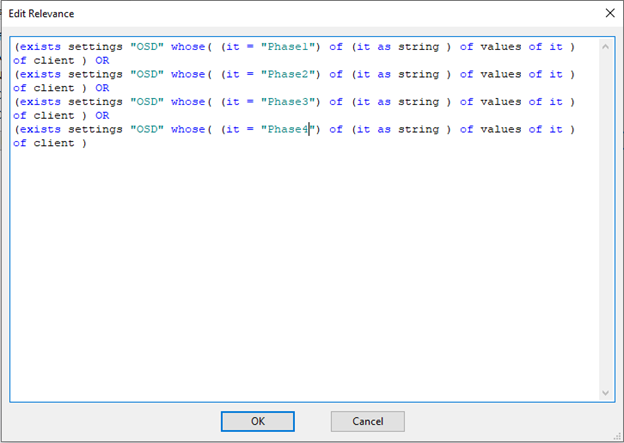
- Save the changes.
Creating OSD Fixlets, Tasks, and Baselines
Create 4 Tasks and 1 Fixlet in the OSD site.
Note: The Fixlet is used for the patching baseline to promote to the next phase.
- Click Fixlets and Tasks.
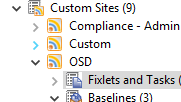
- Create a task called "OSD – Promote to Phase 2".
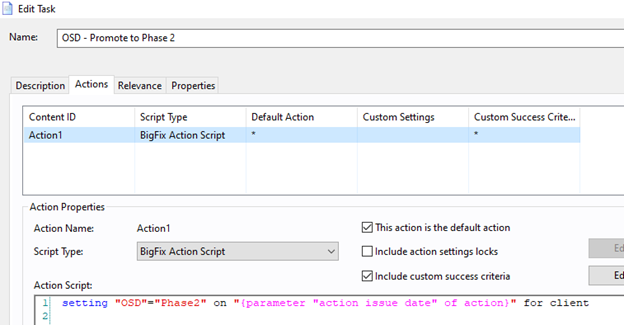
- Open the Actions tab and enter the action script given below:
setting "OSD"="Phase2" on "{parameter "action issue date" of action}" for client
- Open the Relevance tab. Add the statement given below:
(not exists settings "OSD" whose( (it = "Phase2") of (it as string ) of values of it ) of client )

- Create a Task called "OSD – Promote to Phase 3".
The action script
setting "OSD"="Phase3" on "{parameter "action issue date" of action}" for client
The Relevance
(not exists settings "OSD" whose( (it = "Phase3") of (it as string ) of values of it ) of client )
- Create a Fixlet called "OSD – Promote to Phase 4"
Note: This is a Fixlet due to being in the same basleine as patching Fixlets and not Task.
The action script
setting "OSD"="Phase4" on "{parameter "action issue date" of action}" for client
The Relevance
(not exists settings "OSD" whose( (it = "Phase4") of (it as string ) of values of it ) of client )
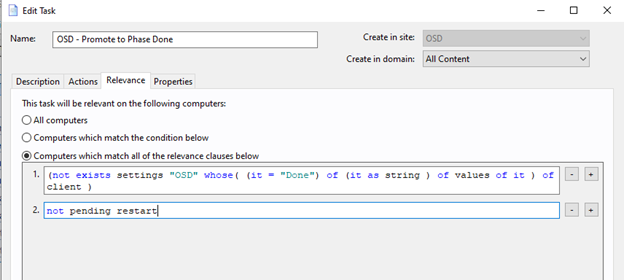
- Create a Task called "OSD – Done".
The action script
setting "OSD"="Done" on "{parameter "action issue date" of action}" for client
The Relevance
(not exists settings "OSD" whose( (it = "Done") of (it as string ) of values of it ) of client )
not pending restart
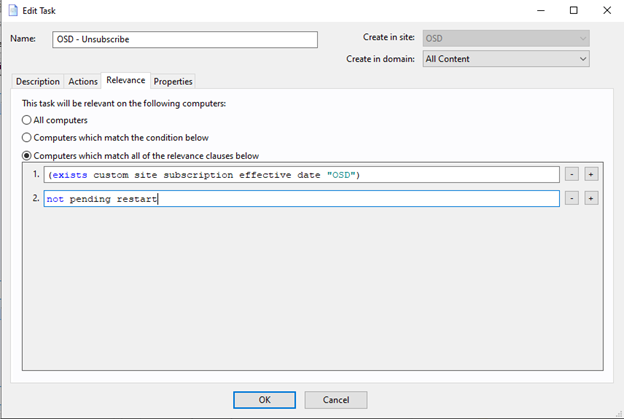
- Create a Task called "OSD – Unsubscribe".
The Action Script
custom site unsubscribe "OSD" on "{now}"
The Relevance
(exists custom site subscription effective date "OSD")
not pending restart
- Expand the OSD site entry and click Baselines

- Create a Baseline called "OSD – Phase 1 (Branding)" in the Master Action Site.
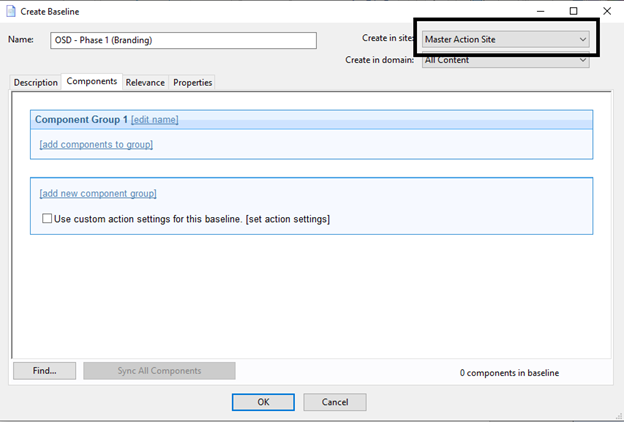
- Open the Relevance tab and select Computers which match all of the relevance clauses below.
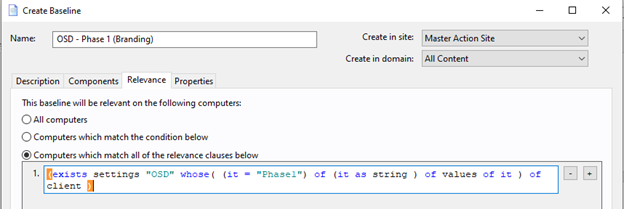
Paste this statement in the clause
(exists settings "OSD" whose( (it = "Phase1") of (it as string ) of values of it ) of client )
Create a Baseline for OSD – Phase 2 (Software) with the clause below
(exists settings "OSD" whose( (it = "Phase2") of (it as string ) of values of it ) of client )
Create a Baseline for OSD – Phase 3 (Patches) with the clause below
(exists settings "OSD" whose( (it = "Phase3") of (it as string ) of values of it ) of client )
Create a Baseline for OSD – Phase 4 (Language Packs) with the clause below and create in the OSD site we crated earlier
(exists settings "OSD" whose( (it = "Phase4") of (it as string ) of values of it ) of client )
You should now have 3 baselines in your newly created OSD site and 1 baseline created in your Master Action Site (Be sure to show non relevant content).


- Open Phase 1 and add the Promote to Phase 2 Task.
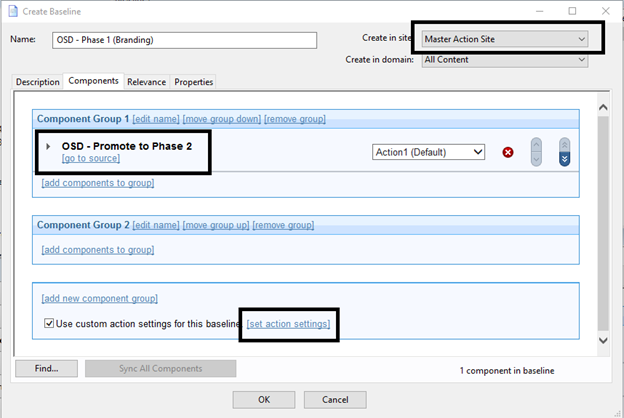
Note: This Task always needs to be at the end of the baseline.
- Click set action settings.
- On the Execution tab, deselect Ends On to make it a policy action and select Reapply this action when it becomes relevant again.
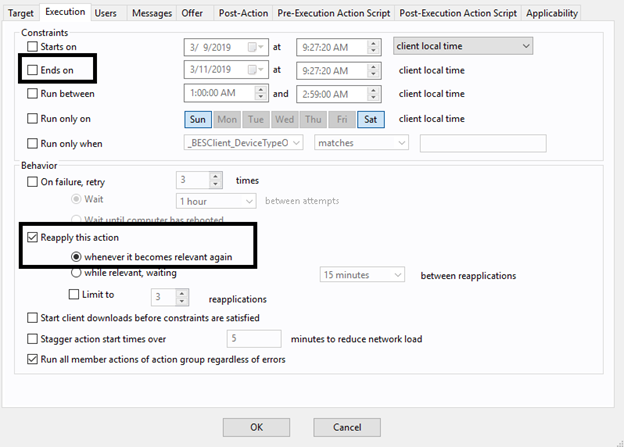
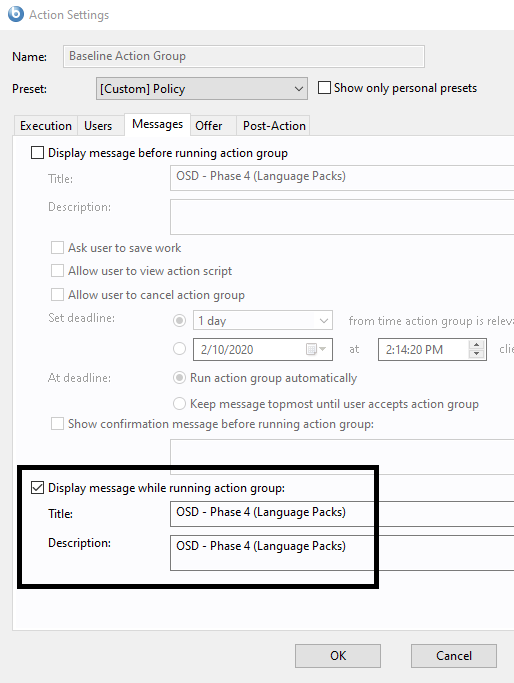
- On the Messages tab, select Display messages while running action group.
- Enter "OSD – Phase 1 (Branding)" in Title and Description.
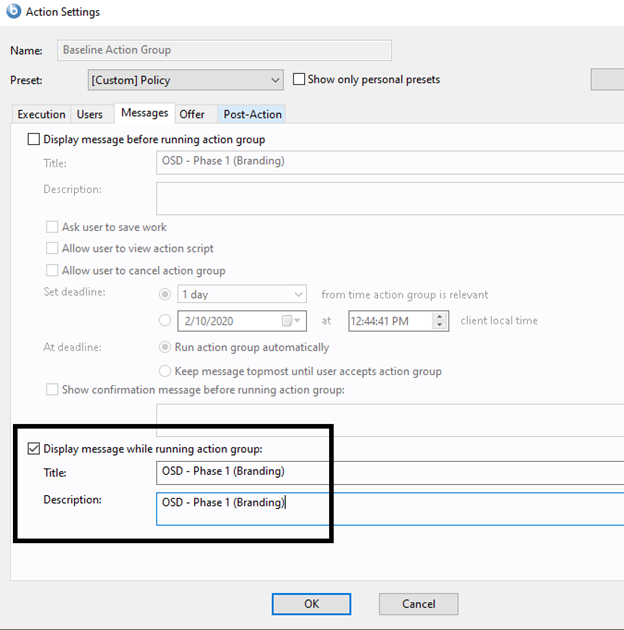
- Open the Baseline OSD – Phase 2 (Software) and add the task OSD – Promote to Phase 3.
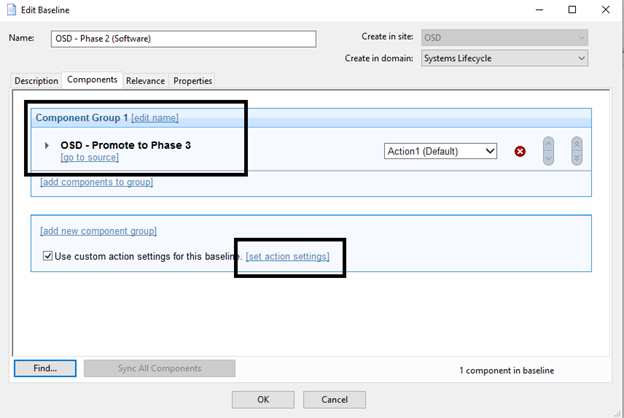
Note: This Task always needs to be at the end of the baseline.
- Click set action settings.
- On the Execution tab, deselect Ends On to make it a policy action and select Reapply this action when it becomes relevant again.
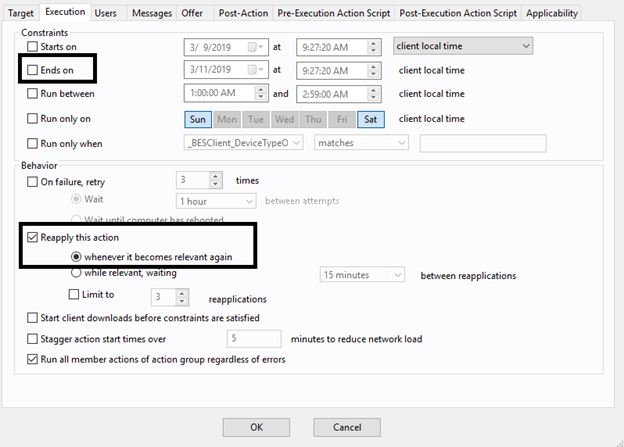
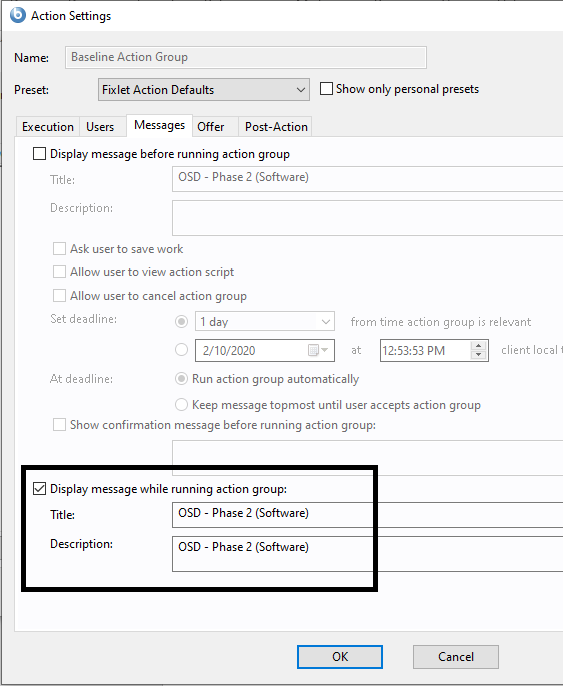
- On the Messages tab, select Display messages while running action group.
- Enter OSD – Phase 2 (Software) in Title and Description.
- Open the Baseline OSD – Phase 3 (Patches) and add the Fixlet OSD – Promote to Phase 4.
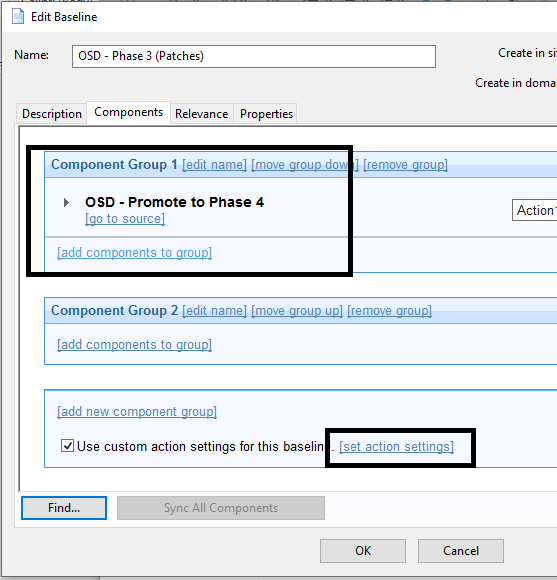
Note: This Task always needs to be at the end of the baseline.
- Click set action settings.
- On the Execution tab, deselect Ends On to make it a policy action and select Reapply this action when it becomes relevant again.
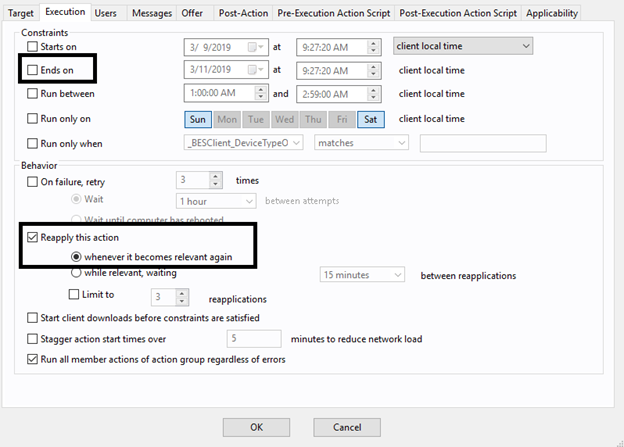
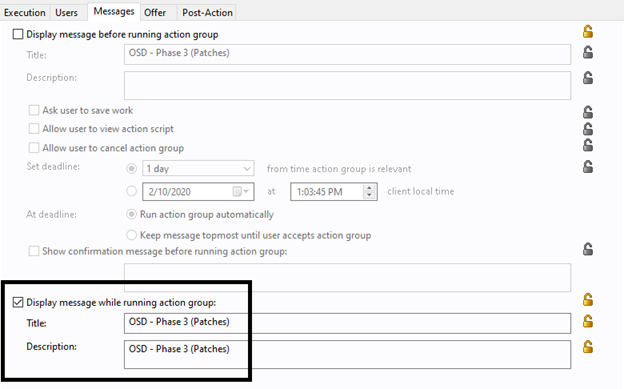
- On the Messages tab, select Display messages while running action group.
- Enter OSD – Phase 3 (Patches) in Title and Description.
- Open the Baseline OSD – Phase 4 (Language Packs) and add the two Tasks OSD – Promote to Done and OSD - Unsubscribe.
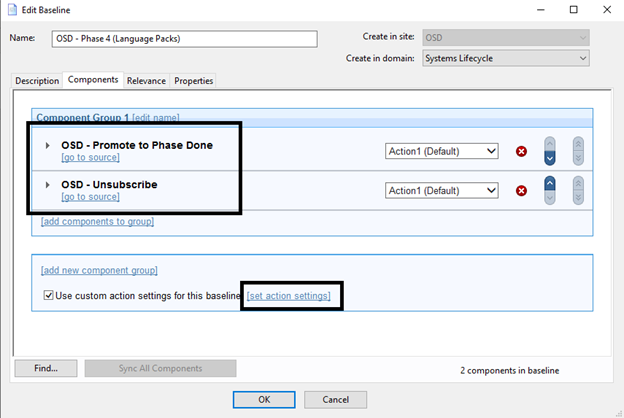
Note: This Task always needs to be at the end of the baseline
- Click set action settings.
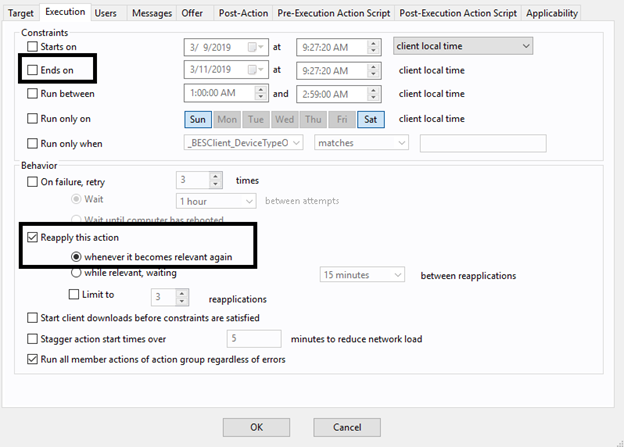
- On the Execution tab, deselect Ends On to make it a policy action and select Reapply this action when it becomes relevant again.
- On the Messages tab, select Display messages while running action group.
- Enter OSD – Phase 4 (Language Packs) in Title and Description.
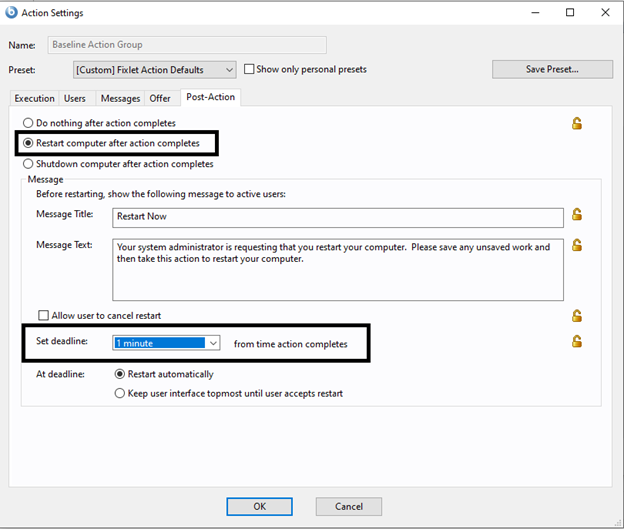
- On the Post-Action tab, select Restart computer after action completes.
- Change the deadline to 1 minute.
- Create 4 computer groups.
- Create OSD – Phase 1 in the Master Action Site.
Note: Do this step with a Master Operator account.
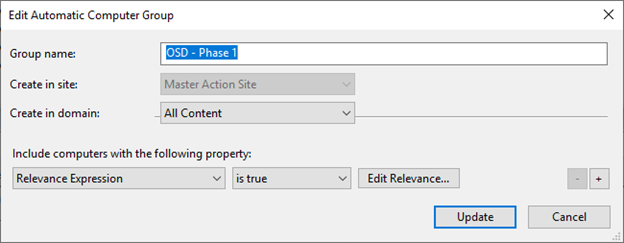
The Relevance Expression is
(exists settings "OSD" whose( (it = "Phase1") of (it as string ) of values of it ) of client )
- Create OSD – Phase 2 in the OSD site.
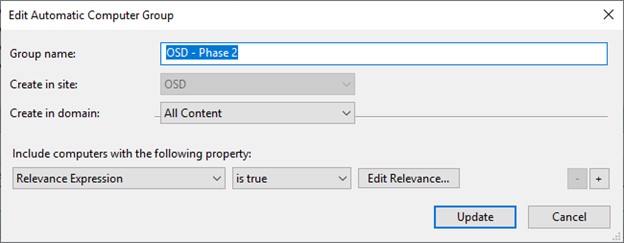
exists settings "OSD" whose( (it = "Phase2") of (it as string ) of values of it ) of client )
- Create OSD – Phase 3 in the OSD site.
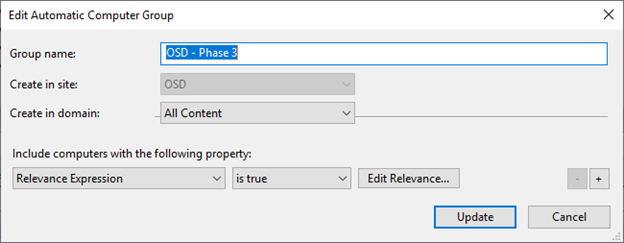
(exists settings "OSD" whose( (it = "Phase3") of (it as string ) of values of it ) of client )
- Create OSD – Phase 4 in the OSD site.
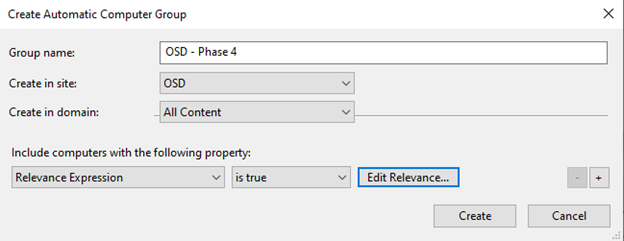
(exists settings "OSD" whose( (it = "Phase4") of (it as string ) of values of it ) of client )
- Deploy the 4 baselines.
- Open OSD – Phase 1 and take action.
- On the Target tab, select Dynamically target by property.
- Select By group and the OSD – Phase 1 group.
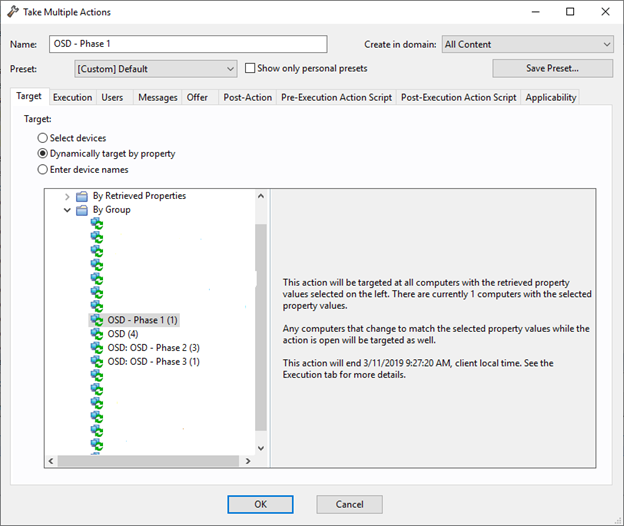
Review the Execution tab and Messages tab to verify the action settings applied to the baseline are selected.
- Click OK to take this action.
- Take action on OSD Phase 2.
- Select Dynamically target by property and By Group and then select OSD – Phase 2.
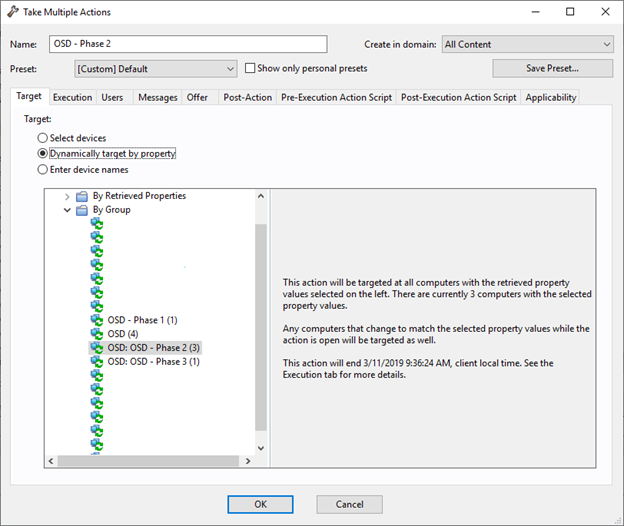
- Take action on OSD Phase 3.
- Select Dynamically target by property and By Group and then select OSD – Phase 3 Group.
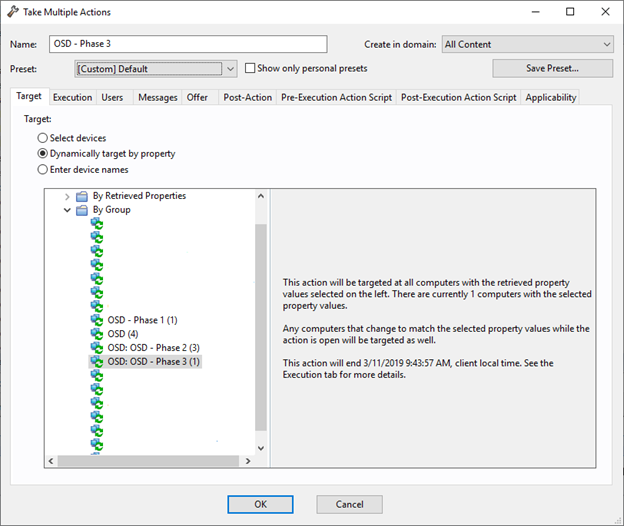
Review the Execution tab and Messages tab to verify the action settings applied to the baseline are selected.
- Click OK to take this action.
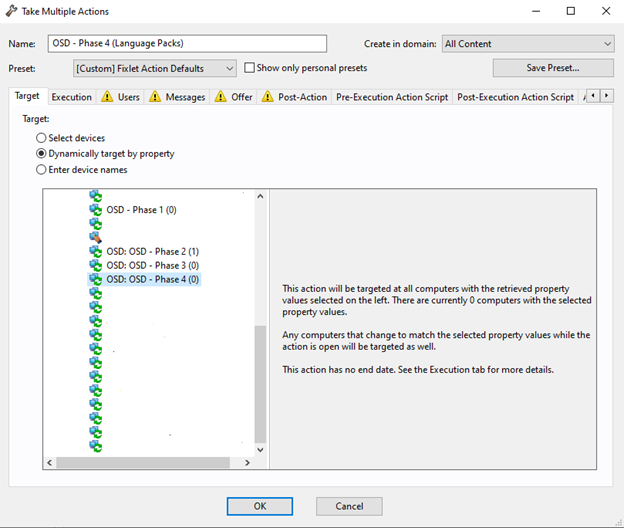
- Take action on OSD Phase 4.
- Select Dynamically target by property and By Group and then select OSD – Phase 4 Group.
- Update the Bare Metal Profile so once the computer images, it automatically runs the OSD phases.
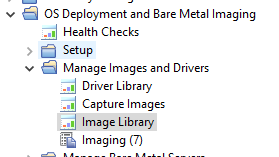
- Select Systems Lifecycle.

- Expand OS Deployment and Bare Metal Imaging.
- Expand Manage Images and Drivers and select Image Library.
- Select your uploaded Win or ISO. Select your Bare Metal Profile and click Edit.
- Enter OSD:Phase1 in Client Settings.
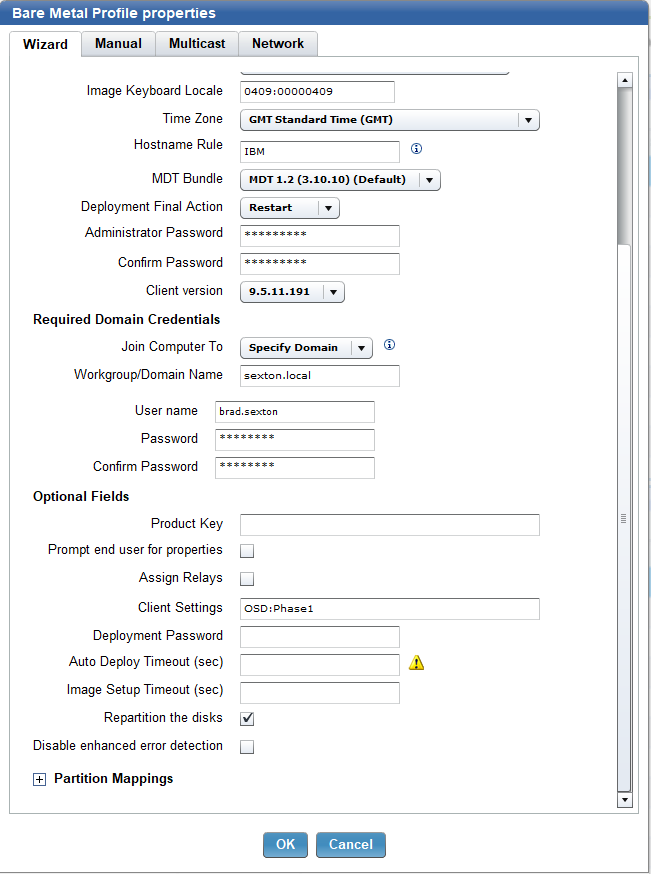

If you are adding your image to the domain, select the Manual tab and remove the following line: FinishAction=Restart
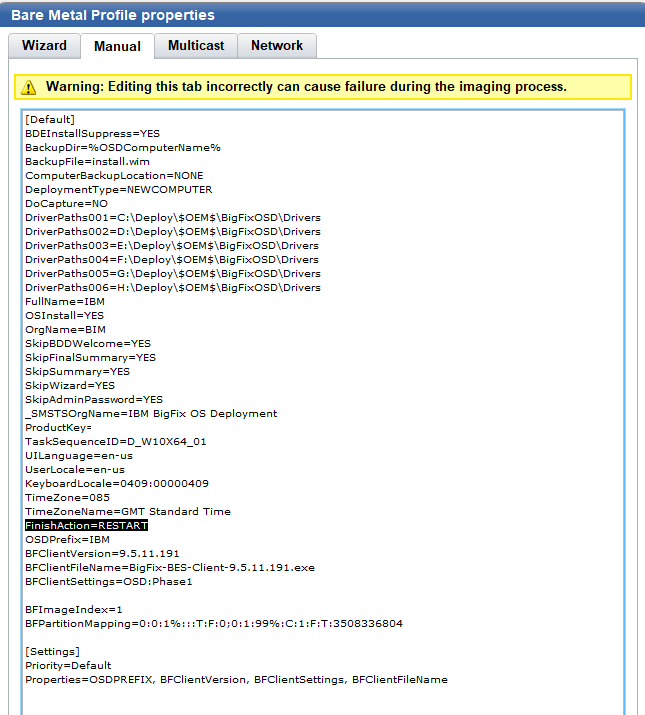
This gets enabled once the PC boots into Windows. It stays logged in as Administrator and runs through Phase1, Phase2, and Phase3. The BigFix agent then reboots the computer, joins the domain and completes the image process.
Examples
Here are some examples:
Phase 1 - Branding such as custom start menu, app associations, and custom task bars
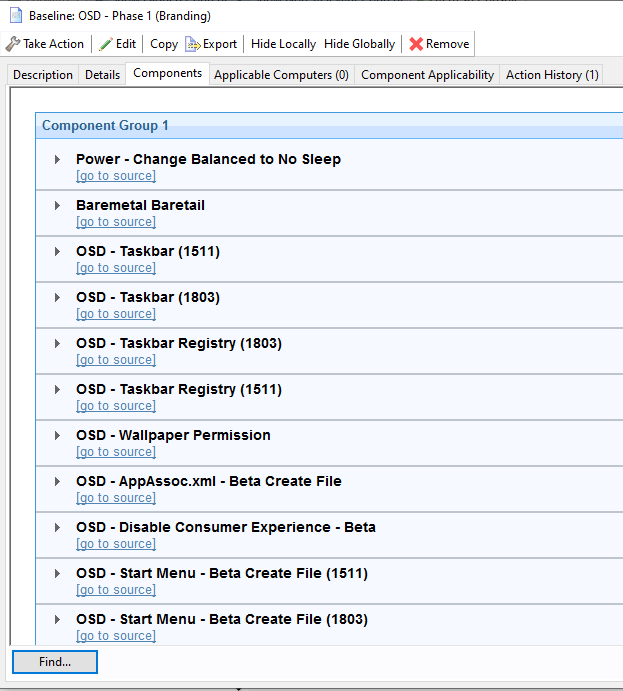
Phase 2 - Software used in your enterprise
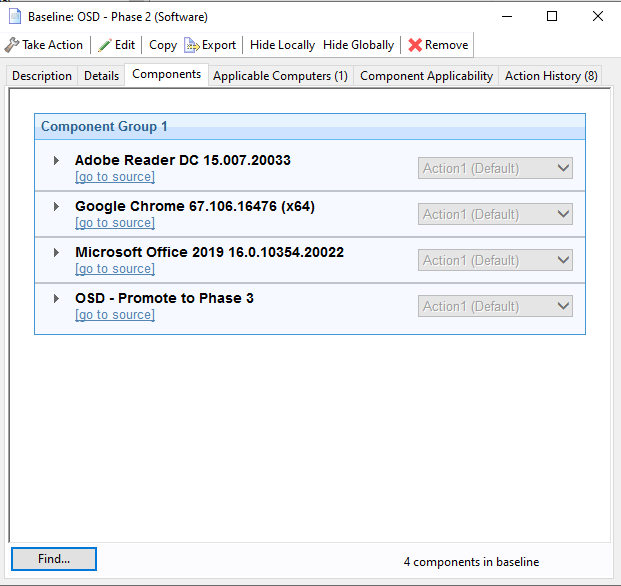
Phase 3 - Patches
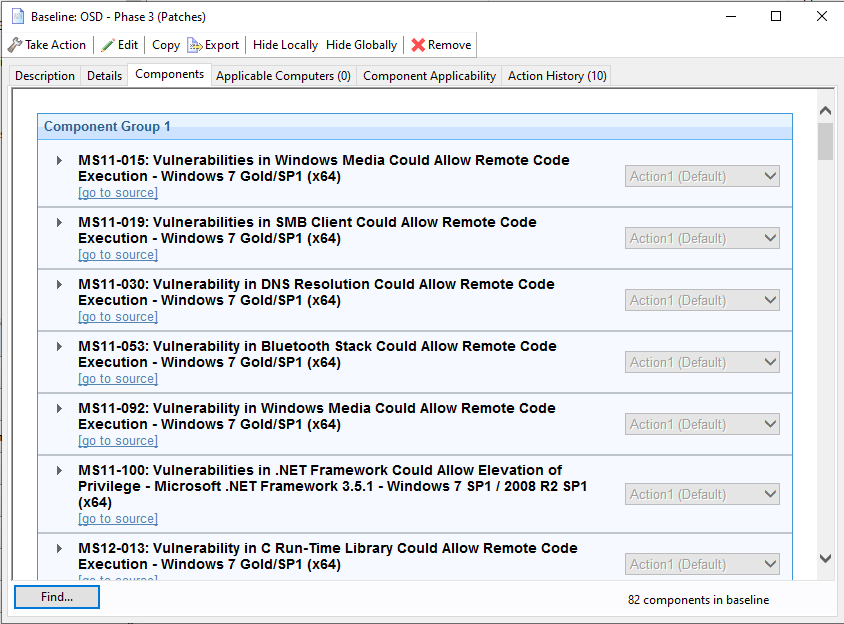
Phase 4 - Language Packs
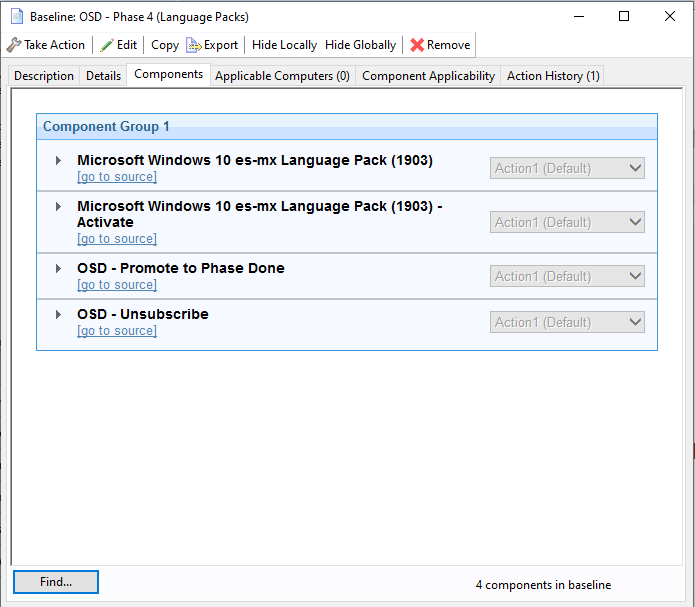
Anytime you update any of these phases, stop and redeploy each action so imaging receives the latest.
~~~~~~~~~~~~~~~~~~~~~~~~~~~~~~~~~~~~~~~~~~~~~~~~~~~~~~~~~~~~~~~~~~~~~
Author
Brad Sexton is a BigFix technical advisor for the mid-Atlantic region. He was a BigFix administrator in a global enterprise for 7 years where he was using BigFix for OSD, Software Deployments, and patching. Brad joined the HCL BigFix team in 2018.
Review and editorial credits
Shivi Sivasubramanian is a senior-level technical author and editor with a demonstrated history of working in the technology industry. A firm believer in the magical power of words, she loves helping the community deliver expressive, minimalist, and user-friendly content. Shivi currently leads a team of information developers in BigFix.
Modificato il da Brad Sexton 64576A77-B31D-BF00-0025-86070027DBEC bsexton@hcltechsw.com
|
There are a couple of tasks you can use to verify if the upgrade will proceed and check different things. The first is the in-place upgrade – target validation.

This step is used to check if the computer has enough disk space, the BigFix Client has enough precache, and whether Windows 7 has a license.
- Run the action on your Windows 7 machine and allow BigFix to change the two parameters for increasing CPU and the Precache downloads.
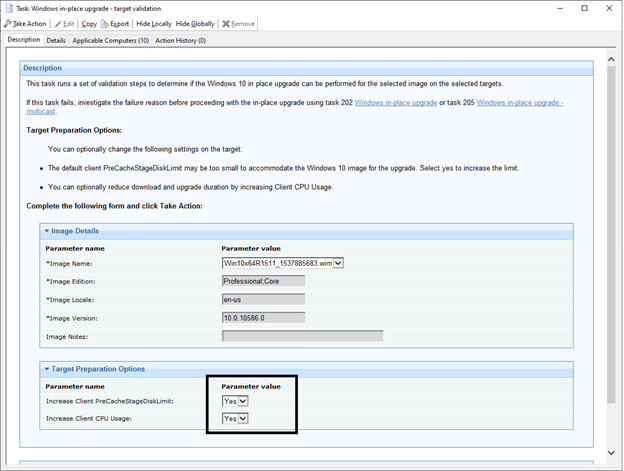
If the action fails, investigate why it failed before proceeding to the next step.
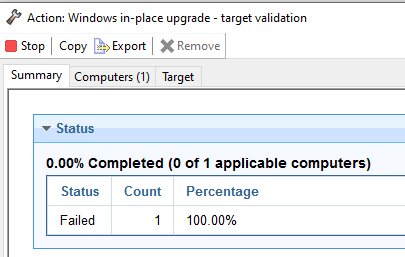
Go to the machine you ran the action on. Open the log file from C:\in_place_validate and check why the target validation failed.
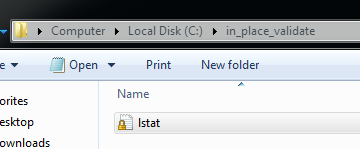
In this case it failed because Windows 7 was not activated and was out of the grace period.

Fix the errors and run the validation again until it completes successfully.

Note: If the action completes, it will clean up and remove the in_place_validate folder.
- Go to task ID 202 – Windows in-place upgrade.

You should find the uploaded ISO file in the image details.
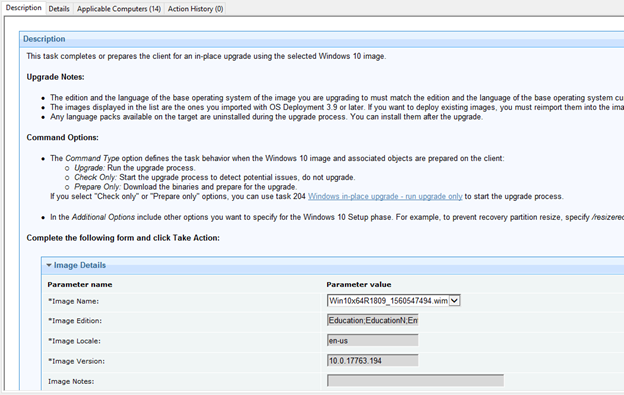
- Run the action so it checks the upgrade and if there are any errors. This check actually starts the upgrade and runs a check for errors or warnings.
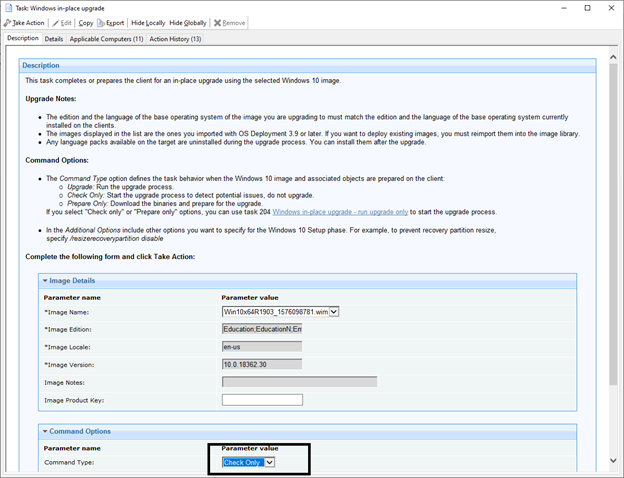
Once you run the Check Only and it completes, the Run Upgrade Only option becomes relevant. This is a good way to create a deployment to check and download the upgrade ahead of time. If there is a problem, this step fails. If it completes, run the run upgrade only Fixlet that uses the already downloaded files to run the upgrade at a later date.

You can now take action and run the in-place upgrade on a PC. During the upgrade, BigFix copies the extracted ISO to C:\in_place_upgrade. BigFix checks and ensures that there are no errors before proceeding with the upgrade such as a driver conflict or an application conflict. The installer writes a log to the in_place_upgrade folder and if the exit code is anything but 0, the setup fails. This is for your benefit so the upgrade does not inadvertently blue screen your machine.
Like in the case of all deployments, you can deploy the in-place upgrade just like another action. You can schedule the deployment to run at a certain time.

Prompt the end user to take action when they are ready and give them flexibility to run at their convenience.
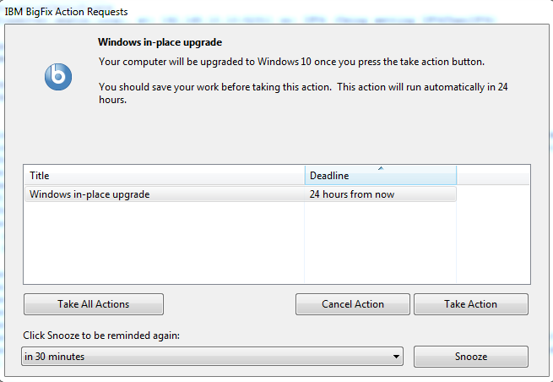
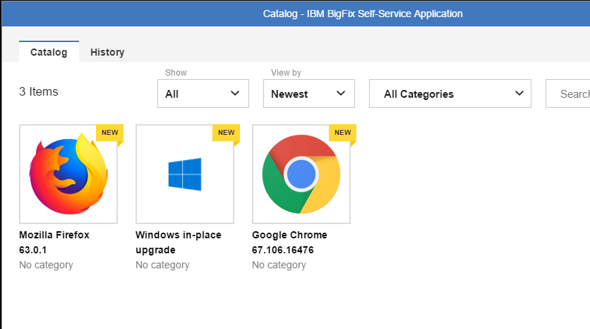
You can also publish it in the BigFix Self service center.
The out.log fails if the exit code is not 0 for the setup. Microsoft outputs these exit codes as binary and it is often painful to convert. I have created an analysis on Bigfix.me that pulls back in the Console the error code for you. So if you have multiple machines that failed with the same error code, you can help remediate the other machines without having to run the setup manually: https://bigfix.me/analysis/details/2998608
So the best way to determine why it failed is to start the upgrade process manually by running setup.exe at C:\in_place_upgrade. In the log, you should see the conflict that is causing the upgrade to fail. Address the conflict before proceeding. Most of the conflicts are due to applications or drivers not being compatible with Windows 10. You can use BigFix to detect and upgrade the driver or applications, so the next time you run the setup it will proceed past errors.
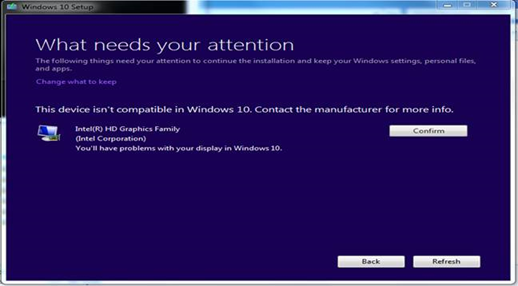
Here is a link to some of the switches you can run and add command options: https://docs.microsoft.com/en-us/windows-hardware/manufacture/desktop/windows-setup-command-line-options
/MigrateDrivers none - instructs whether to migrate the drivers from the existing installation during the upgrade. You can specify All or None. By default, the setup decides which is best for each individual driver based on the installation choice. You can use this switch with /installdrivers, though it is generally not required
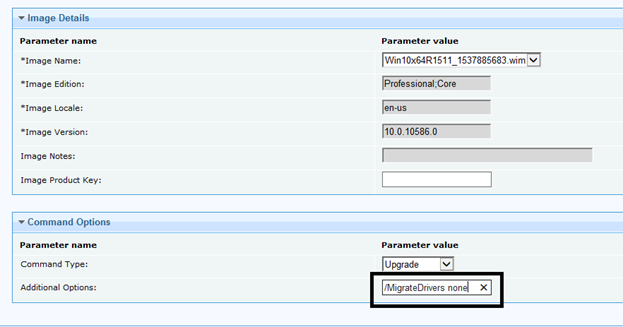
If you want to ignore the error, add a parameter to the action in BigFix - /Compat IgnoreWarning

For Mcafee Drive Encryption, read this article on how to suspend Mcafee preboot. You can create a software deployment to enable the temporary autoboot for the machines to upgrade.
https://docs.mcafee.com/bundle/drive-encryption-7.2.0-product-guide-epolicy-orchestrator/page/GUID-5EF63BEA-B5B5-482C-A203-486D72BB0712.html
~~~~~~~~~~~~~~~~~~~~~~~~~~~~~~~~~~~~~~~~~~~~~~~~~~~~~~~~~~~~~~~~~~~~~
Author
Brad Sexton is a BigFix technical advisor for the mid-Atlantic region. He was a BigFix administrator in a global enterprise for 7 years where he was using BigFix for OSD, Software Deployments, and patching. Brad joined the HCL BigFix team in 2018.
Review and editorial credits
Shivi Sivasubramanian is a senior-level technical author and editor with a demonstrated history of working in the technology industry. A firm believer in the magical power of words, she loves helping the community deliver expressive, minimalist, and user-friendly content. Shivi currently leads a team of information developers in BigFix.
Modificato il da Brad Sexton 64576A77-B31D-BF00-0025-86070027DBEC bsexton@hcltechsw.com
|
This article explains how to use BigFix to create a custom start menu as part of the imaging process. With this, you can paste an XML file into the action script. BigFix runs a DISM command to import the start menu so it gets added for default users.
You can also do this by using a group policy though there are a few limitations with that approach. If you force a start menu through a group policy, the user cannot make custom changes to their start menu. This severely limits them and does not allow them to pin their frequently used programs and so on once they start using the PC. It is better to provide the end user with a custom start menu to start and allow them to make custom changes later.
- Make changes to the start menu as needed.

- Open Powershell and export your start menu layout by running the following command: Export-Startlayout –path C:\Windows\Temp\Startmenu.xml
After running the command, browse to C:\Windows\Temp and locate the Startmenu.xml file.

- Save the file.
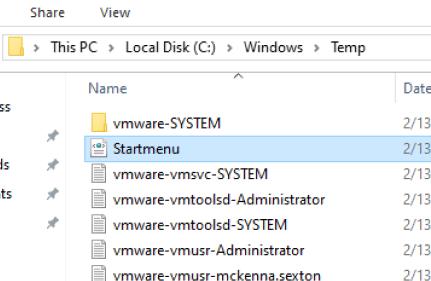
- You can either download a template I have uploaded on Bigfix.me or create your own task.
To create your own task, do the following steps:
- In BigFix Console, go to Tools > Create New Task.
- Open the Actions tab.
- Paste the action script into the space indicated below with "<PASTE XML HERE>"
action uses wow64 redirection false

delete __createfile

Createfile until END_OF_FILE

<PASTE XML HERE>

END_OF_FILE

delete Startmenu.xml

move __createfile Startmenu.xml

delete __createfile

//   CREATEFILE

createfile until END_OF_FILE2

Import-StartLayout –LayoutPath Startmenu.xml -MountPath $env:SystemDrive\

END_OF_FILE2

delete startmenu.ps1

move __createfile startmenu.ps1

waithidden { pathname of file ((it as string) of value "Path" of key "HKEY_LOCAL_MACHINE\SOFTWARE\Microsoft\PowerShell\1\ShellIds\Microsoft.PowerShell" of native registry) } -ExecutionPolicy unrestricted -File startmenu.ps1
- Open the StartMenu.xml saved earlier in Notepad.
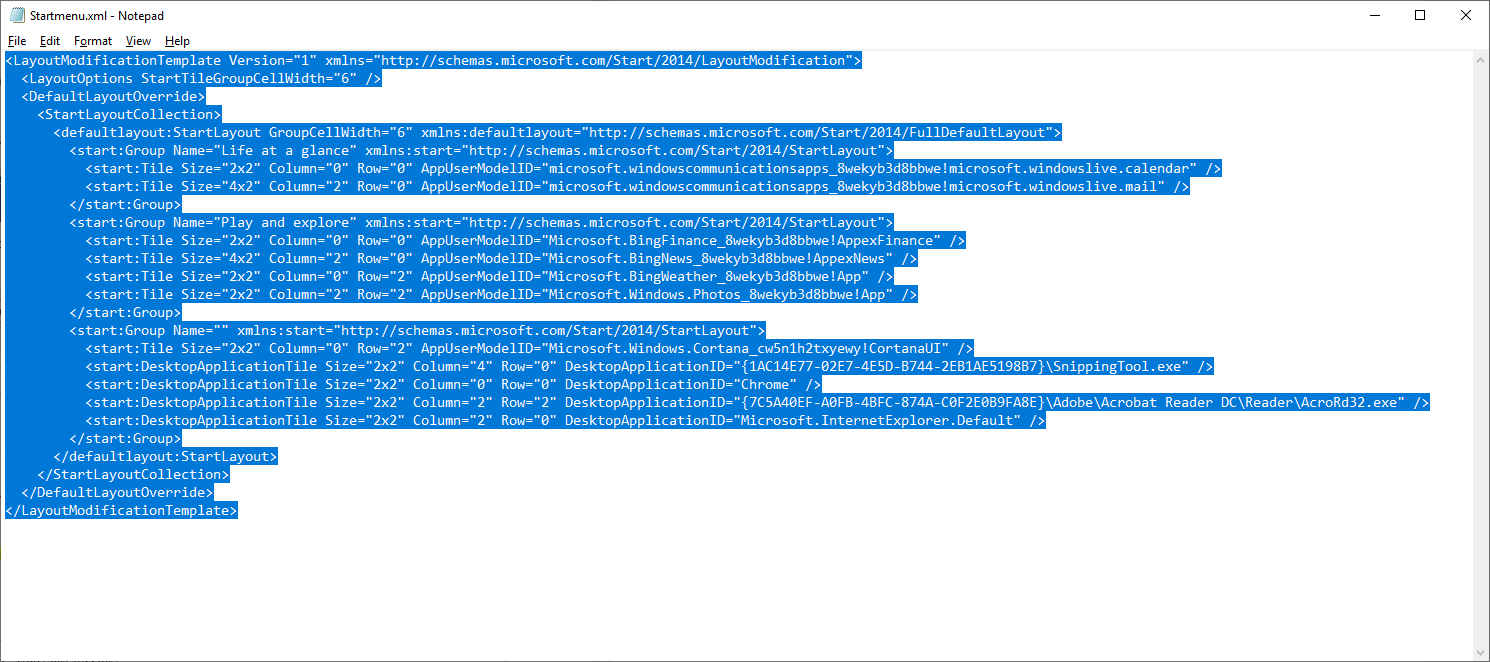
- Select the contents of the XML. Copy and replace the section that has "<PASTE XML HERE>" in the action script.
Your action script looks like this:
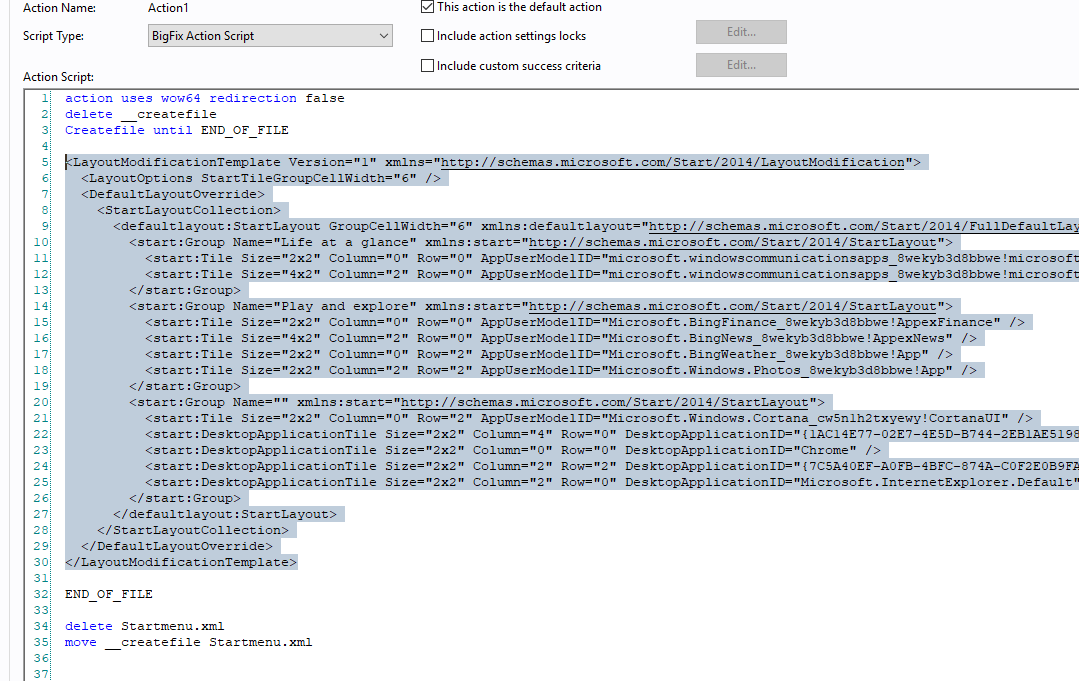
Note: If you have any sections in the XML that contains the {, add a double {{ in its place. BigFix considers this relevance and not as xml.
Before

After

- Create two relevance statements:
name of operating system starts with "Win10"
operating system as string contains "1903"
Note: This start menu is for the 1903 build of Windows 10. Be sure to change the build of your version of Windows 10 for the second statement.
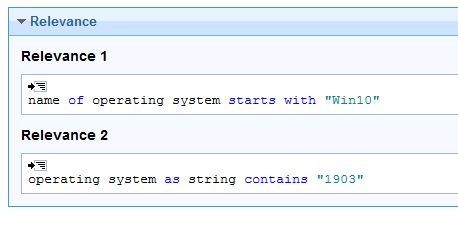
- Close the new BigFix Task and deploy it. This updates the default user profile to include the new start menu layout. After the deployment, you should see a new file called LayoutModification.xml.
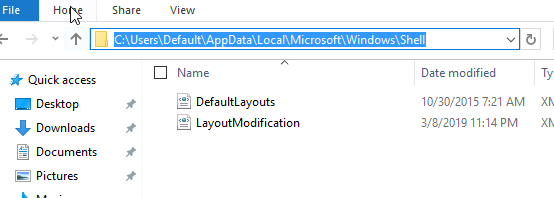
Any new user that logs in will find the start menu and be able to make changes later.
~~~~~~~~~~~~~~~~~~~~~~~~~~~~~~~~~~~~~~~~~~~~~~~~~~~~~~~~~~~~~~~~~~~~~
Author
Brad Sexton is a BigFix technical advisor for the mid-Atlantic region. He was a BigFix administrator in a global enterprise for 7 years where he was using BigFix for OSD, Software Deployments, and patching. Brad joined the HCL BigFix team in 2018.
Review and editorial credits
Shivi Sivasubramanian is a senior-level technical author and editor with a demonstrated history of working in the technology industry. A firm believer in the magical power of words, she loves helping the community deliver expressive, minimalist, and user-friendly content. Shivi currently leads a team of information developers in BigFix.
Modificato il da Brad Sexton 64576A77-B31D-BF00-0025-86070027DBEC bsexton@hcltechsw.com
|
Did you know BigFix is great for mergers and acquisitions in terms of gathering data, inventory, patch status, compliance status - all that even before you think about migrating networks and domains? This article explains how to deploy the agent to the new organization and segment them off in your BigFix environment. You can then gather information to develop your plan to start patching, deploying security software, and managing them, before the domains are migrated securely through your internet-facing relay.
The article explains how you set up DMZ relay for mergers and acquisitions so as to help gather inventory and develop a plan for domain migration. Once a company is acquired, the first step would be to install the BigFix agent on the newly acquired company’s machines. Once that is done, you can deploy local relays to check in to the DMZ relay to optimize the traffic. You can then install the agent to the rest of the machines in the newly acquired organization. You can gather information about the newly acquired company such as patch posture, software inventory, compliance, overlapping IP ranges, and an overall inventory of the environment. Once the agent is deployed, you can designate relays at the new organization that communicates with your DMZ relay. You can optimize the communications with the machines to start using the local relays that would check in securely through your company's DMZ relay. You can gradually take over the patch process, start hardening the new machines with your security software, and so on.
- Create your BES clinet installer so it checks in to your DMZ relay and not your root server. Open Notepad and copy-paste the following:
__RelaySelect_Automatic=0
__RelayServer1=http://DMZRELAYNAME:52311/bfmirror/downloads
_BESClient_RelaySelect_FailoverRelay=http://DMZRELAYNAME:52311/bfmirror/downloads
- Rename the DMZRELAYNAME section to suit the name of the DMZ relay your clients need to connect to when they are off the network.
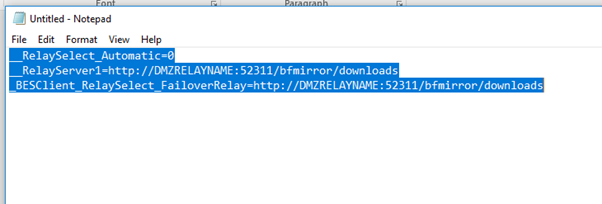
- Save the file as clientsettings.cfg and save it into its own folder.
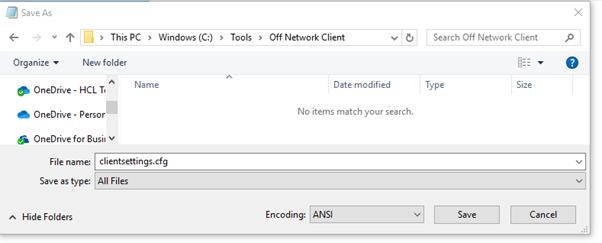
- Copy setup.exe and the masthead.afx into the same folder. This files can be found in your BES Installers folder on the BigFix server.
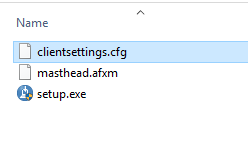
Provide this agent to your newly acquired company to install on one of their machines.
I prefer to do a single PC installation and allow that machine to check in. Once the machine checks in, I create groups within BigFix to distinguish the newly acquired domain. This way, if I have roles in the BigFix setup defined for my team, I only want to allow the acquisition team to see the new machines. This is done to ensure there is no action taken on the new machines. If there is any outgoing policy action, I can ensure that the new domain is not targeted. I prefer setting a domain property so it can be targeted in my group membership.
- Logged in as a master operator account, go to Tools > Manage Properties.
- Scroll down to “Domain/Workgroup – Windows”. Select Create a Custom Copy and click OK.
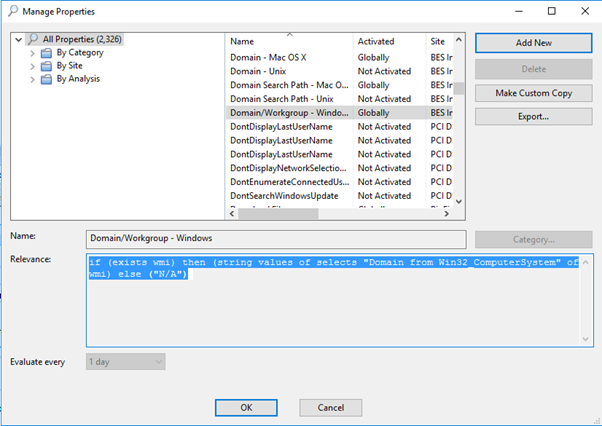
When you create an automatic group, you should find Domain/Workgroup – Windows.
- Create a new group for your domain. Select the property Domain/Workgroup – Windows "contains" and enter the new domain name.
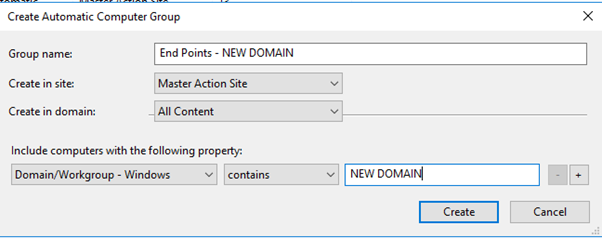
- Edit the computer group roles so as to restrict who has access to the newly acquired machines. For instance, my "Servers-All" role can see all the servers. This probably works in most environments, but since you are dealing with two domains, you probably want to edit the role to only include the source company's domain and servers. My old server role was set up just looking at the device type that contained "server".
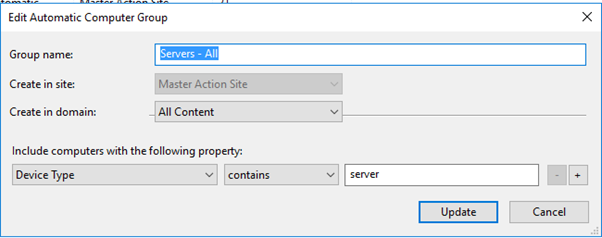
- Change the group to include the device type and the set "contains" to "SOURCE DOMAIN".
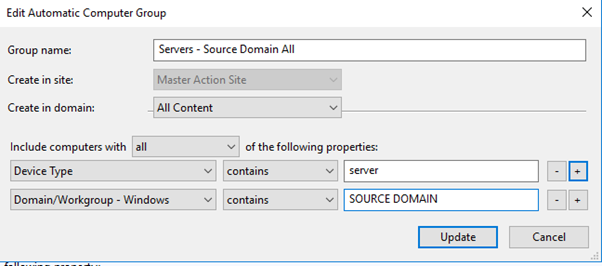
Now that the group is updated, ensure that your roles are set up so only the SOURCE domain machines are shown.
- Create a role for the NEW DOMAIN, so appropriate people on the acquisition team have access to the endpoints.In BigFix Console, go to Roles and create a new role called End Points – New domain and target the new group you created earlier.
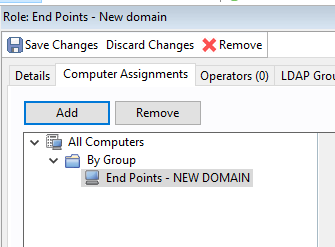
You can get more granular and provide your desktop team on the acquisition team access to the newly acquired workstations and server team and vice versa. This will help even if anyone mistakenly targets the newly acquired company’s PCs before they are ready.
You may need to install the agent on a few more machines and verify if everything is working as expected. Check the NEW DOMAIN PC and see if any policy actions are targeting that machine that you do not want to. Failure to check could start a process of installing software, and so on before they are ready to test.
Now that you have a few NEW DOMAIN PCs on the network and roles are restricted so only certain people have access, policy actions are not being deployed. You can set up a relay on their network. This way, not all of the BigFix agents are checking in to your DMZ relay.
- Install the BigFix agent on the machine you intend to use as a relay. Once that PC is checked in, you can deploy the Install BigFix Relay on that machine.

- Once that relay is set up, create a new clientsettings.cfg file so those machines are checking in to their local relay.
- Paste the following into notepad
__RelaySelect_Automatic=0
__RelayServer1=http://NEWDOMAINRELAY:52311/bfmirror/downloads
_BESClient_RelaySelect_FailoverRelay=http://DMZRELAYNAME:52311/bfmirror/downloads
- Change NEWDOMAINRELAY to your new relay’s information and save the file as clientsettings.cfg.
- Create a folder called "New domain Client" and save the clientsettings.cfg file in to it.
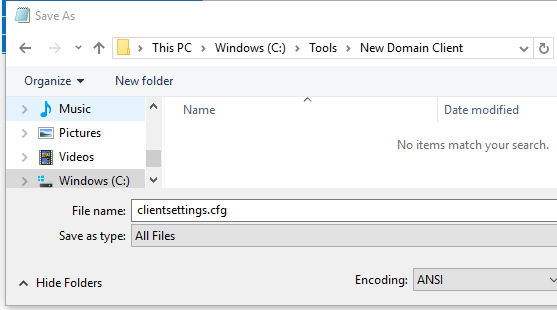
- Copy setup.exe and masthead.afx into the same folder.
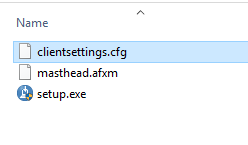
This is the agent you want the new company to deploy to their endpoints. They can utilize other tools to deploy the BigFix agent or create a login script. Once the agent installs, the PC will check into their local relay. The local relay will check in directly to your company's DMZ relay.
Once the agent is installed on all of your PCs, you can then start to develop your plan to integrate them. You can then run BigFix inventory scans, verify if they are patching their PCs, check security and compliance with the different BigFix modules. Once you have the plan ready, you can start integrating them and installing your security software, get them part of your patch cycle, gather inventory about used software, and so on.
~~~~~~~~~~~~~~~~~~~~~~~~~~~~~~~~~~~~~~~~~~~~~~~~~~~~~~~~~~~~~~~~~~~~~
Author
Brad Sexton is a BigFix technical advisor for the mid-Atlantic region. He was a BigFix administrator in a global enterprise for 7 years where he was using BigFix for OSD, Software Deployments, and patching. Brad joined the HCL BigFix team in 2018.
Review and editorial credits
Shivi Sivasubramanian is a senior-level technical author and editor with a demonstrated history of working in the technology industry. A firm believer in the magical power of words, she loves helping the community deliver expressive, minimalist, and user-friendly content. Shivi currently leads a team of information developers in BigFix.
Modificato il da Brad Sexton 64576A77-B31D-BF00-0025-86070027DBEC bsexton@hcltechsw.com
|
Many organizations use Azure, Google Cloud, and AWS and often times, costs can get out of hand due to admins spinning up VM's and forgetting about them. With BigFix, you can now manage and control your Azure, Google Cloud, and AWS environments and gather inventory and key information about cloud instances. BigFix is a single platform that can tell you where the device is and whether it is patched and compliant. This article provides detailed guidance on how to set up a multicloud environment with BigFix 10.
- Install MongoDB on a machine that you would like to host the Plugin Portal. This cannot be a current relay. For assistance, see https://www.mongodb.com/download-center/community
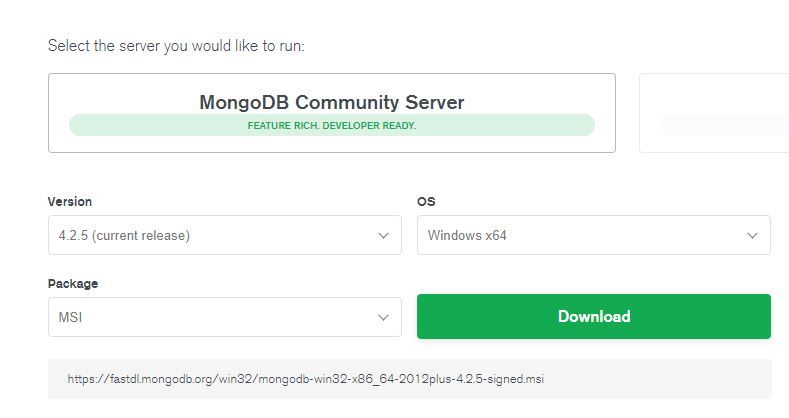
- In WebUI, click the gear Icon and select Plugin Management. The gear Icon is only visible to Master Operators.
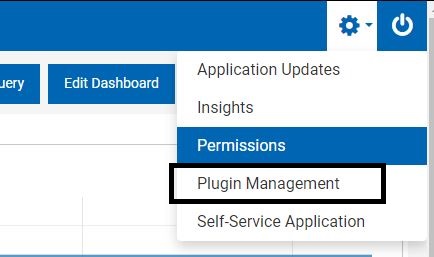
- Click Activate Now to activate the cloud providers analyses.

- Click OK to activate the prerequisite analysis.

- Click Install to install the Plugin Portal to the machine on which you installed MongoDB.
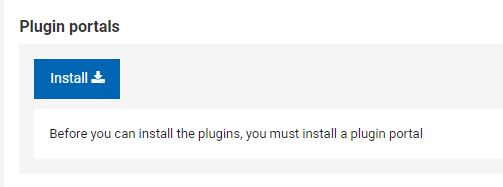
- Click Deploy Content.

- Select the machine on which you installed MongoDB.
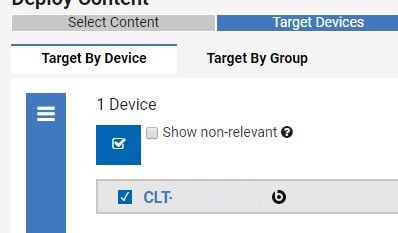
- Click Requires Decision.
- Click Click here to install the BigFix Plugin Portal.

- Click Next.

- Click Deploy.
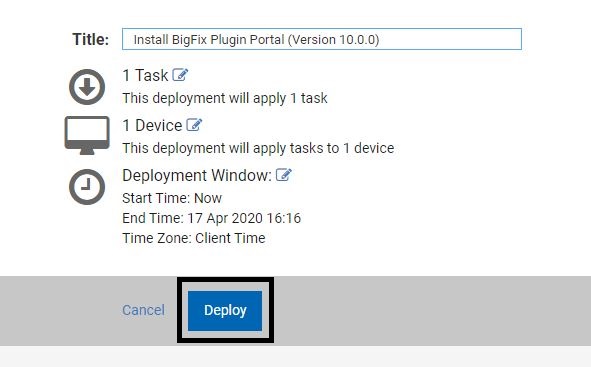
Once the Plugin Portal finishes installing, install your AWS, Azure, or VMware plugins.
Installing AWS plugin
- Click the gear Icon and click Plugin Management.
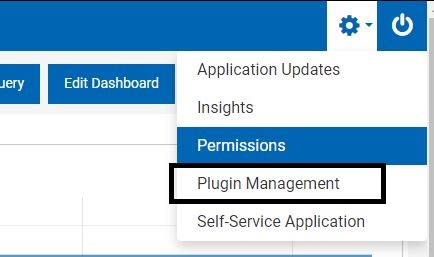
- Under Plugins, click Install.
- Select the cloud provider you would like to configure. For example, AWS.
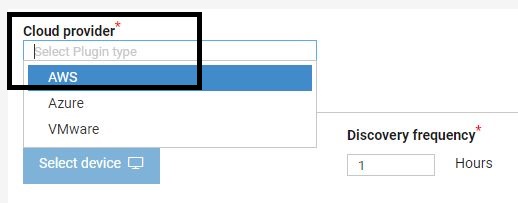
This action requires you to set the following:
- AWS default region
- Account label
- Access key ID
- Secret access key

You need to need to log in to your AWS environment to find these details. If you are a novice AWS user, here is some guidance:
- Log in to AWS: https://aws.amazon.com/
- Select your account in the top right corner and click My Security Credentials.
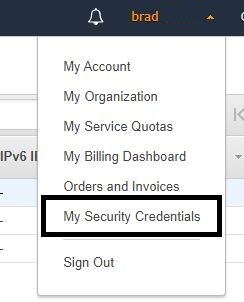
- Click Access Keys and then Create New Access Key.
Your Access Key ID and Secret Key Access Key are created.
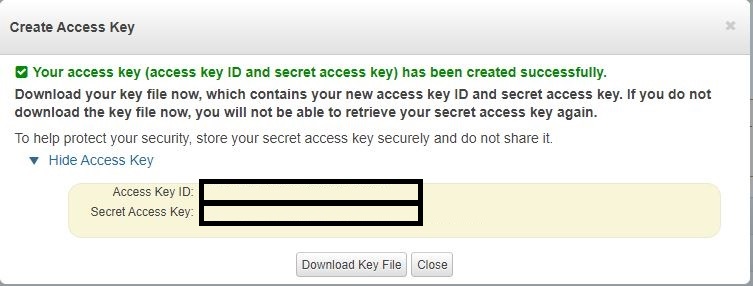
- Go to Services > EC2.
Under Service Health, you will find the region you are assigned to.
To find the syntax for that region, go here: https://docs.aws.amazon.com/AWSEC2/latest/UserGuide/using-regions-availability-zones.html
Once you have all of your information, take action on your cloud plugin install to complete the AWS setup.
- Activate analyses in the legacy BigFix Console. They should activate automatically if you installed the AWS plug-in via the WebUI.

- Activate the cloud providers analyses.

Installing Azure plugin
If you are setting up for Azure, then the following analyzes apply. These should activate automatically if you installed the Azure plug-in via the WebUI.

For Azure you will need the following information:
- Account Label
- Tenant ID
- Subscription ID
- Client ID (Application ID)
- Password (Client Secret)
- Being a novice Azure admin I was unsure where to find this information and here is how I found it

- Log in to https://portal.azure.com/ and search for Azure Active Directory and open it.
- Note down the Tenant ID.
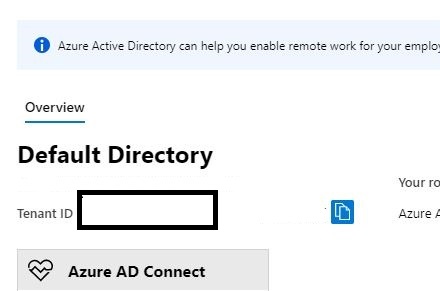
- Click App Registrations.
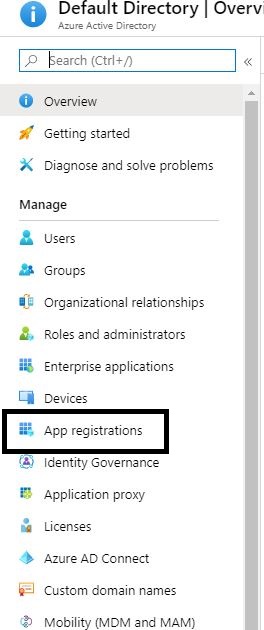
- Click Register an application.

- Name the instance and click Register.
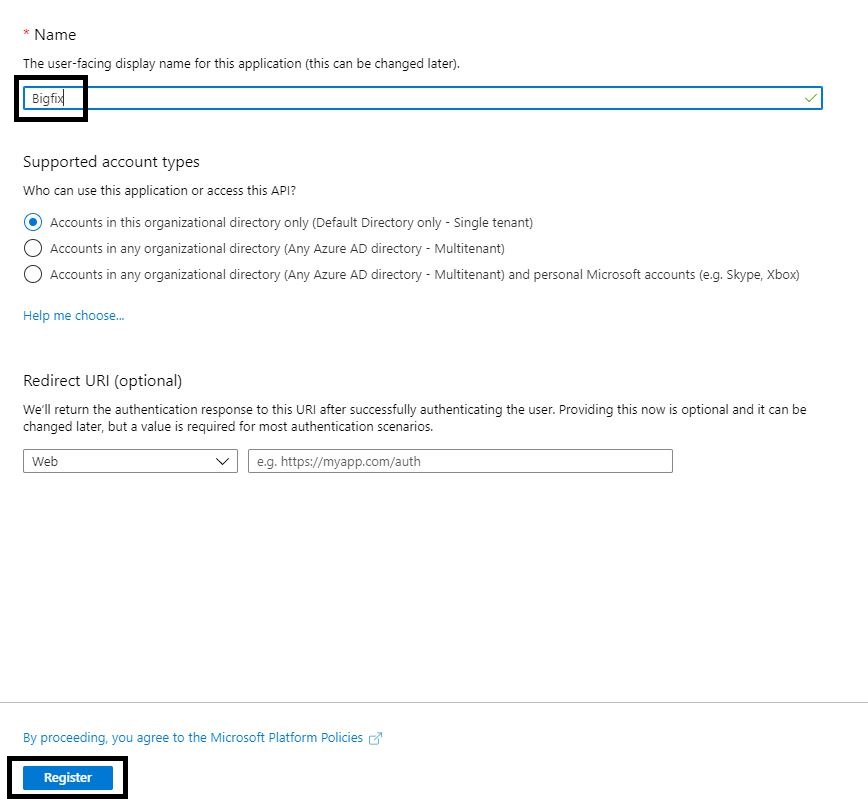
- Note down the Application (Client) ID.
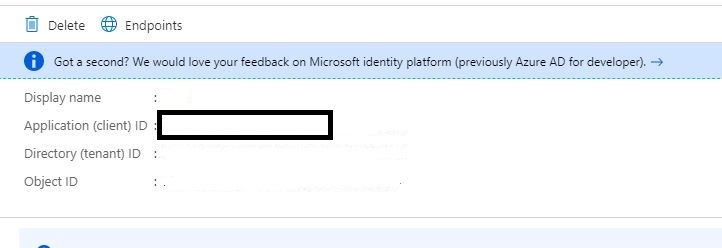
- Click Certificates and Secrets
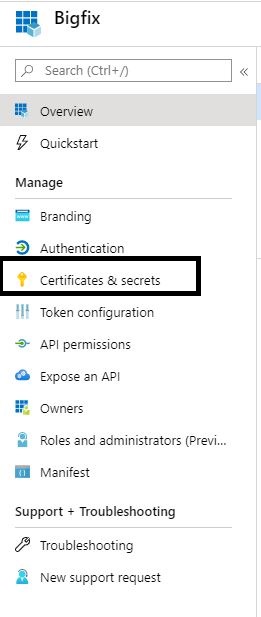
- Click Add a new client secret
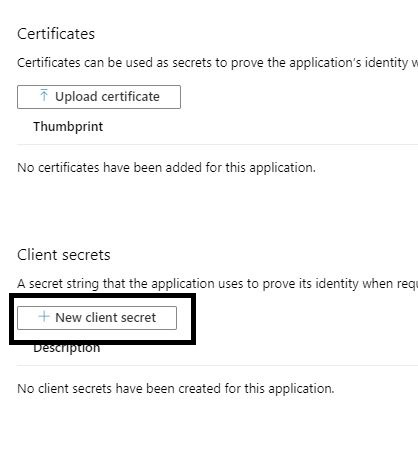
- Enter a name and expiration and click Add
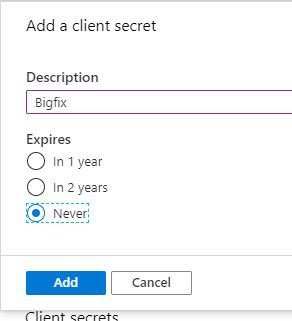
- Copy the new security key to the BigFix Action.

- Search for subscriptions.
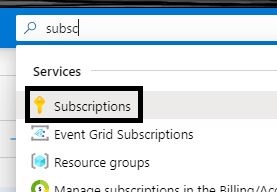
- Note down the Subscription ID.
- Click on your Azure subscription.

- Click Access control (IAM).
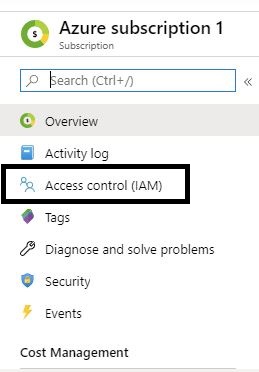
- Click Add a role assignment.
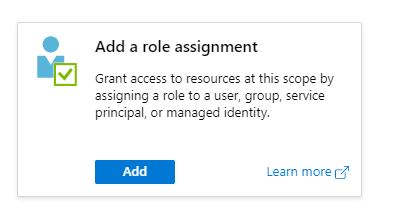
- Select the Reader role and add the app registration name created earlier and save the changes.
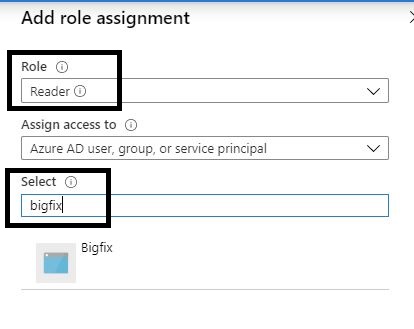
Now that you have all of the required details, you can take action to install the Azure plugin.
Once the plugin gets installed for either provider, you will see BigFix populated with cloud devices.

Select any device and deploy the BigFix agent if desired.
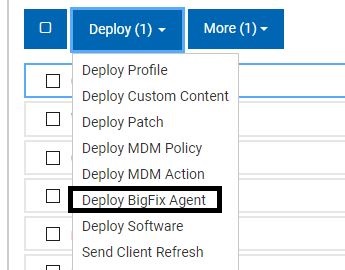
If the machine has the BigFix agent installed and is a cloud device, you will see a BigFix logo with a cloud icon attached to it.

Once your cloud machine checks in, you get a bunch of information that you can now filter for within Webui, the legacy console, and WebReports.
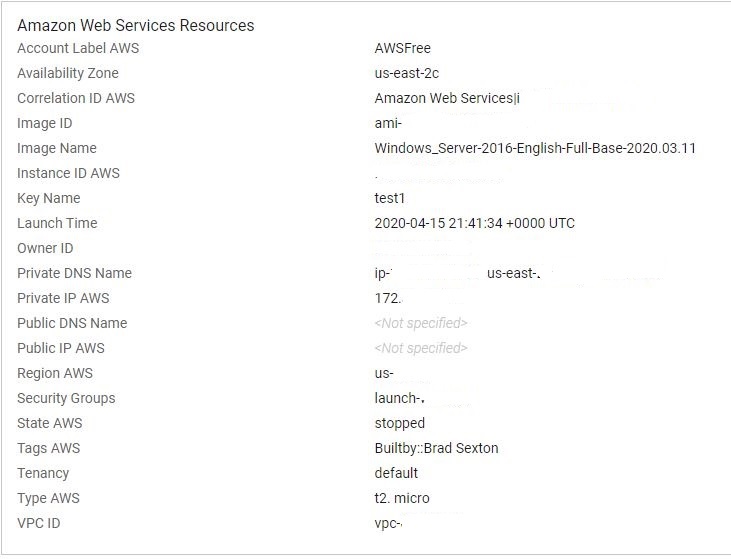
For example, log in to your Google Cloud console and click API & Services > Credentials.
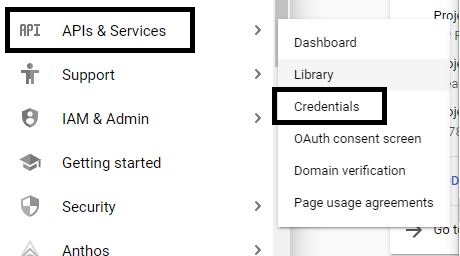
Click Create Credentials > Service Account.
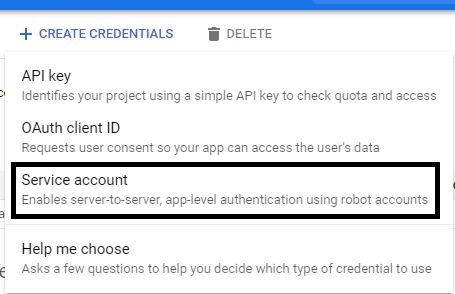
Enter a name for the account and description and click Create.
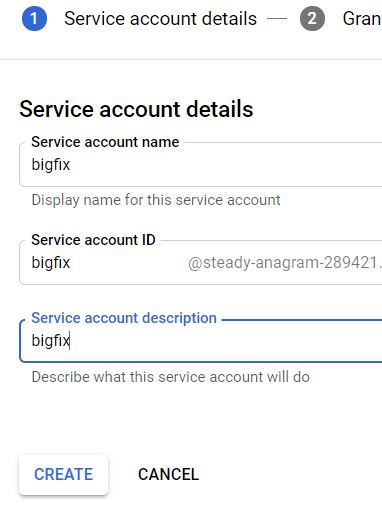
Assign a owner role to your account and click Continue.
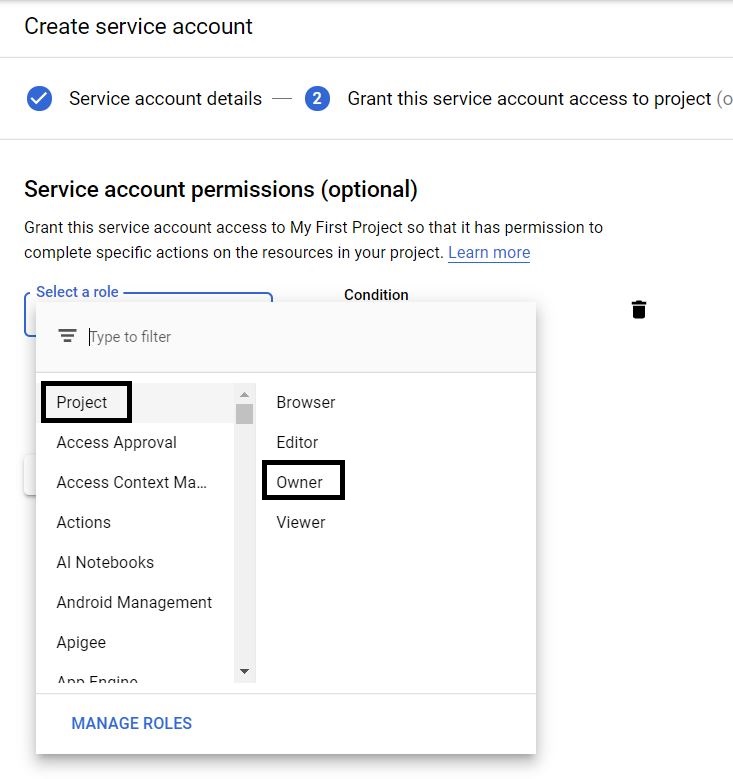
Click Done on the next screen.
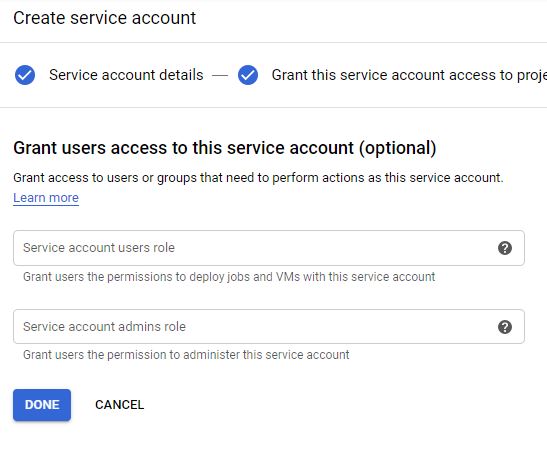
Edit the newly created account.

Click ADD KEY > Create New Key.
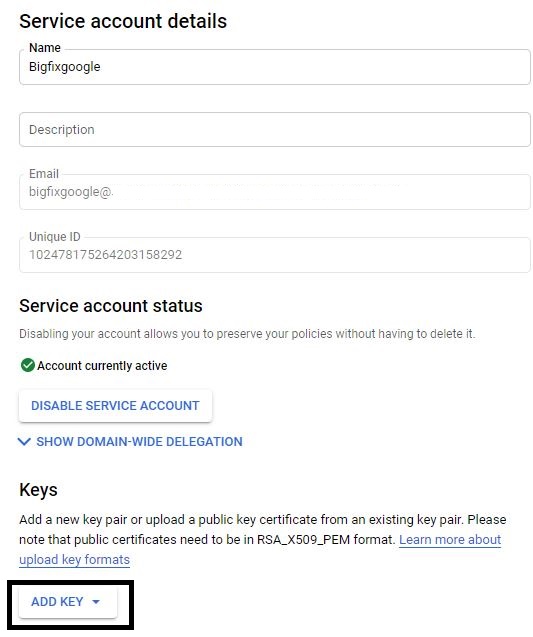
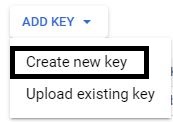
Select JSON and click Create.
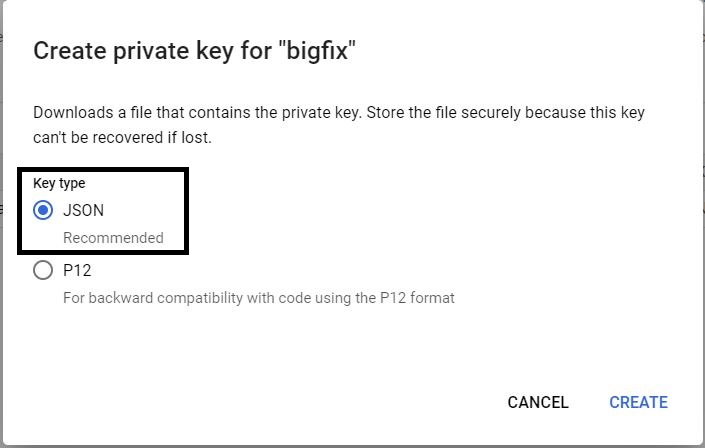
Log in to BigFix WebUI and click the gear Icon in the top right corner and then click Plugin Management.
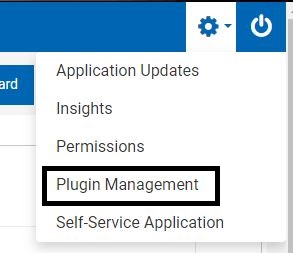
Click Install.
Click GCP for Google Cloud.
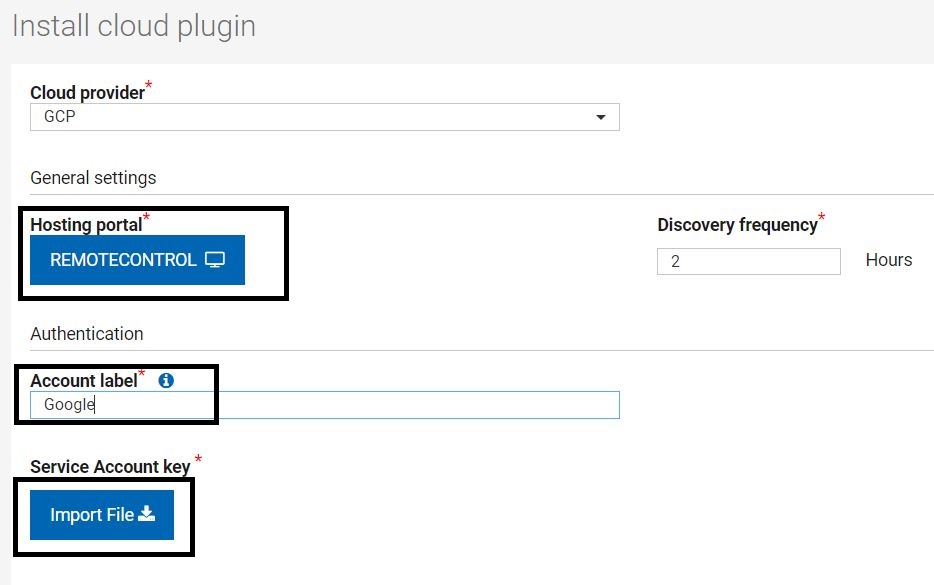
Select the hosting portal and account label. Import the JSON file created earlier and click Install.
~~~~~~~~~~~~~~~~~~~~~~~~~~~~~~~~~~~~~~~~~~~~~~~~~~~~~~~~~~~~~~~~~~~~~
Author
Brad Sexton is a BigFix technical advisor for the mid-Atlantic region. He was a BigFix administrator in a global enterprise for 7 years where he was using BigFix for OSD, Software Deployments, and patching. Brad joined the HCL BigFix team in 2018.
Review and editorial credits
Shivi Sivasubramanian is a senior-level technical author and editor with a demonstrated history of working in the technology industry. A firm believer in the magical power of words, she loves helping the community deliver expressive, minimalist, and user-friendly content. Shivi currently leads a team of information developers in BigFix
Modificato il da Brad Sexton 64576A77-B31D-BF00-0025-86070027DBEC bsexton@hcltechsw.com
|
With great power comes great responsibility! While having domain admin rights on your workstation, you do not want to log in to it and use it to check your email or do your day-to-day activities. The same goes with your BigFix Master Operator. Your Master Operator account is needed for configuring your environment; your day-to-day job of patching and pushing out software should be used with a least privileged one. For details, see my earlier article on how to set up roles and grant your account the access privileges it needs. You can also set additional security controls in your accounts. For details, see the official documentation.
In this article however, I will walk you through the steps for setting up some of these features to keep additional checks in place so they fit your organizational needs.
- On your BigFix Server computer, open BigFix Administration Tool (BESAdmin).
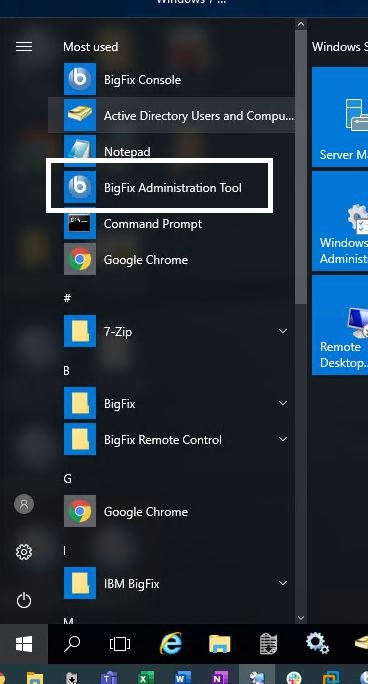
- Enter the site key and password when prompted.
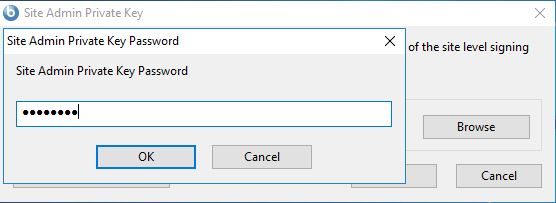
- Open the Advanced Option tab and select Add.
The first setting to add is requireConfirmAction - set the value to true and click OK.
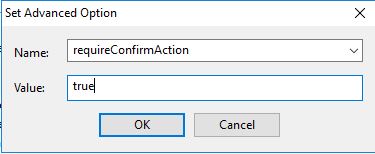
A summary of the action is displayed. Click OK to proceed.
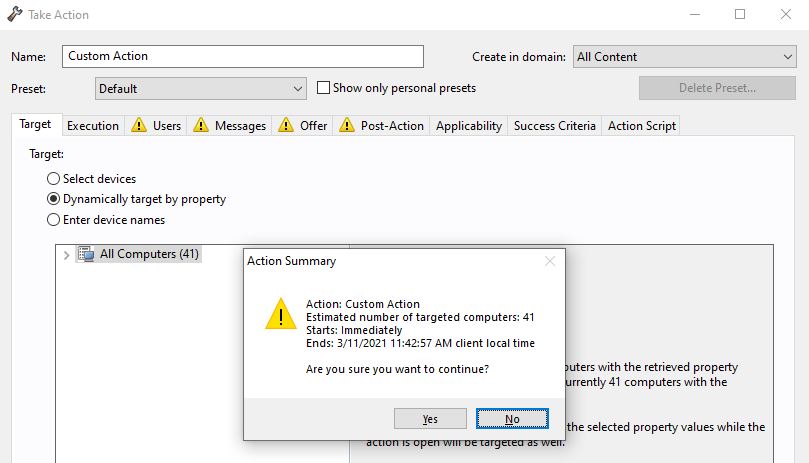
disableNmoDynamicTargeting
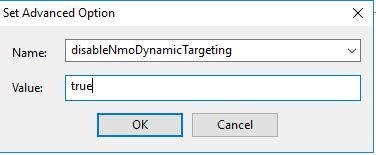
This action prevents non-master operators (NMO) from targeting dynamically and sending out mass deployments. It only allows them to target either by using a list or by entering the device names manually.
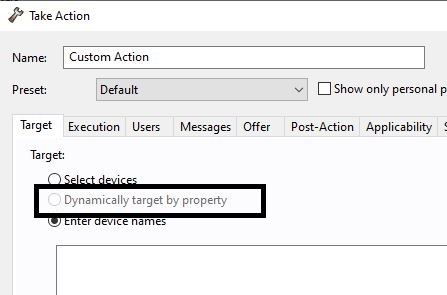
loginTimeoutSeconds
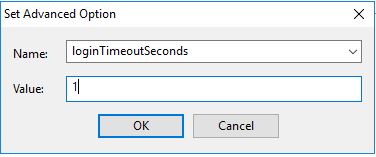
This forces the operator including master operators to re-authenticate before each action is taken.
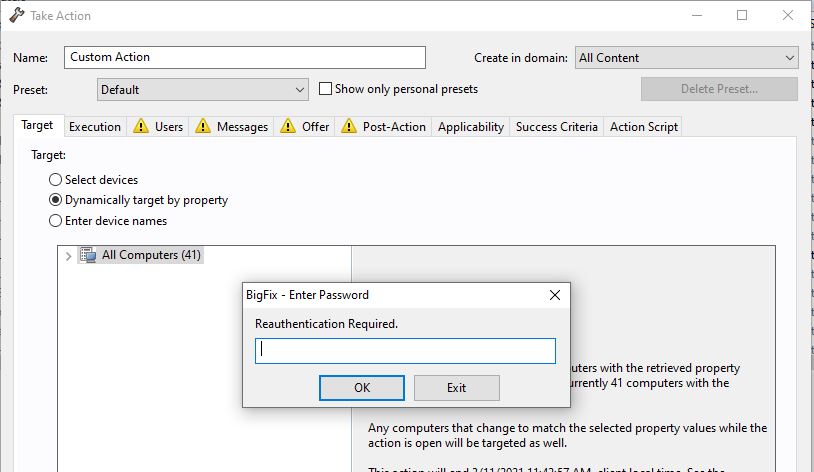
targetBySpecificListWarning
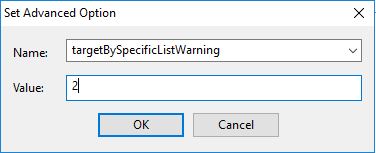
This issues a warning to the console operator when they target more machines than a predefined value.
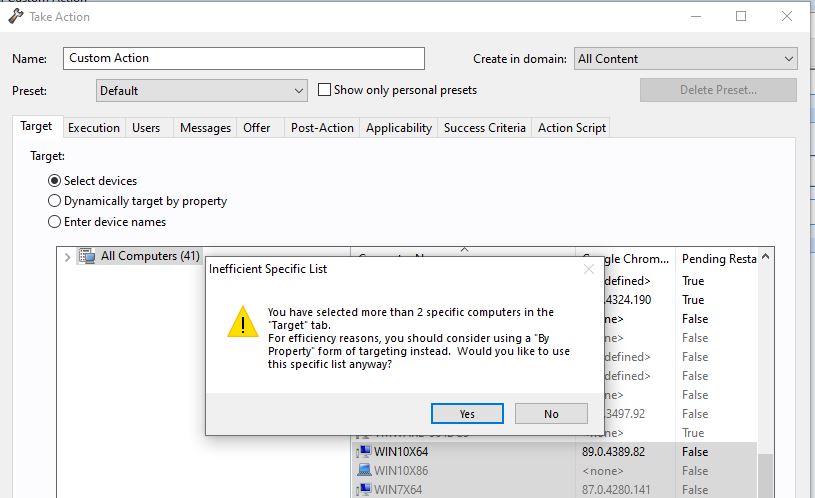
useFourEyesAuthentication
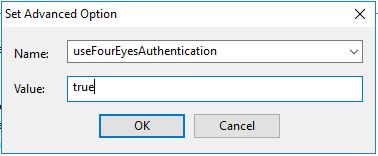
- Go to roles settings and create an "approver" role and add the operators you want to be able to approve actions.
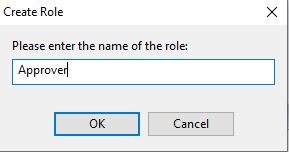
- Set the operator that you want to be able to force an approval before the actions can be run.
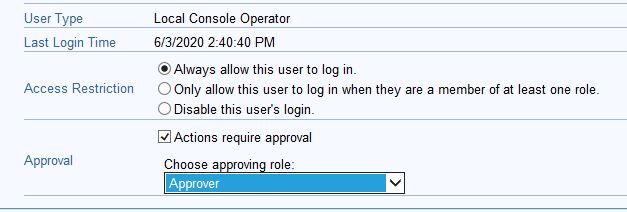
Once this is done, you are prompted to enter the approver's credentials before taking an action.
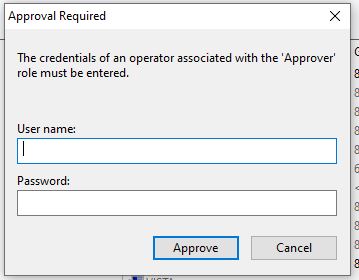
~~~~~~~~~~~~~~~~~~~~~~~~~~~~~~~~~~~~~~~~~~~~~~~~~~~~~~~~~~~~~~~~~~~~~
Author
Brad Sexton is a BigFix technical advisor for the mid-Atlantic region. He was a BigFix administrator in a global enterprise for 7 years where he was using BigFix for OSD, Software Deployments, and patching. Brad joined the HCL BigFix team in 2018.
Review and editorial credits
Shivi Sivasubramanian is a senior-level technical author and editor with a demonstrated history of working in the technology industry. A firm believer in the magical power of words, she loves helping the community deliver expressive, minimalist, and user-friendly content. Shivi currently leads a team of information developers in BigFix.
Modificato il da Brad Sexton 64576A77-B31D-BF00-0025-86070027DBEC bsexton@hcltechsw.com
|
With Windows 7 and Windows 2008 coming to the end of support, BigFix network self-quarantine helps you block these devices off your network. If you have an Extended Security Update from Microsoft, you can still patch devices through BigFix. For details, see BigFix offers Fixlets after End of Support for Windows 7 and Windows Server 2008.
If you own the BigFix Compliance module, you can set criteria such as patch level, anti-virus definitions, certain services running, and so on. If they do not meet the defined criteria, BigFix self-quarantines the devices and blocks all traffic but the BigFix one. This article explains how to set up network self-quarantine and keep Windows 7 devices off of your network. You can also learn how to upgrade such devices either by an in-place upgrade or reimage.
- In BigFix Console, go to the BigFix Management domain.

- Select the License Overview Dashboard.

- Enable the BigFix Client Compliance (IPSec Framework) and BigFix Client Compliance Configuration sites.


Note: Allow the sites to gather and you will see a message at the bottom right of the screen in the Console about the gather status.

- Once the gather is complete, click on each site and subscribe all computers to the site.

- Click on BigFix Client Compliance (IPSec Framework).
- Subscribe All computers and click Save.
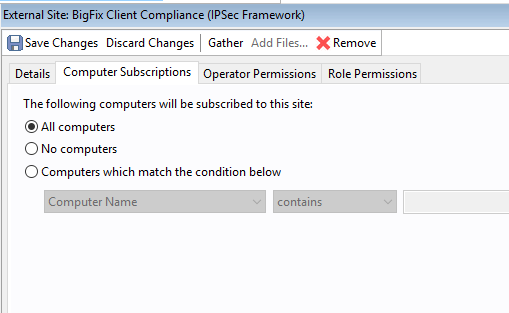
- Click BigFix Client Compliance Configuration.

- Subscribe All Computers and click Save.
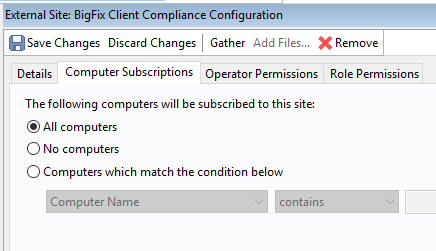
- Click the Endpoint Protection domain.
- Expand the site Network Self-Quarantine and select Client Compliance Policy Wizard.
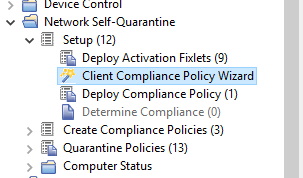
- Select the Create a new BigFix Client Compliance Document to Deploy option.
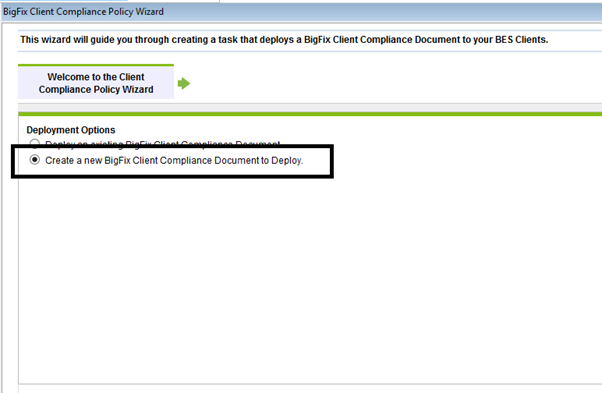
- Select Windows 7.
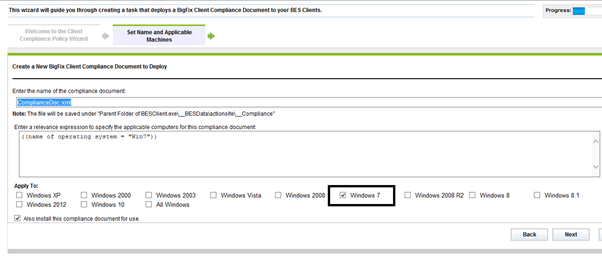
- Enter 1 in Maximum number of relevant critical patches.
Note: Once Windows 7 goes to end of support, BigFix will release a critical Fixlet showing you that it is no longer supported for patching. This patch will force the machine to be out of compliance.

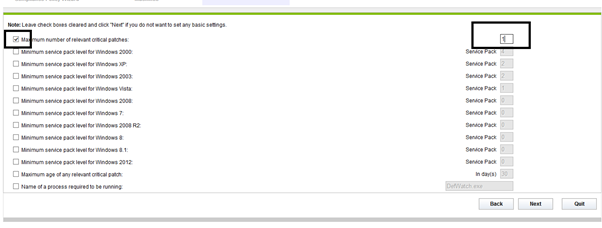
- Click Next. Anti-virus is not in the scope of this exercise.
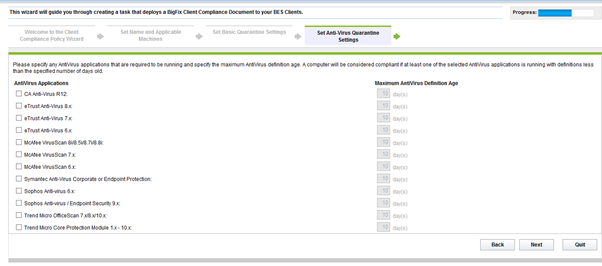
- Click Finish to create your Compliance.xml Task.
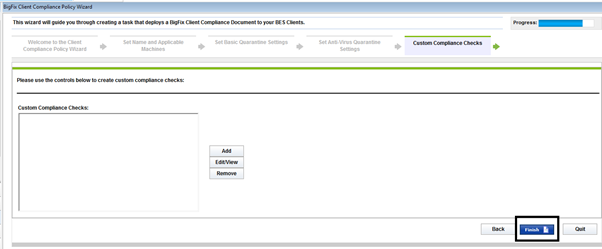
- Click OK to save the Task.
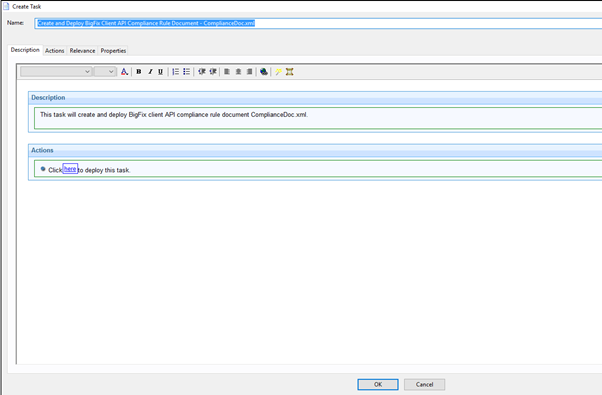
- Deploy the Task to the computers. Select Take Action and Select your Windows 7 Machines.
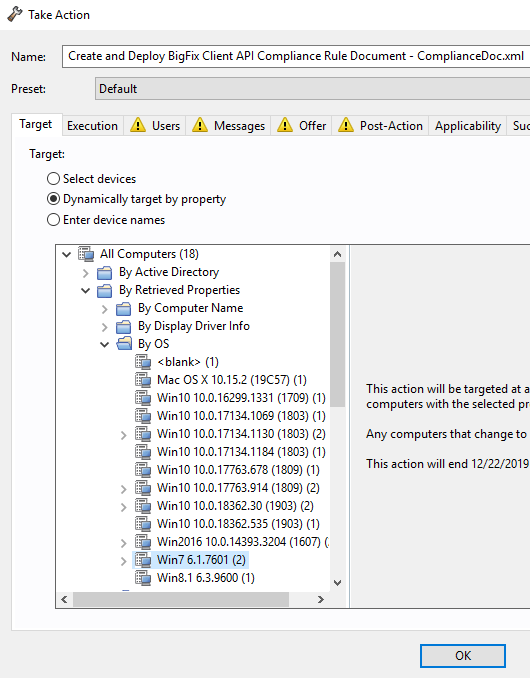
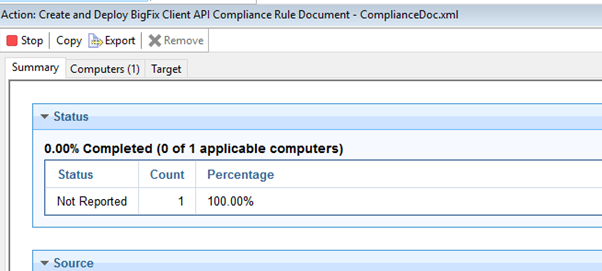
- Create your quarantine policies.
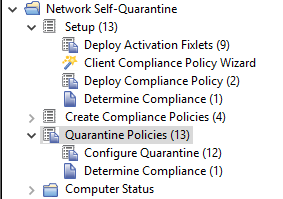
- Create a policy action for Quarantine – Determine Compliance. Select the Task Quarantine – Determine Compliance and Take Action.
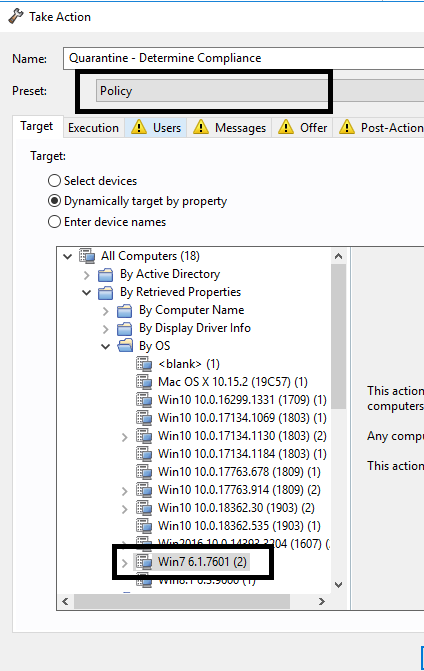
- Run the Task as a policy by taking action on the Task Quarantine - Quarantine Needed - Windows Vista / Server 2008 / 7 / Server 2008 R2 / 8 / 8.1 / Server 2012 / Server 2012 R2 / 10. Target your Windows 7 devices.
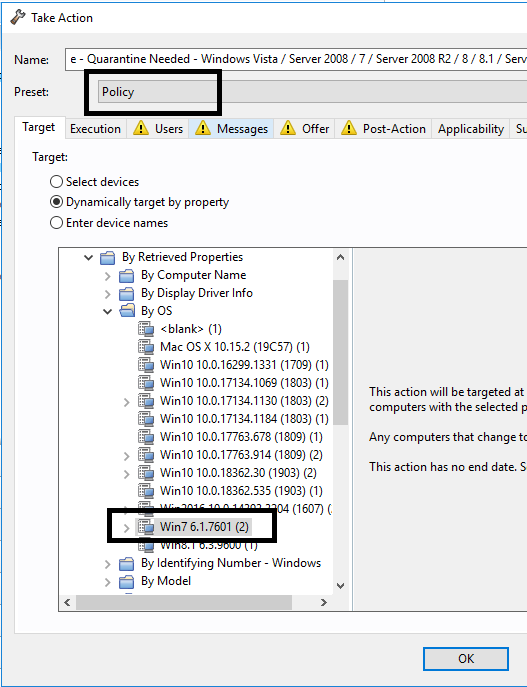
If you remote into one of your Windows 7 devices, you will notice that the Windows firewall blocks all the network traffic but the Bigfix port.
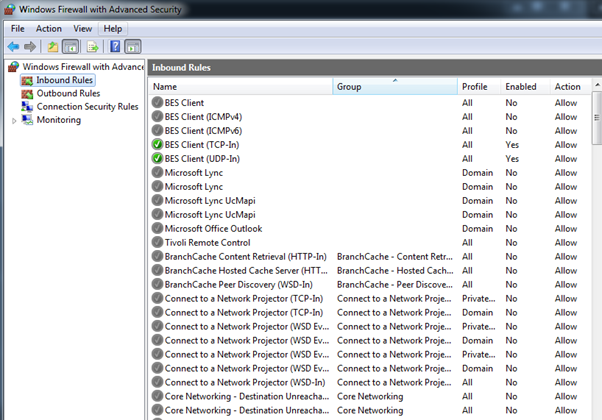
You are protected and the unpatched Windows 7 devices are almost unusable on your network. You can still manage the devices through BigFix which means you can use the BigFix in-place upgrade to upgrade them from Windows 7 to Windows 10. For details on how to set that up, see Setting up in-place upgrade. If the in-place upgrade is not an option, you can bare-metal image the machines or reimage your machines. For details, see Setting up bare-metal imaging and reimaging You can still patch Windows 7 or Windows 2008 devices if you have an ESU agreement with Microsoft. For details, see this link. You can also block those devices and force BigFix to upgrade them with in-place upgrades and reimaging. Feel free to reach out for assistance.
~~~~~~~~~~~~~~~~~~~~~~~~~~~~~~~~~~~~~~~~~~~~~~~~~~~~~~~~~~~~~~~~~~~~~
Author
Brad Sexton is a BigFix technical advisor for the mid-Atlantic region. He was a BigFix administrator in a global enterprise for 7 years where he was using BigFix for OSD, Software Deployments, and patching. Brad joined the HCL BigFix team in 2018.
Review and editorial credits
Shivi Sivasubramanian is a senior-level technical author and editor with a demonstrated history of working in the technology industry. A firm believer in the magical power of words, she loves helping the community deliver expressive, minimalist, and user-friendly content. Shivi currently leads a team of information developers in BigFix.
Modificato il da Brad Sexton 64576A77-B31D-BF00-0025-86070027DBEC bsexton@hcltechsw.com
|


